Category: plsql

  • Khóa học miễn phí PL/SQL – Date & Time nhận dự án làm có lương

    PL/SQL – Date & Time


    In this chapter, we will discuss the Date and Time in PL/SQL. There are two classes of date and time related data types in PL/SQL −

    • Datetime data types
    • Interval data types

    The Datetime data types are −

    • DATE
    • TIMESTAMP
    • TIMESTAMP WITH TIME ZONE
    • TIMESTAMP WITH LOCAL TIME ZONE

    The Interval data types are −

    • INTERVAL YEAR TO MONTH
    • INTERVAL DAY TO SECOND

    Field Values for Datetime and Interval Data Types

    Both datetime and interval data types consist of fields. The values of these fields determine the value of the data type. The following table lists the fields and their possible values for datetimes and intervals.

    Field Name Valid Datetime Values Valid Interval Values
    YEAR -4712 to 9999 (excluding year 0) Any nonzero integer
    MONTH 01 to 12 0 to 11
    DAY 01 to 31 (limited by the values of MONTH and YEAR, according to the rules of the calendar for the locale) Any nonzero integer
    HOUR 00 to 23 0 to 23
    MINUTE 00 to 59 0 to 59
    SECOND

    00 to 59.9(n), where 9(n) is the precision of time fractional seconds

    The 9(n) portion is not applicable for DATE.

    0 to 59.9(n), where 9(n) is the precision of interval fractional seconds
    TIMEZONE_HOUR

    -12 to 14 (range accommodates daylight savings time changes)

    Not applicable for DATE or TIMESTAMP.

    Not applicable
    TIMEZONE_MINUTE

    00 to 59

    Not applicable for DATE or TIMESTAMP.

    Not applicable
    TIMEZONE_REGION Not applicable for DATE or TIMESTAMP. Not applicable
    TIMEZONE_ABBR Not applicable for DATE or TIMESTAMP. Not applicable

    The Datetime Data Types and Functions

    Following are the Datetime data types −

    DATE

    It stores date and time information in both character and number datatypes. It is made of information on century, year, month, date, hour, minute, and second. It is specified as −

    TIMESTAMP

    It is an extension of the DATE data type. It stores the year, month, and day of the DATE datatype, along with hour, minute, and second values. It is useful for storing precise time values.

    TIMESTAMP WITH TIME ZONE

    It is a variant of TIMESTAMP that includes a time zone region name or a time zone offset in its value. The time zone offset is the difference (in hours and minutes) between local time and UTC. This data type is useful for collecting and evaluating date information across geographic regions.

    TIMESTAMP WITH LOCAL TIME ZONE

    It is another variant of TIMESTAMP that includes a time zone offset in its value.

    Following table provides the Datetime functions (where, x has the datetime value) −

    S.No Function Name & Description
    1

    ADD_MONTHS(x, y);

    Adds y months to x.

    2

    LAST_DAY(x);

    Returns the last day of the month.

    3

    MONTHS_BETWEEN(x, y);

    Returns the number of months between x and y.

    4

    NEXT_DAY(x, day);

    Returns the datetime of the next day after x.

    5

    NEW_TIME;

    Returns the time/day value from a time zone specified by the user.

    6

    ROUND(x [, unit]);

    Rounds x.

    7

    SYSDATE();

    Returns the current datetime.

    8

    TRUNC(x [, unit]);

    Truncates x.

    Timestamp functions (where, x has a timestamp value) −

    S.No Function Name & Description
    1

    CURRENT_TIMESTAMP();

    Returns a TIMESTAMP WITH TIME ZONE containing the current session time along with the session time zone.

    2

    EXTRACT({ YEAR | MONTH | DAY | HOUR | MINUTE | SECOND } | { TIMEZONE_HOUR | TIMEZONE_MINUTE } | { TIMEZONE_REGION | } TIMEZONE_ABBR ) FROM x)

    Extracts and returns a year, month, day, hour, minute, second, or time zone from x.

    3

    FROM_TZ(x, time_zone);

    Converts the TIMESTAMP x and the time zone specified by time_zone to a TIMESTAMP WITH TIMEZONE.

    4

    LOCALTIMESTAMP();

    Returns a TIMESTAMP containing the local time in the session time zone.

    5

    SYSTIMESTAMP();

    Returns a TIMESTAMP WITH TIME ZONE containing the current database time along with the database time zone.

    6

    SYS_EXTRACT_UTC(x);

    Converts the TIMESTAMP WITH TIMEZONE x to a TIMESTAMP containing the date and time in UTC.

    7

    TO_TIMESTAMP(x, [format]);

    Converts the string x to a TIMESTAMP.

    8

    TO_TIMESTAMP_TZ(x, [format]);

    Converts the string x to a TIMESTAMP WITH TIMEZONE.

    Examples

    The following code snippets illustrate the use of the above functions −

    Example 1

    SELECT SYSDATE FROM DUAL;
    

    Output

    08/31/2012 5:25:34 PM
    

    Example 2

    SELECT TO_CHAR(CURRENT_DATE, ''DD-MM-YYYY HH:MI:SS'') FROM DUAL;
    

    Output

    31-08-2012 05:26:14
    

    Example 3

    SELECT ADD_MONTHS(SYSDATE, 5) FROM DUAL;
    

    Output

    01/31/2013 5:26:31 PM
    

    Example 4

    SELECT LOCALTIMESTAMP FROM DUAL;
    

    Output

    8/31/2012 5:26:55.347000 PM
    

    The Interval Data Types and Functions

    Following are the Interval data types −

    • IINTERVAL YEAR TO MONTH − It stores a period of time using the YEAR and MONTH datetime fields.

    • INTERVAL DAY TO SECOND − It stores a period of time in terms of days, hours, minutes, and seconds.

    Interval Functions

    S.No Function Name & Description
    1

    NUMTODSINTERVAL(x, interval_unit);

    Converts the number x to an INTERVAL DAY TO SECOND.

    2

    NUMTOYMINTERVAL(x, interval_unit);

    Converts the number x to an INTERVAL YEAR TO MONTH.

    3

    TO_DSINTERVAL(x);

    Converts the string x to an INTERVAL DAY TO SECOND.

    4

    TO_YMINTERVAL(x);

    Converts the string x to an INTERVAL YEAR TO MONTH.


    Khóa học lập trình tại Toidayhoc vừa học vừa làm dự án vừa nhận lương: Khóa học lập trình nhận lương tại trung tâm Toidayhoc

  • Khóa học miễn phí PL/SQL – Questions and Answers nhận dự án làm có lương

    PL/SQL Questions and Answers


    PL/SQL Questions and Answers has been designed with a special intention of helping students and professionals preparing for various Certification Exams and Job Interviews. This section provides a useful collection of sample Interview Questions and Multiple Choice Questions (MCQs) and their answers with appropriate explanations.

    Questions and Answers
    SN Question/Answers Type
    1

    This section provides a huge collection of PL/SQL Interview Questions with their answers hidden in a box to challenge you to have a go at them before discovering the correct answer.

    2

    This section provides a great collection of PL/SQL Multiple Choice Questions (MCQs) on a single page along with their correct answers and explanation. If you select the right option, it turns green; else red.

    3

    If you are preparing to appear for a Java and PL/SQL related certification exam, then this section is a must for you. This section simulates a real online test along with a given timer which challenges you to complete the test within a given time-frame. Finally you can check your overall test score and how you fared among millions of other candidates who attended this online test.

    4

    This section provides various mock tests that you can download at your local machine and solve offline. Every mock test is supplied with a mock test key to let you verify the final score and grade yourself.


    Khóa học lập trình tại Toidayhoc vừa học vừa làm dự án vừa nhận lương: Khóa học lập trình nhận lương tại trung tâm Toidayhoc

  • Khóa học miễn phí PL/SQL – Object Oriented nhận dự án làm có lương

    PL/SQL – Object Oriented


    In this chapter, we will discuss Object-Oriented PL/SQL. PL/SQL allows defining an object type, which helps in designing object-oriented database in Oracle. An object type allows you to create composite types. Using objects allow you to implement real world objects with specific structure of data and methods for operating it. Objects have attributes and methods. Attributes are properties of an object and are used for storing an object”s state; and methods are used for modeling its behavior.

    Objects are created using the CREATE [OR REPLACE] TYPE statement. Following is an example to create a simple address object consisting of few attributes −

    CREATE OR REPLACE TYPE address AS OBJECT
    (house_no varchar2(10),
     street varchar2(30),
     city varchar2(20),
     state varchar2(10),
     pincode varchar2(10)
    );
    /
    

    When the above code is executed at the SQL prompt, it produces the following result −

    Type created.
    

    Let”s create one more object customer where we will wrap attributes and methods together to have object-oriented feeling −

    CREATE OR REPLACE TYPE customer AS OBJECT
    (code number(5),
     name varchar2(30),
     contact_no varchar2(12),
     addr address,
     member procedure display
    );
    /
    

    When the above code is executed at the SQL prompt, it produces the following result −

    Type created.
    

    Instantiating an Object

    Defining an object type provides a blueprint for the object. To use this object, you need to create instances of this object. You can access the attributes and methods of the object using the instance name and the access operator (.) as follows −

    DECLARE
       residence address;
    BEGIN
       residence := address(''103A'', ''M.G.Road'', ''Jaipur'', ''Rajasthan'',''201301'');
       dbms_output.put_line(''House No: ''|| residence.house_no);
       dbms_output.put_line(''Street: ''|| residence.street);
       dbms_output.put_line(''City: ''|| residence.city);
       dbms_output.put_line(''State: ''|| residence.state);
       dbms_output.put_line(''Pincode: ''|| residence.pincode);
    END;
    /
    

    When the above code is executed at the SQL prompt, it produces the following result −

    House No: 103A
    Street: M.G.Road
    City: Jaipur
    State: Rajasthan
    Pincode: 201301
    
    PL/SQL procedure successfully completed.
    

    Member Methods

    Member methods are used for manipulating the attributes of the object. You provide the declaration of a member method while declaring the object type. The object body defines the code for the member methods. The object body is created using the CREATE TYPE BODY statement.

    Constructors are functions that return a new object as its value. Every object has a system defined constructor method. The name of the constructor is same as the object type. For example −

    residence := address(''103A'', ''M.G.Road'', ''Jaipur'', ''Rajasthan'',''201301'');
    

    The comparison methods are used for comparing objects. There are two ways to compare objects −

    Map method

    The Map method is a function implemented in such a way that its value depends upon the value of the attributes. For example, for a customer object, if the customer code is same for two customers, both customers could be the same. So the relationship between these two objects would depend upon the value of code.

    Order method

    The Order method implements some internal logic for comparing two objects. For example, for a rectangle object, a rectangle is bigger than another rectangle if both its sides are bigger.

    Using Map method

    Let us try to understand the above concepts using the following rectangle object −

    CREATE OR REPLACE TYPE rectangle AS OBJECT
    (length number,
     width number,
     member function enlarge( inc number) return rectangle,
     member procedure display,
     map member function measure return number
    );
    /
    

    When the above code is executed at the SQL prompt, it produces the following result −

    Type created.
    

    Creating the type body −

    CREATE OR REPLACE TYPE BODY rectangle AS
       MEMBER FUNCTION enlarge(inc number) return rectangle IS
       BEGIN
          return rectangle(self.length + inc, self.width + inc);
       END enlarge;
       MEMBER PROCEDURE display IS
       BEGIN
          dbms_output.put_line(''Length: ''|| length);
          dbms_output.put_line(''Width: ''|| width);
       END display;
       MAP MEMBER FUNCTION measure return number IS
       BEGIN
          return (sqrt(length*length + width*width));
       END measure;
    END;
    /
    

    When the above code is executed at the SQL prompt, it produces the following result −

    Type body created.
    

    Now using the rectangle object and its member functions −

    DECLARE
       r1 rectangle;
       r2 rectangle;
       r3 rectangle;
       inc_factor number := 5;
    BEGIN
       r1 := rectangle(3, 4);
       r2 := rectangle(5, 7);
       r3 := r1.enlarge(inc_factor);
       r3.display;
       IF (r1 > r2) THEN -- calling measure function
          r1.display;
       ELSE
          r2.display;
       END IF;
    END;
    /
    

    When the above code is executed at the SQL prompt, it produces the following result −

    Length: 8
    Width: 9
    Length: 5
    Width: 7
    
    PL/SQL procedure successfully completed.
    

    Using Order method

    Now, the same effect could be achieved using an order method. Let us recreate the rectangle object using an order method −

    CREATE OR REPLACE TYPE rectangle AS OBJECT
    (length number,
     width number,
     member procedure display,
     order member function measure(r rectangle) return number
    );
    /
    

    When the above code is executed at the SQL prompt, it produces the following result −

    Type created.
    

    Creating the type body −

    CREATE OR REPLACE TYPE BODY rectangle AS
       MEMBER PROCEDURE display IS
       BEGIN
          dbms_output.put_line(''Length: ''|| length);
          dbms_output.put_line(''Width: ''|| width);
       END display;
       ORDER MEMBER FUNCTION measure(r rectangle) return number IS
       BEGIN
          IF(sqrt(self.length*self.length + self.width*self.width)>
             sqrt(r.length*r.length + r.width*r.width)) then
             return(1);
          ELSE
             return(-1);
          END IF;
       END measure;
    END;
    /
    

    When the above code is executed at the SQL prompt, it produces the following result −

    Type body created.
    

    Using the rectangle object and its member functions −

    DECLARE
       r1 rectangle;
       r2 rectangle;
    BEGIN
       r1 := rectangle(23, 44);
       r2 := rectangle(15, 17);
       r1.display;
       r2.display;
       IF (r1 > r2) THEN -- calling measure function
          r1.display;
       ELSE
          r2.display;
       END IF;
    END;
    /
    

    When the above code is executed at the SQL prompt, it produces the following result −

    Length: 23
    Width: 44
    Length: 15
    Width: 17
    Length: 23
    Width: 44
    
    PL/SQL procedure successfully completed.
    

    Inheritance for PL/SQL Objects

    PL/SQL allows creating object from the existing base objects. To implement inheritance, the base objects should be declared as NOT FINAL. The default is FINAL.

    The following programs illustrate the inheritance in PL/SQL Objects. Let us create another object named TableTop, this is inherited from the Rectangle object. For this, we need to create the base rectangle object −

    CREATE OR REPLACE TYPE rectangle AS OBJECT
    (length number,
     width number,
     member function enlarge( inc number) return rectangle,
     NOT FINAL member procedure display) NOT FINAL
    /
    

    When the above code is executed at the SQL prompt, it produces the following result −

    Type created.
    

    Creating the base type body −

    CREATE OR REPLACE TYPE BODY rectangle AS
       MEMBER FUNCTION enlarge(inc number) return rectangle IS
       BEGIN
          return rectangle(self.length + inc, self.width + inc);
       END enlarge;
       MEMBER PROCEDURE display IS
       BEGIN
          dbms_output.put_line(''Length: ''|| length);
          dbms_output.put_line(''Width: ''|| width);
       END display;
    END;
    /
    

    When the above code is executed at the SQL prompt, it produces the following result −

    Type body created.
    

    Creating the child object tabletop

    CREATE OR REPLACE TYPE tabletop UNDER rectangle
    (
       material varchar2(20),
       OVERRIDING member procedure display
    )
    /
    

    When the above code is executed at the SQL prompt, it produces the following result −

    Type created.
    

    Creating the type body for the child object tabletop

    CREATE OR REPLACE TYPE BODY tabletop AS
    OVERRIDING MEMBER PROCEDURE display IS
    BEGIN
       dbms_output.put_line(''Length: ''|| length);
       dbms_output.put_line(''Width: ''|| width);
       dbms_output.put_line(''Material: ''|| material);
    END display;
    /
    

    When the above code is executed at the SQL prompt, it produces the following result −

    Type body created.
    

    Using the tabletop object and its member functions −

    DECLARE
       t1 tabletop;
       t2 tabletop;
    BEGIN
       t1:= tabletop(20, 10, ''Wood'');
       t2 := tabletop(50, 30, ''Steel'');
       t1.display;
       t2.display;
    END;
    /
    

    When the above code is executed at the SQL prompt, it produces the following result −

    Length: 20
    Width: 10
    Material: Wood
    Length: 50
    Width: 30
    Material: Steel
    
    PL/SQL procedure successfully completed.
    

    Abstract Objects in PL/SQL

    The NOT INSTANTIABLE clause allows you to declare an abstract object. You cannot use an abstract object as it is; you will have to create a subtype or child type of such objects to use its functionalities.

    For example,

    CREATE OR REPLACE TYPE rectangle AS OBJECT
    (length number,
     width number,
     NOT INSTANTIABLE NOT FINAL MEMBER PROCEDURE display)
     NOT INSTANTIABLE NOT FINAL
    /
    

    When the above code is executed at the SQL prompt, it produces the following result −

    Type created.
    

    Khóa học lập trình tại Toidayhoc vừa học vừa làm dự án vừa nhận lương: Khóa học lập trình nhận lương tại trung tâm Toidayhoc

  • Khóa học miễn phí PL/SQL – Strings nhận dự án làm có lương

    PL/SQL – Strings


    The string in PL/SQL is actually a sequence of characters with an optional size specification. The characters could be numeric, letters, blank, special characters or a combination of all. PL/SQL offers three kinds of strings −

    • Fixed-length strings − In such strings, programmers specify the length while declaring the string. The string is right-padded with spaces to the length so specified.

    • Variable-length strings − In such strings, a maximum length up to 32,767, for the string is specified and no padding takes place.

    • Character large objects (CLOBs) − These are variable-length strings that can be up to 128 terabytes.

    PL/SQL strings could be either variables or literals. A string literal is enclosed within quotation marks. For example,

    ''This is a string literal.'' Or ''hello world''
    

    To include a single quote inside a string literal, you need to type two single quotes next to one another. For example,

    ''this isn''''t what it looks like''
    

    Declaring String Variables

    Oracle database provides numerous string datatypes, such as CHAR, NCHAR, VARCHAR2, NVARCHAR2, CLOB, and NCLOB. The datatypes prefixed with an ”N” are ”national character set” datatypes, that store Unicode character data.

    If you need to declare a variable-length string, you must provide the maximum length of that string. For example, the VARCHAR2 data type. The following example illustrates declaring and using some string variables −

    DECLARE
       name varchar2(20);
       company varchar2(30);
       introduction clob;
       choice char(1);
    BEGIN
       name := ''John Smith
       company := ''Infotech
       introduction := '' Hello! I''''m John Smith from Infotech.
       choice := ''y
       IF choice = ''y'' THEN
          dbms_output.put_line(name);
          dbms_output.put_line(company);
          dbms_output.put_line(introduction);
       END IF;
    END;
    /
    

    When the above code is executed at the SQL prompt, it produces the following result −

    John Smith
    Infotech
    Hello! I''m John Smith from Infotech.
    
    PL/SQL procedure successfully completed
    

    To declare a fixed-length string, use the CHAR datatype. Here you do not have to specify a maximum length for a fixed-length variable. If you leave off the length constraint, Oracle Database automatically uses a maximum length required. The following two declarations are identical −

    red_flag CHAR(1) := ''Y
     red_flag CHAR   := ''Y
    

    PL/SQL String Functions and Operators

    PL/SQL offers the concatenation operator (||) for joining two strings. The following table provides the string functions provided by PL/SQL −

    S.No Function & Purpose
    1

    ASCII(x);

    Returns the ASCII value of the character x.

    2

    CHR(x);

    Returns the character with the ASCII value of x.

    3

    CONCAT(x, y);

    Concatenates the strings x and y and returns the appended string.

    4

    INITCAP(x);

    Converts the initial letter of each word in x to uppercase and returns that string.

    5

    INSTR(x, find_string [, start] [, occurrence]);

    Searches for find_string in x and returns the position at which it occurs.

    6

    INSTRB(x);

    Returns the location of a string within another string, but returns the value in bytes.

    7

    LENGTH(x);

    Returns the number of characters in x.

    8

    LENGTHB(x);

    Returns the length of a character string in bytes for single byte character set.

    9

    LOWER(x);

    Converts the letters in x to lowercase and returns that string.

    10

    LPAD(x, width [, pad_string]) ;

    Pads x with spaces to the left, to bring the total length of the string up to width characters.

    11

    LTRIM(x [, trim_string]);

    Trims characters from the left of x.

    12

    NANVL(x, value);

    Returns value if x matches the NaN special value (not a number), otherwise x is returned.

    13

    NLS_INITCAP(x);

    Same as the INITCAP function except that it can use a different sort method as specified by NLSSORT.

    14

    NLS_LOWER(x) ;

    Same as the LOWER function except that it can use a different sort method as specified by NLSSORT.

    15

    NLS_UPPER(x);

    Same as the UPPER function except that it can use a different sort method as specified by NLSSORT.

    16

    NLSSORT(x);

    Changes the method of sorting the characters. Must be specified before any NLS function; otherwise, the default sort will be used.

    17

    NVL(x, value);

    Returns value if x is null; otherwise, x is returned.

    18

    NVL2(x, value1, value2);

    Returns value1 if x is not null; if x is null, value2 is returned.

    19

    REPLACE(x, search_string, replace_string);

    Searches x for search_string and replaces it with replace_string.

    20

    RPAD(x, width [, pad_string]);

    Pads x to the right.

    21

    RTRIM(x [, trim_string]);

    Trims x from the right.

    22

    SOUNDEX(x) ;

    Returns a string containing the phonetic representation of x.

    23

    SUBSTR(x, start [, length]);

    Returns a substring of x that begins at the position specified by start. An optional length for the substring may be supplied.

    24

    SUBSTRB(x);

    Same as SUBSTR except that the parameters are expressed in bytes instead of characters for the single-byte character systems.

    25

    TRIM([trim_char FROM) x);

    Trims characters from the left and right of x.

    26

    UPPER(x);

    Converts the letters in x to uppercase and returns that string.

    Let us now work out on a few examples to understand the concept −

    Example 1

    DECLARE
       greetings varchar2(11) := ''hello world
    BEGIN
       dbms_output.put_line(UPPER(greetings));
    
       dbms_output.put_line(LOWER(greetings));
    
       dbms_output.put_line(INITCAP(greetings));
    
       /* retrieve the first character in the string */
       dbms_output.put_line ( SUBSTR (greetings, 1, 1));
    
       /* retrieve the last character in the string */
       dbms_output.put_line ( SUBSTR (greetings, -1, 1));
    
       /* retrieve five characters,
          starting from the seventh position. */
       dbms_output.put_line ( SUBSTR (greetings, 7, 5));
    
       /* retrieve the remainder of the string,
          starting from the second position. */
       dbms_output.put_line ( SUBSTR (greetings, 2));
    
       /* find the location of the first "e" */
       dbms_output.put_line ( INSTR (greetings, ''e''));
    END;
    /
    

    When the above code is executed at the SQL prompt, it produces the following result −

    HELLO WORLD
    hello world
    Hello World
    h
    d
    World
    ello World
    2
    
    PL/SQL procedure successfully completed.
    

    Example 2

    DECLARE
       greetings varchar2(30) := ''......Hello World.....
    BEGIN
       dbms_output.put_line(RTRIM(greetings,''.''));
       dbms_output.put_line(LTRIM(greetings, ''.''));
       dbms_output.put_line(TRIM( ''.'' from greetings));
    END;
    /
    

    When the above code is executed at the SQL prompt, it produces the following result −

    ......Hello World
    Hello World.....
    Hello World
    
    PL/SQL procedure successfully completed.
    

    Khóa học lập trình tại Toidayhoc vừa học vừa làm dự án vừa nhận lương: Khóa học lập trình nhận lương tại trung tâm Toidayhoc

  • Khóa học miễn phí PL/SQL – Procedures nhận dự án làm có lương

    PL/SQL – Procedures


    In this chapter, we will discuss Procedures in PL/SQL. A subprogram is a program unit/module that performs a particular task. These subprograms are combined to form larger programs. This is basically called the ”Modular design”. A subprogram can be invoked by another subprogram or program which is called the calling program.

    A subprogram can be created −

    • At the schema level
    • Inside a package
    • Inside a PL/SQL block

    At the schema level, subprogram is a standalone subprogram. It is created with the CREATE PROCEDURE or the CREATE FUNCTION statement. It is stored in the database and can be deleted with the DROP PROCEDURE or DROP FUNCTION statement.

    A subprogram created inside a package is a packaged subprogram. It is stored in the database and can be deleted only when the package is deleted with the DROP PACKAGE statement. We will discuss packages in the chapter ”PL/SQL – Packages”.

    PL/SQL subprograms are named PL/SQL blocks that can be invoked with a set of parameters. PL/SQL provides two kinds of subprograms −

    • Functions − These subprograms return a single value; mainly used to compute and return a value.

    • Procedures − These subprograms do not return a value directly; mainly used to perform an action.

    This chapter is going to cover important aspects of a PL/SQL procedure. We will discuss PL/SQL function in the next chapter.

    Parts of a PL/SQL Subprogram

    Each PL/SQL subprogram has a name, and may also have a parameter list. Like anonymous PL/SQL blocks, the named blocks will also have the following three parts −

    S.No Parts & Description
    1

    Declarative Part

    It is an optional part. However, the declarative part for a subprogram does not start with the DECLARE keyword. It contains declarations of types, cursors, constants, variables, exceptions, and nested subprograms. These items are local to the subprogram and cease to exist when the subprogram completes execution.

    2

    Executable Part

    This is a mandatory part and contains statements that perform the designated action.

    3

    Exception-handling

    This is again an optional part. It contains the code that handles run-time errors.

    Creating a Procedure

    A procedure is created with the CREATE OR REPLACE PROCEDURE statement. The simplified syntax for the CREATE OR REPLACE PROCEDURE statement is as follows −

    CREATE [OR REPLACE] PROCEDURE procedure_name
    [(parameter_name [IN | OUT | IN OUT] type [, ...])]
    {IS | AS}
    BEGIN
      < procedure_body >
    END procedure_name;
    

    Where,

    • procedure-name specifies the name of the procedure.

    • [OR REPLACE] option allows the modification of an existing procedure.

    • The optional parameter list contains name, mode and types of the parameters. IN represents the value that will be passed from outside and OUT represents the parameter that will be used to return a value outside of the procedure.

    • procedure-body contains the executable part.

    • The AS keyword is used instead of the IS keyword for creating a standalone procedure.

    Example

    The following example creates a simple procedure that displays the string ”Hello World!” on the screen when executed.

    CREATE OR REPLACE PROCEDURE greetings
    AS
    BEGIN
       dbms_output.put_line(''Hello World!'');
    END;
    /
    

    When the above code is executed using the SQL prompt, it will produce the following result −

    Procedure created.
    

    Executing a Standalone Procedure

    A standalone procedure can be called in two ways −

    • Using the EXECUTE keyword

    • Calling the name of the procedure from a PL/SQL block

    The above procedure named ”greetings” can be called with the EXECUTE keyword as −

    EXECUTE greetings;
    

    The above call will display −

    Hello World
    
    PL/SQL procedure successfully completed.
    

    The procedure can also be called from another PL/SQL block −

    BEGIN
       greetings;
    END;
    /
    

    The above call will display −

    Hello World
    
    PL/SQL procedure successfully completed.
    

    Deleting a Standalone Procedure

    A standalone procedure is deleted with the DROP PROCEDURE statement. Syntax for deleting a procedure is −

    DROP PROCEDURE procedure-name;
    

    You can drop the greetings procedure by using the following statement −

    DROP PROCEDURE greetings;
    

    Parameter Modes in PL/SQL Subprograms

    The following table lists out the parameter modes in PL/SQL subprograms −

    S.No Parameter Mode & Description
    1

    IN

    An IN parameter lets you pass a value to the subprogram. It is a read-only parameter. Inside the subprogram, an IN parameter acts like a constant. It cannot be assigned a value. You can pass a constant, literal, initialized variable, or expression as an IN parameter. You can also initialize it to a default value; however, in that case, it is omitted from the subprogram call. It is the default mode of parameter passing. Parameters are passed by reference.

    2

    OUT

    An OUT parameter returns a value to the calling program. Inside the subprogram, an OUT parameter acts like a variable. You can change its value and reference the value after assigning it. The actual parameter must be variable and it is passed by value.

    3

    IN OUT

    An IN OUT parameter passes an initial value to a subprogram and returns an updated value to the caller. It can be assigned a value and the value can be read.

    The actual parameter corresponding to an IN OUT formal parameter must be a variable, not a constant or an expression. Formal parameter must be assigned a value. Actual parameter is passed by value.

    IN & OUT Mode Example 1

    This program finds the minimum of two values. Here, the procedure takes two numbers using the IN mode and returns their minimum using the OUT parameters.

    DECLARE
       a number;
       b number;
       c number;
    PROCEDURE findMin(x IN number, y IN number, z OUT number) IS
    BEGIN
       IF x < y THEN
          z:= x;
       ELSE
          z:= y;
       END IF;
    END;
    BEGIN
       a:= 23;
       b:= 45;
       findMin(a, b, c);
       dbms_output.put_line('' Minimum of (23, 45) : '' || c);
    END;
    /
    

    When the above code is executed at the SQL prompt, it produces the following result −

    Minimum of (23, 45) : 23
    
    PL/SQL procedure successfully completed.
    

    IN & OUT Mode Example 2

    This procedure computes the square of value of a passed value. This example shows how we can use the same parameter to accept a value and then return another result.

    DECLARE
       a number;
    PROCEDURE squareNum(x IN OUT number) IS
    BEGIN
      x := x * x;
    END;
    BEGIN
       a:= 23;
       squareNum(a);
       dbms_output.put_line('' Square of (23): '' || a);
    END;
    /
    

    When the above code is executed at the SQL prompt, it produces the following result −

    Square of (23): 529
    
    PL/SQL procedure successfully completed.
    

    Methods for Passing Parameters

    Actual parameters can be passed in three ways −

    • Positional notation
    • Named notation
    • Mixed notation

    Positional Notation

    In positional notation, you can call the procedure as −

    findMin(a, b, c, d);
    

    In positional notation, the first actual parameter is substituted for the first formal parameter; the second actual parameter is substituted for the second formal parameter, and so on. So, a is substituted for x, b is substituted for y, c is substituted for z and d is substituted for m.

    Named Notation

    In named notation, the actual parameter is associated with the formal parameter using the arrow symbol ( => ). The procedure call will be like the following −

    findMin(x => a, y => b, z => c, m => d);
    

    Mixed Notation

    In mixed notation, you can mix both notations in procedure call; however, the positional notation should precede the named notation.

    The following call is legal −

    findMin(a, b, c, m => d);
    

    However, this is not legal:

    findMin(x => a, b, c, d);
    

    Khóa học lập trình tại Toidayhoc vừa học vừa làm dự án vừa nhận lương: Khóa học lập trình nhận lương tại trung tâm Toidayhoc

  • Khóa học miễn phí PL/SQL – Functions nhận dự án làm có lương

    PL/SQL – Functions


    In this chapter, we will discuss the functions in PL/SQL. A function is same as a procedure except that it returns a value. Therefore, all the discussions of the previous chapter are true for functions too.

    Creating a Function

    A standalone function is created using the CREATE FUNCTION statement. The simplified syntax for the CREATE OR REPLACE PROCEDURE statement is as follows −

    CREATE [OR REPLACE] FUNCTION function_name
    [(parameter_name [IN | OUT | IN OUT] type [, ...])]
    RETURN return_datatype
    {IS | AS}
    BEGIN
       < function_body >
    END [function_name];
    

    Where,

    • function-name specifies the name of the function.

    • [OR REPLACE] option allows the modification of an existing function.

    • The optional parameter list contains name, mode and types of the parameters. IN represents the value that will be passed from outside and OUT represents the parameter that will be used to return a value outside of the procedure.

    • The function must contain a return statement.

    • The RETURN clause specifies the data type you are going to return from the function.

    • function-body contains the executable part.

    • The AS keyword is used instead of the IS keyword for creating a standalone function.

    Example

    The following example illustrates how to create and call a standalone function. This function returns the total number of CUSTOMERS in the customers table.

    We will use the CUSTOMERS table, which we had created in the chapter −

    Select * from customers;
    
    +----+----------+-----+-----------+----------+
    | ID | NAME     | AGE | ADDRESS   | SALARY   |
    +----+----------+-----+-----------+----------+
    |  1 | Ramesh   |  32 | Ahmedabad |  2000.00 |
    |  2 | Khilan   |  25 | Delhi     |  1500.00 |
    |  3 | kaushik  |  23 | Kota      |  2000.00 |
    |  4 | Chaitali |  25 | Mumbai    |  6500.00 |
    |  5 | Hardik   |  27 | Bhopal    |  8500.00 |
    |  6 | Komal    |  22 | MP        |  4500.00 |
    +----+----------+-----+-----------+----------+
    
    CREATE OR REPLACE FUNCTION totalCustomers
    RETURN number IS
       total number(2) := 0;
    BEGIN
       SELECT count(*) into total
       FROM customers;
    
       RETURN total;
    END;
    /
    

    When the above code is executed using the SQL prompt, it will produce the following result −

    Function created.
    

    Calling a Function

    While creating a function, you give a definition of what the function has to do. To use a function, you will have to call that function to perform the defined task. When a program calls a function, the program control is transferred to the called function.

    A called function performs the defined task and when its return statement is executed or when the last end statement is reached, it returns the program control back to the main program.

    To call a function, you simply need to pass the required parameters along with the function name and if the function returns a value, then you can store the returned value. Following program calls the function totalCustomers from an anonymous block −

    DECLARE
       c number(2);
    BEGIN
       c := totalCustomers();
       dbms_output.put_line(''Total no. of Customers: '' || c);
    END;
    /
    

    When the above code is executed at the SQL prompt, it produces the following result −

    Total no. of Customers: 6
    
    PL/SQL procedure successfully completed.
    

    Example

    The following example demonstrates Declaring, Defining, and Invoking a Simple PL/SQL Function that computes and returns the maximum of two values.

    DECLARE
       a number;
       b number;
       c number;
    FUNCTION findMax(x IN number, y IN number)
    RETURN number
    IS
        z number;
    BEGIN
       IF x > y THEN
          z:= x;
       ELSE
          Z:= y;
       END IF;
       RETURN z;
    END;
    BEGIN
       a:= 23;
       b:= 45;
       c := findMax(a, b);
       dbms_output.put_line('' Maximum of (23,45): '' || c);
    END;
    /
    

    When the above code is executed at the SQL prompt, it produces the following result −

    Maximum of (23,45): 45
    
    PL/SQL procedure successfully completed.
    

    PL/SQL Recursive Functions

    We have seen that a program or subprogram may call another subprogram. When a subprogram calls itself, it is referred to as a recursive call and the process is known as recursion.

    To illustrate the concept, let us calculate the factorial of a number. Factorial of a number n is defined as −

    n! = n*(n-1)!
       = n*(n-1)*(n-2)!
          ...
       = n*(n-1)*(n-2)*(n-3)... 1
    

    The following program calculates the factorial of a given number by calling itself recursively −

    DECLARE
       num number;
       factorial number;
    
    FUNCTION fact(x number)
    RETURN number
    IS
       f number;
    BEGIN
       IF x=0 THEN
          f := 1;
       ELSE
          f := x * fact(x-1);
       END IF;
    RETURN f;
    END;
    
    BEGIN
       num:= 6;
       factorial := fact(num);
       dbms_output.put_line('' Factorial ''|| num || '' is '' || factorial);
    END;
    /
    

    When the above code is executed at the SQL prompt, it produces the following result −

    Factorial 6 is 720
    
    PL/SQL procedure successfully completed.
    

    Khóa học lập trình tại Toidayhoc vừa học vừa làm dự án vừa nhận lương: Khóa học lập trình nhận lương tại trung tâm Toidayhoc

  • Khóa học miễn phí PL/SQL – Arrays nhận dự án làm có lương

    PL/SQL – Arrays


    In this chapter, we will discuss arrays in PL/SQL. The PL/SQL programming language provides a data structure called the VARRAY, which can store a fixed-size sequential collection of elements of the same type. A varray is used to store an ordered collection of data, however it is often better to think of an array as a collection of variables of the same type.

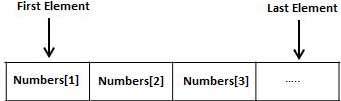
    All varrays consist of contiguous memory locations. The lowest address corresponds to the first element and the highest address to the last element.

    Varrays in PL/SQL

    An array is a part of collection type data and it stands for variable-size arrays. We will study other collection types in a later chapter ”PL/SQL Collections”.

    Each element in a varray has an index associated with it. It also has a maximum size that can be changed dynamically.

    Creating a Varray Type

    A varray type is created with the CREATE TYPE statement. You must specify the maximum size and the type of elements stored in the varray.

    The basic syntax for creating a VARRAY type at the schema level is −

    CREATE OR REPLACE TYPE varray_type_name IS VARRAY(n) of <element_type>
    

    Where,

    • varray_type_name is a valid attribute name,
    • n is the number of elements (maximum) in the varray,
    • element_type is the data type of the elements of the array.

    Maximum size of a varray can be changed using the ALTER TYPE statement.

    For example,

    CREATE Or REPLACE TYPE namearray AS VARRAY(3) OF VARCHAR2(10);
    /
    
    Type created.
    

    The basic syntax for creating a VARRAY type within a PL/SQL block is −

    TYPE varray_type_name IS VARRAY(n) of <element_type>
    

    For example −

    TYPE namearray IS VARRAY(5) OF VARCHAR2(10);
    Type grades IS VARRAY(5) OF INTEGER;
    

    Let us now work out on a few examples to understand the concept −

    Example 1

    The following program illustrates the use of varrays −

    DECLARE
       type namesarray IS VARRAY(5) OF VARCHAR2(10);
       type grades IS VARRAY(5) OF INTEGER;
       names namesarray;
       marks grades;
       total integer;
    BEGIN
       names := namesarray(''Kavita'', ''Pritam'', ''Ayan'', ''Rishav'', ''Aziz'');
       marks:= grades(98, 97, 78, 87, 92);
       total := names.count;
       dbms_output.put_line(''Total ''|| total || '' Students'');
       FOR i in 1 .. total LOOP
          dbms_output.put_line(''Student: '' || names(i) || ''
          Marks: '' || marks(i));
       END LOOP;
    END;
    /
    

    When the above code is executed at the SQL prompt, it produces the following result −

    Total 5 Students
    Student: Kavita  Marks: 98
    Student: Pritam  Marks: 97
    Student: Ayan  Marks: 78
    Student: Rishav  Marks: 87
    Student: Aziz  Marks: 92
    
    PL/SQL procedure successfully completed.
    

    Please note

    • In Oracle environment, the starting index for varrays is always 1.

    • You can initialize the varray elements using the constructor method of the varray type, which has the same name as the varray.

    • Varrays are one-dimensional arrays.

    • A varray is automatically NULL when it is declared and must be initialized before its elements can be referenced.

    Example 2

    Elements of a varray could also be a %ROWTYPE of any database table or %TYPE of any database table field. The following example illustrates the concept.

    We will use the CUSTOMERS table stored in our database as −

    Select * from customers;
    
    +----+----------+-----+-----------+----------+
    | ID | NAME     | AGE | ADDRESS   | SALARY   |
    +----+----------+-----+-----------+----------+
    |  1 | Ramesh   |  32 | Ahmedabad |  2000.00 |
    |  2 | Khilan   |  25 | Delhi     |  1500.00 |
    |  3 | kaushik  |  23 | Kota      |  2000.00 |
    |  4 | Chaitali |  25 | Mumbai    |  6500.00 |
    |  5 | Hardik   |  27 | Bhopal    |  8500.00 |
    |  6 | Komal    |  22 | MP        |  4500.00 |
    +----+----------+-----+-----------+----------+
    

    Following example makes the use of cursor, which you will study in detail in a separate chapter.

    DECLARE
       CURSOR c_customers is
       SELECT  name FROM customers;
       type c_list is varray (6) of customers.name%type;
       name_list c_list := c_list();
       counter integer :=0;
    BEGIN
       FOR n IN c_customers LOOP
          counter := counter + 1;
          name_list.extend;
          name_list(counter)  := n.name;
          dbms_output.put_line(''Customer(''||counter ||''):''||name_list(counter));
       END LOOP;
    END;
    /
    

    When the above code is executed at the SQL prompt, it produces the following result −

    Customer(1): Ramesh
    Customer(2): Khilan
    Customer(3): kaushik
    Customer(4): Chaitali
    Customer(5): Hardik
    Customer(6): Komal
    
    PL/SQL procedure successfully completed.
    

    Khóa học lập trình tại Toidayhoc vừa học vừa làm dự án vừa nhận lương: Khóa học lập trình nhận lương tại trung tâm Toidayhoc

  • Khóa học miễn phí PL/SQL – Cursors nhận dự án làm có lương

    PL/SQL – Cursors


    In this chapter, we will discuss the cursors in PL/SQL. Oracle creates a memory area, known as the context area, for processing an SQL statement, which contains all the information needed for processing the statement; for example, the number of rows processed, etc.

    A cursor is a pointer to this context area. PL/SQL controls the context area through a cursor. A cursor holds the rows (one or more) returned by a SQL statement. The set of rows the cursor holds is referred to as the active set.

    You can name a cursor so that it could be referred to in a program to fetch and process the rows returned by the SQL statement, one at a time. There are two types of cursors −

    • Implicit cursors
    • Explicit cursors

    Implicit Cursors

    Implicit cursors are automatically created by Oracle whenever an SQL statement is executed, when there is no explicit cursor for the statement. Programmers cannot control the implicit cursors and the information in it.

    Whenever a DML statement (INSERT, UPDATE and DELETE) is issued, an implicit cursor is associated with this statement. For INSERT operations, the cursor holds the data that needs to be inserted. For UPDATE and DELETE operations, the cursor identifies the rows that would be affected.

    In PL/SQL, you can refer to the most recent implicit cursor as the SQL cursor, which always has attributes such as %FOUND, %ISOPEN, %NOTFOUND, and %ROWCOUNT. The SQL cursor has additional attributes, %BULK_ROWCOUNT and %BULK_EXCEPTIONS, designed for use with the FORALL statement. The following table provides the description of the most used attributes −

    S.No Attribute & Description
    1

    %FOUND

    Returns TRUE if an INSERT, UPDATE, or DELETE statement affected one or more rows or a SELECT INTO statement returned one or more rows. Otherwise, it returns FALSE.

    2

    %NOTFOUND

    The logical opposite of %FOUND. It returns TRUE if an INSERT, UPDATE, or DELETE statement affected no rows, or a SELECT INTO statement returned no rows. Otherwise, it returns FALSE.

    3

    %ISOPEN

    Always returns FALSE for implicit cursors, because Oracle closes the SQL cursor automatically after executing its associated SQL statement.

    4

    %ROWCOUNT

    Returns the number of rows affected by an INSERT, UPDATE, or DELETE statement, or returned by a SELECT INTO statement.

    Any SQL cursor attribute will be accessed as sql%attribute_name as shown below in the example.

    Example

    We will be using the CUSTOMERS table we had created and used in the previous chapters.

    Select * from customers;
    
    +----+----------+-----+-----------+----------+
    | ID | NAME     | AGE | ADDRESS   | SALARY   |
    +----+----------+-----+-----------+----------+
    |  1 | Ramesh   |  32 | Ahmedabad |  2000.00 |
    |  2 | Khilan   |  25 | Delhi     |  1500.00 |
    |  3 | kaushik  |  23 | Kota      |  2000.00 |
    |  4 | Chaitali |  25 | Mumbai    |  6500.00 |
    |  5 | Hardik   |  27 | Bhopal    |  8500.00 |
    |  6 | Komal    |  22 | MP        |  4500.00 |
    +----+----------+-----+-----------+----------+
    

    The following program will update the table and increase the salary of each customer by 500 and use the SQL%ROWCOUNT attribute to determine the number of rows affected −

    DECLARE
       total_rows number(2);
    BEGIN
       UPDATE customers
       SET salary = salary + 500;
       IF sql%notfound THEN
          dbms_output.put_line(''no customers selected'');
       ELSIF sql%found THEN
          total_rows := sql%rowcount;
          dbms_output.put_line( total_rows || '' customers selected '');
       END IF;
    END;
    /
    

    When the above code is executed at the SQL prompt, it produces the following result −

    6 customers selected
    
    PL/SQL procedure successfully completed.
    

    If you check the records in customers table, you will find that the rows have been updated −

    Select * from customers;
    
    +----+----------+-----+-----------+----------+
    | ID | NAME     | AGE | ADDRESS   | SALARY   |
    +----+----------+-----+-----------+----------+
    |  1 | Ramesh   |  32 | Ahmedabad |  2500.00 |
    |  2 | Khilan   |  25 | Delhi     |  2000.00 |
    |  3 | kaushik  |  23 | Kota      |  2500.00 |
    |  4 | Chaitali |  25 | Mumbai    |  7000.00 |
    |  5 | Hardik   |  27 | Bhopal    |  9000.00 |
    |  6 | Komal    |  22 | MP        |  5000.00 |
    +----+----------+-----+-----------+----------+
    

    Explicit Cursors

    Explicit cursors are programmer-defined cursors for gaining more control over the context area. An explicit cursor should be defined in the declaration section of the PL/SQL Block. It is created on a SELECT Statement which returns more than one row.

    The syntax for creating an explicit cursor is −

    CURSOR cursor_name IS select_statement;
    

    Working with an explicit cursor includes the following steps −

    • Declaring the cursor for initializing the memory
    • Opening the cursor for allocating the memory
    • Fetching the cursor for retrieving the data
    • Closing the cursor to release the allocated memory

    Declaring the Cursor

    Declaring the cursor defines the cursor with a name and the associated SELECT statement. For example −

    CURSOR c_customers IS
       SELECT id, name, address FROM customers;
    

    Opening the Cursor

    Opening the cursor allocates the memory for the cursor and makes it ready for fetching the rows returned by the SQL statement into it. For example, we will open the above defined cursor as follows −

    OPEN c_customers;
    

    Fetching the Cursor

    Fetching the cursor involves accessing one row at a time. For example, we will fetch rows from the above-opened cursor as follows −

    FETCH c_customers INTO c_id, c_name, c_addr;
    

    Closing the Cursor

    Closing the cursor means releasing the allocated memory. For example, we will close the above-opened cursor as follows −

    CLOSE c_customers;
    

    Example

    Following is a complete example to illustrate the concepts of explicit cursors &minua;

    DECLARE
       c_id customers.id%type;
       c_name customers.name%type;
       c_addr customers.address%type;
       CURSOR c_customers is
          SELECT id, name, address FROM customers;
    BEGIN
       OPEN c_customers;
       LOOP
       FETCH c_customers into c_id, c_name, c_addr;
          EXIT WHEN c_customers%notfound;
          dbms_output.put_line(c_id || '' '' || c_name || '' '' || c_addr);
       END LOOP;
       CLOSE c_customers;
    END;
    /
    

    When the above code is executed at the SQL prompt, it produces the following result −

    1 Ramesh Ahmedabad
    2 Khilan Delhi
    3 kaushik Kota
    4 Chaitali Mumbai
    5 Hardik Bhopal
    6 Komal MP
    
    PL/SQL procedure successfully completed.
    

    Khóa học lập trình tại Toidayhoc vừa học vừa làm dự án vừa nhận lương: Khóa học lập trình nhận lương tại trung tâm Toidayhoc

  • Khóa học miễn phí PL/SQL – Basic Syntax nhận dự án làm có lương

    PL/SQL – Basic Syntax


    In this chapter, we will discuss the Basic Syntax of PL/SQL which is a block-structured language; this means that the PL/SQL programs are divided and written in logical blocks of code. Each block consists of three sub-parts −

    S.No Sections & Description
    1

    Declarations

    This section starts with the keyword DECLARE. It is an optional section and defines all variables, cursors, subprograms, and other elements to be used in the program.

    2

    Executable Commands

    This section is enclosed between the keywords BEGIN and END and it is a mandatory section. It consists of the executable PL/SQL statements of the program. It should have at least one executable line of code, which may be just a NULL command to indicate that nothing should be executed.

    3

    Exception Handling

    This section starts with the keyword EXCEPTION. This optional section contains exception(s) that handle errors in the program.

    Every PL/SQL statement ends with a semicolon (;). PL/SQL blocks can be nested within other PL/SQL blocks using BEGIN and END. Following is the basic structure of a PL/SQL block −

    DECLARE
       <declarations section>
    BEGIN
       <executable command(s)>
    EXCEPTION
       <exception handling>
    END;
    

    The ”Hello World” Example

    DECLARE
       message  varchar2(20):= ''Hello, World!
    BEGIN
       dbms_output.put_line(message);
    END;
    /
    

    The end; line signals the end of the PL/SQL block. To run the code from the SQL command line, you may need to type / at the beginning of the first blank line after the last line of the code. When the above code is executed at the SQL prompt, it produces the following result −

    Hello World
    
    PL/SQL procedure successfully completed.
    

    The PL/SQL Identifiers

    PL/SQL identifiers are constants, variables, exceptions, procedures, cursors, and reserved words. The identifiers consist of a letter optionally followed by more letters, numerals, dollar signs, underscores, and number signs and should not exceed 30 characters.

    By default, identifiers are not case-sensitive. So you can use integer or INTEGER to represent a numeric value. You cannot use a reserved keyword as an identifier.

    The PL/SQL Delimiters

    A delimiter is a symbol with a special meaning. Following is the list of delimiters in PL/SQL −

    Delimiter Description
    +, -, *, / Addition, subtraction/negation, multiplication, division
    % Attribute indicator
    Character string delimiter
    . Component selector
    (,) Expression or list delimiter
    : Host variable indicator
    , Item separator
    Quoted identifier delimiter
    = Relational operator
    @ Remote access indicator
    ; Statement terminator
    := Assignment operator
    => Association operator
    || Concatenation operator
    ** Exponentiation operator
    <<, >> Label delimiter (begin and end)
    /*, */ Multi-line comment delimiter (begin and end)
    Single-line comment indicator
    .. Range operator
    <, >, <=, >= Relational operators
    <>, ”=, ~=, ^= Different versions of NOT EQUAL

    The PL/SQL Comments

    Program comments are explanatory statements that can be included in the PL/SQL code that you write and helps anyone reading its source code. All programming languages allow some form of comments.

    The PL/SQL supports single-line and multi-line comments. All characters available inside any comment are ignored by the PL/SQL compiler. The PL/SQL single-line comments start with the delimiter — (double hyphen) and multi-line comments are enclosed by /* and */.

    DECLARE
       -- variable declaration
       message  varchar2(20):= ''Hello, World!
    BEGIN
       /*
       *  PL/SQL executable statement(s)
       */
       dbms_output.put_line(message);
    END;
    /
    

    When the above code is executed at the SQL prompt, it produces the following result −

    Hello World
    
    PL/SQL procedure successfully completed.
    

    PL/SQL Program Units

    A PL/SQL unit is any one of the following −

    • PL/SQL block
    • Function
    • Package
    • Package body
    • Procedure
    • Trigger
    • Type
    • Type body

    Each of these units will be discussed in the following chapters.


    Khóa học lập trình tại Toidayhoc vừa học vừa làm dự án vừa nhận lương: Khóa học lập trình nhận lương tại trung tâm Toidayhoc

  • Khóa học miễn phí PL/SQL – Overview nhận dự án làm có lương

    PL/SQL – Overview


    The PL/SQL programming language was developed by Oracle Corporation in the late 1980s as procedural extension language for SQL and the Oracle relational database. Following are certain notable facts about PL/SQL −

    • PL/SQL is a completely portable, high-performance transaction-processing language.

    • PL/SQL provides a built-in, interpreted and OS independent programming environment.

    • PL/SQL can also directly be called from the command-line SQL*Plus interface.

    • Direct call can also be made from external programming language calls to database.

    • PL/SQL”s general syntax is based on that of ADA and Pascal programming language.

    • Apart from Oracle, PL/SQL is available in TimesTen in-memory database and IBM DB2.

    Features of PL/SQL

    PL/SQL has the following features −

    • PL/SQL is tightly integrated with SQL.
    • It offers extensive error checking.
    • It offers numerous data types.
    • It offers a variety of programming structures.
    • It supports structured programming through functions and procedures.
    • It supports object-oriented programming.
    • It supports the development of web applications and server pages.

    Advantages of PL/SQL

    PL/SQL has the following advantages −

    • SQL is the standard database language and PL/SQL is strongly integrated with SQL. PL/SQL supports both static and dynamic SQL. Static SQL supports DML operations and transaction control from PL/SQL block. In Dynamic SQL, SQL allows embedding DDL statements in PL/SQL blocks.

    • PL/SQL allows sending an entire block of statements to the database at one time. This reduces network traffic and provides high performance for the applications.

    • PL/SQL gives high productivity to programmers as it can query, transform, and update data in a database.

    • PL/SQL saves time on design and debugging by strong features, such as exception handling, encapsulation, data hiding, and object-oriented data types.

    • Applications written in PL/SQL are fully portable.

    • PL/SQL provides high security level.

    • PL/SQL provides access to predefined SQL packages.

    • PL/SQL provides support for Object-Oriented Programming.

    • PL/SQL provides support for developing Web Applications and Server Pages.


    Khóa học lập trình tại Toidayhoc vừa học vừa làm dự án vừa nhận lương: Khóa học lập trình nhận lương tại trung tâm Toidayhoc