Your cart is currently empty!
Category: orientdb
-
Khóa học miễn phí OrientDB – Java Interface nhận dự án làm có lương
OrientDB – Java Interface
Similar to RDBMS, OrientDB supports JDBC. For this, first we need to configure the environment for JDBC programming. Following is the procedure to create a connection between your application and database.
First, we need to download the JDBC Driver. Visit the following link to download OrientDB-JDBC.
Following are the basic five steps to achieve OrientDB-jdbc connectivity.
- Load JDBC driver
- Create Connection
- Create statement
- Execute statement
- Close connection
Example
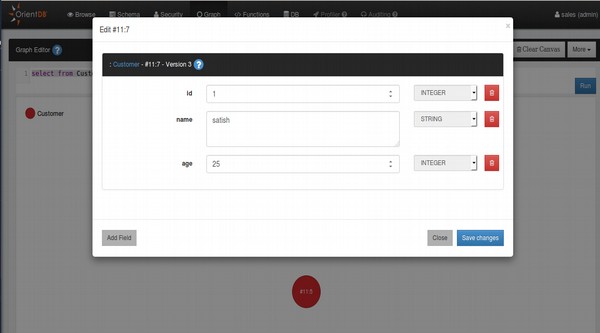
Try the following example to understand OrientDB-JDBC connectivity. Let us consider we have an employee table which contains the following fields and its types.
Sr.No. Field Name Type 1 Id Integer 2 Name String 3 Salary Integer 4 Join date Date You can create a Schema (table) by executing the following commands.
CREATE DATABASE PLOCAL:/opt/orientdb/databases/testdb
CREATE CLASS Employee
CREATE PROPERTY Customer.id integer
CREATE PROPERTY Customer.name String
CREATE PROPERTY Customer.salary integer
CREATE PROPERTY Customer.join_date date
After executing all the commands, you will get the Employee table with the following fields, employee name with id, age, and join_date fields.
Save the following code into OrientJdbcDemo.java file.
import com.orientechnologies.common.log.OLogManager;
import com.orientechnologies.orient.core.db.document.ODatabaseDocumentTx;
import org.junit.After;
import org.junit.Before;
import org.junit.BeforeClass;

import java.io.File;
import java.sql.DriverManager;
import java.util.Properties;

import static com.orientechnologies.orient.jdbc.OrientDbCreationHelper.createSchemaDB;
import static com.orientechnologies.orient.jdbc.OrientDbCreationHelper.loadDB;
import static java.lang.Class.forName;

public abstract class OrientJdbcDemo {

   protected OrientJdbcConnection conn;

   public static void main(String ar[]){

      //load Driver
      forName(OrientJdbcDriver.class.getName());
      String dbUrl = "memory:testdb";
      ODatabaseDocumentTx db = new ODatabaseDocumentTx(dbUrl);
      String username = "admin";
      String password = "admin";
      createSchemaDB(db);
      loadDB(db, 20);
      dbtx.create();

      //Create Connection
      Properties info = new Properties();
      info.put("user", username);
      info.put("password", password);
      conn = (OrientJdbcConnection) DriverManager.getConnection("jdbc:orient:" + dbUrl, info);

      //create and execute statement
      Statement stmt = conn.createStatement();
      int updated = stmt.executeUpdate("INSERT into emplyoee
         (intKey, text, salary, date) values (''001'',''satish'',''25000'',''"
          + date.toString() + "'')");

      int updated = stmt.executeUpdate("INSERT into emplyoee
         (intKey, text, salary, date) values (''002'',''krishna'',''25000'',''"
         + date.toString() + "'')");

      System.out.println("Records successfully inserted");

      //Close Connection
      if (conn != null && !conn.isClosed())
         conn.close();
   }
}
The following command is used to compile the above program.
$ javac –classpath:.:orientdb-jdbc-1.0-SNAPSHOT.jar OrientJdbcDemo.java
$ java –classpath:.:orientdb-jdbc-1.0-SNAPSHOT.jar OrientJdbcDemo
If the above command is executed successfully, you will get the following output.
Records Successfully Inserted
Khóa học lập trình tại Toidayhoc vừa học vừa làm dự án vừa nhận lương: Khóa học lập trình nhận lương tại trung tâm Toidayhoc
Khóa học miễn phí OrientDB – Move Vertex nhận dự án làm có lương
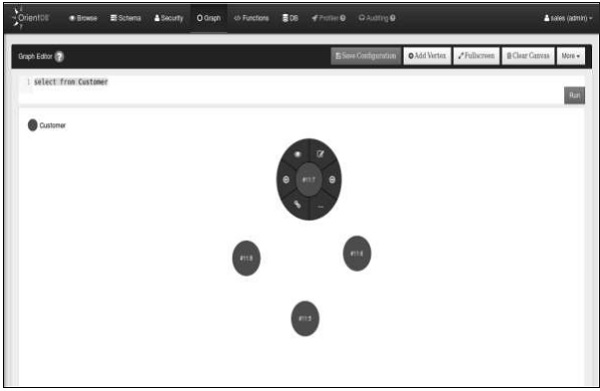
OrientDB – Move Vertex
Move Vertex command in OrientDB is to move one or more vertices from current location to different class or cluster. If you are applying move command on a particular vertex, then it will update all the edges that are connected to this vertex. If you are specifying a cluster to move vertex, then it moves the vertices to the server owner of the target cluster.
The following statement is the basic syntax of Move Vertex Command.
MOVE VERTEX <source> TO <destination>
[SET [<field>=<value>]* [,]]
[MERGE <JSON>]
[BATCH <batch-size>]
Following are the details about the options in the above syntax.
<source> − Defines the vertex you want to move. It accepts Record ID of a particular vertex or array of Record IDs for vertices.
<destination> − Defines where you want to move the vertex. It supports either class or a cluster as destination.
SET − Sets the values to fields.
MERGE − Sets the values to fields through JSON.
BATCH − Defines the batch size.
Note − This command updates all connected edges, but not links. When using Graph API, it is recommended to use edge connected to vertices.
Example
Try the following examples to learn how to move vertices.
Execute the following query to move a single vertex having Record ID #11:2 from its current position to Class Employee.
orientdb> MOVE VERTEX #11:2 TO CLASS:Employee
If the above query is executed successfully, you will get the following output −
Move vertex command executed with result ''[{old:#11:2, new:#13:0}]'' in 0.022000 sec(s)
Execute the following query to move set of vertices from the class ‘Customer’ to class ‘Employee’.
orientdb> MOVE VERTEX (SELECT FROM Customer) TO CLASS:Employee
If the above query is executed successfully, you will get the following output.
Move vertex command executed with result ''[{old:#11:0,
new:#13:1},{old:#11:1, new:#13:2},{old:#11:2, new:#13:3}]'' in 0.011000 sec(s)
Khóa học lập trình tại Toidayhoc vừa học vừa làm dự án vừa nhận lương: Khóa học lập trình nhận lương tại trung tâm Toidayhoc