Your cart is currently empty!
Category: Amazonrds
-
Khóa học miễn phí Amazon RDS – Oracle DBA Tasks nhận dự án làm có lương
Amazon RDS – Oracle DBA Tasks
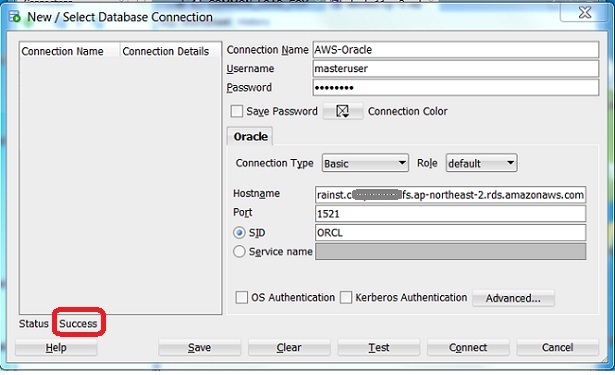
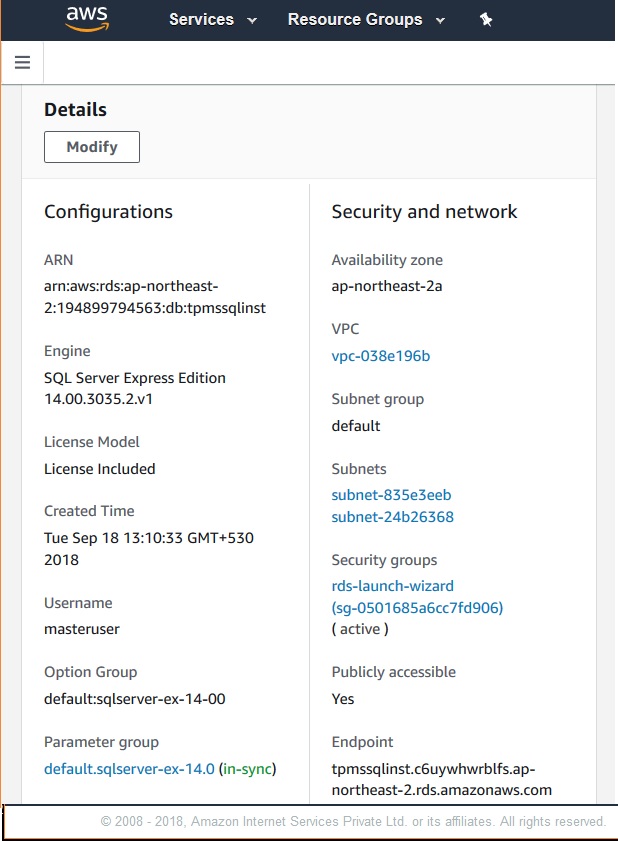
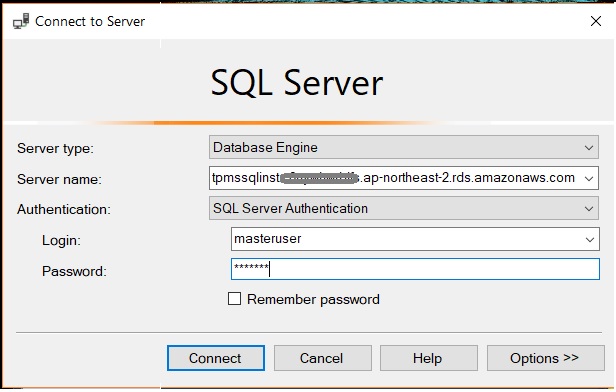
As an industry leading database technology, oracle has many in-built features which makes it easy to manage the DBA activities, even in the cloud. The Amazon RDS oracle DB provides access to many stored procedures and functions which can be accessed using the SQL developer client tool. This procedure can be executed using the user ID and password created during the Amazon RDS instance creation. Below are the examples of some of the most frequently used DBA activities.
Killing a Session
Sometimes a long running query or any other DB activity needs to be killed by killing the session. We use the Amazon RDS procedure rdsadmin.rdsadmin_util.kill to kill a session. The following code does that.
# First get the session identifier and the session serial number,
select SID, SERIAL#, STATUS from V$SESSION where USERNAME = ''AWSUSER

# Next use the procedure
begin
    rdsadmin.rdsadmin_util.kill(
        sid    => sid,
        serial => serial_number);
end;
/
Setting the Default Tablespace
The Amazon RDS procedure rdsadmin.rdsadmin_util.alter_default_tablespace can be used to set to the default tablespace for a DB using the following command.
exec rdsadmin.rdsadmin_util.alter_default_tablespace(tablespace_name => ''AWSuser'');
Setting the Database Time Zone
We can use the Amazon RDS procedure rdsadmin.rdsadmin_util.alter_db_time_zone to changes the time zone for the DB.
# Change the time zone of the DB to UTC + 5.30
exec rdsadmin.rdsadmin_util.alter_db_time_zone(p_new_tz => ''+5:30'');
# Change the time zone to a specific region
exec rdsadmin.rdsadmin_util.alter_db_time_zone(p_new_tz => ''Asia/Kolkata'');
Adding Online Redo Logs
We can use the Amazon RDS procedure rdsadmin.rdsadmin_util.add_logfile to add additional redo logs. The following command adds a log file of size 128MB.
exec rdsadmin.rdsadmin_util.add_logfile(p_size => ''128M'');
Khóa học lập trình tại Toidayhoc vừa học vừa làm dự án vừa nhận lương: Khóa học lập trình nhận lương tại trung tâm Toidayhoc
Khóa học miễn phí Amazon RDS – Oracle Creating DB nhận dự án làm có lương
Amazon RDS – Oracle Creating DB
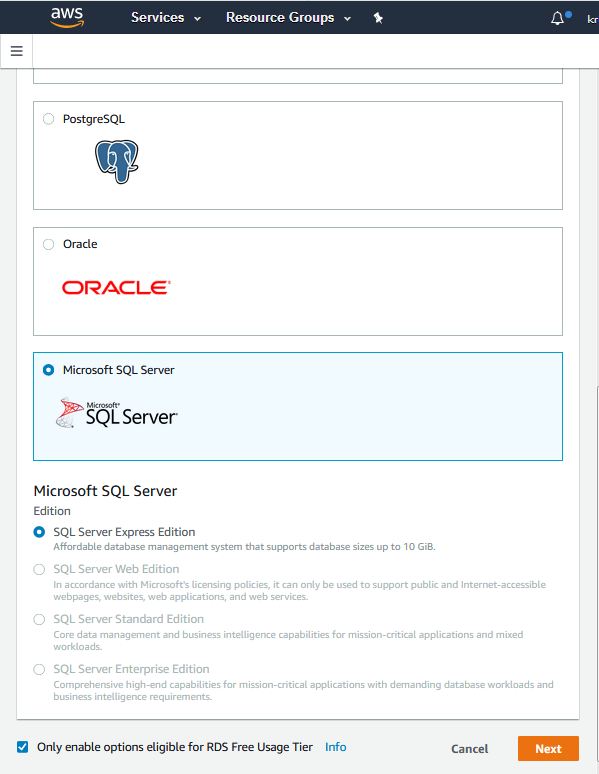
As a cloud platform AWS gives you very minimal number of steps to setup a DB in RDS. Creating a Oracle DB can be done in three ways. Using AWS management console, AWS CLI or AWS API. We will look at each of these approaches one by one.
Using AWS management Console
AWS management console is the most convenient way to get started with RDS. You login to the AWS console using your AWS account details, locate the RDS service and then follow the steps shown below to create a Oracle SQL DB instance.
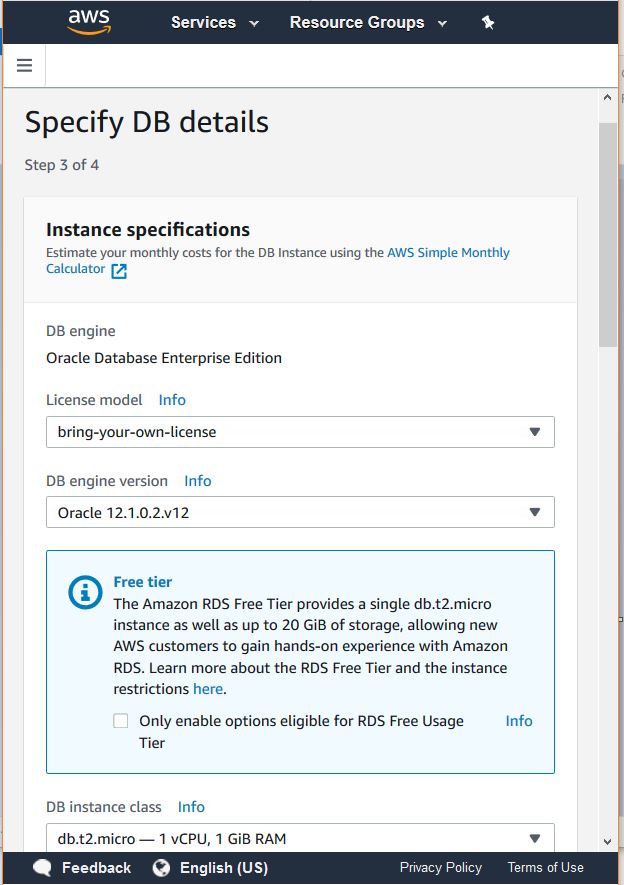
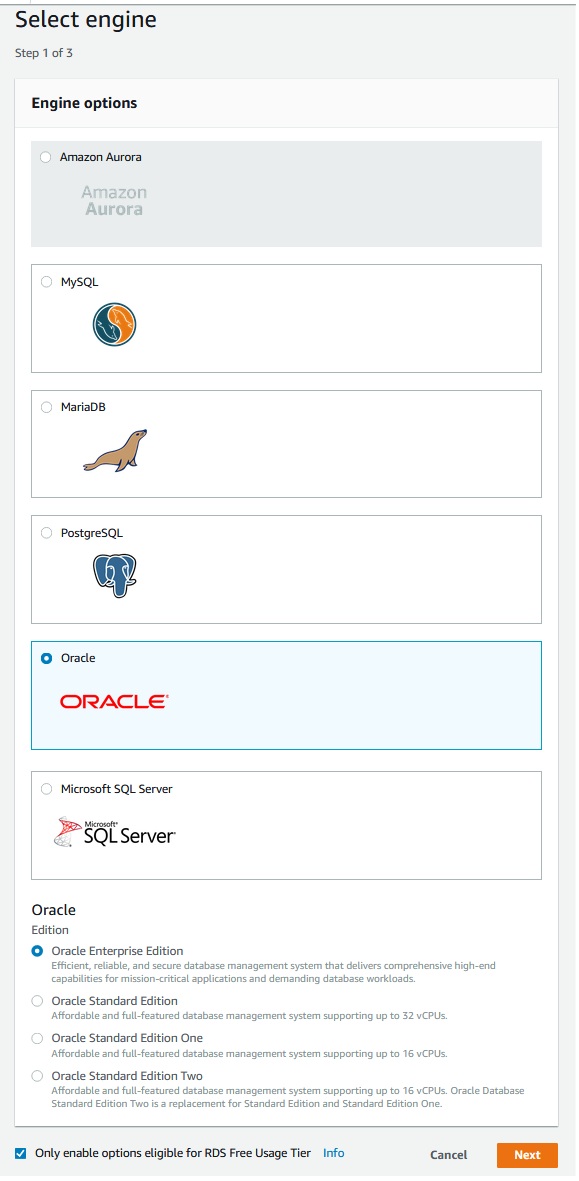
Step-1
Select the Oracle db Engine form the console.
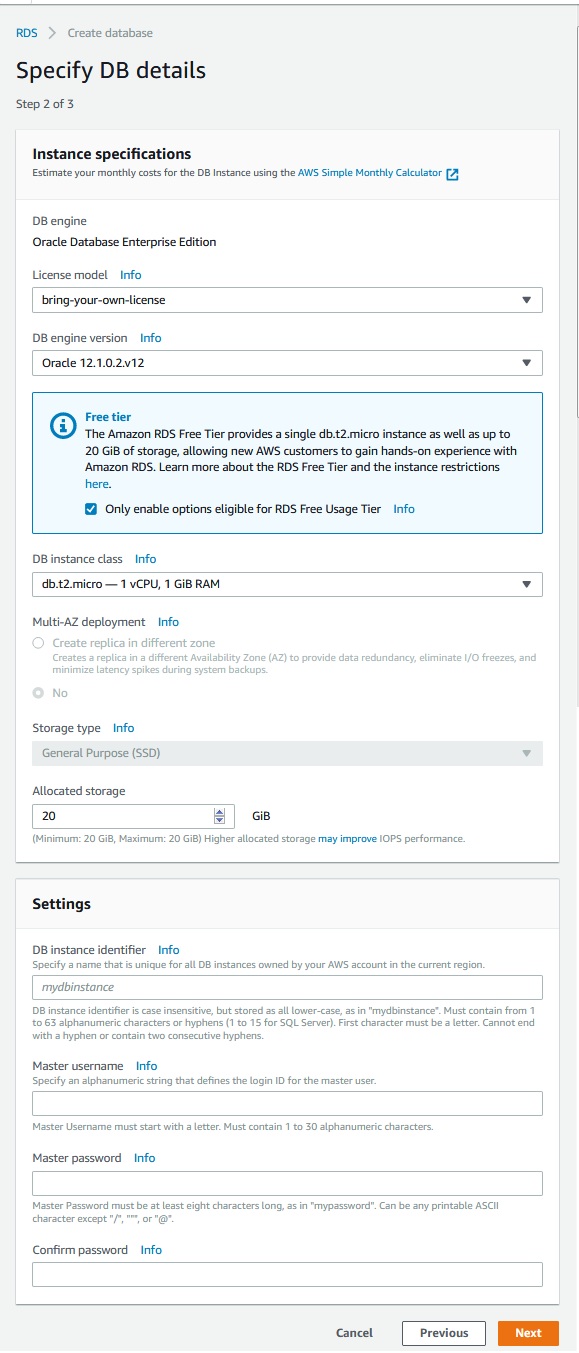
Step-2
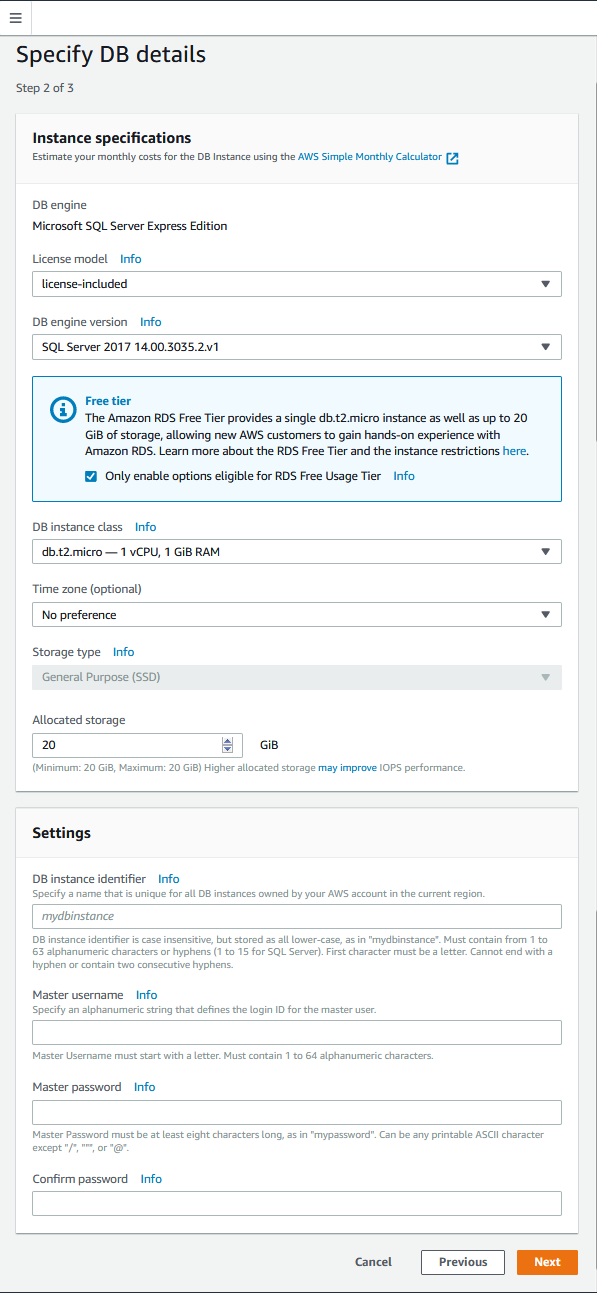
Specify the required DB details.
Step-3
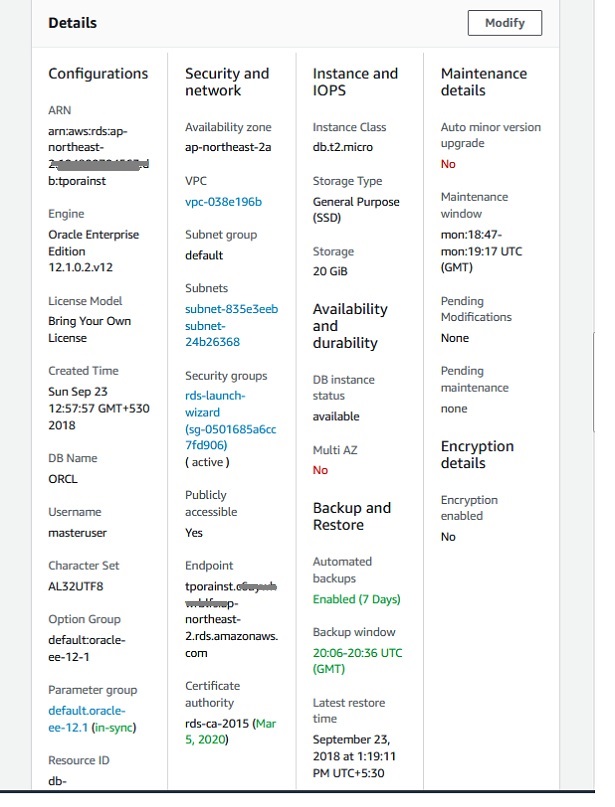
In this step you decide on the db instance class, amount of storage allocated also set the master password along with few other details.
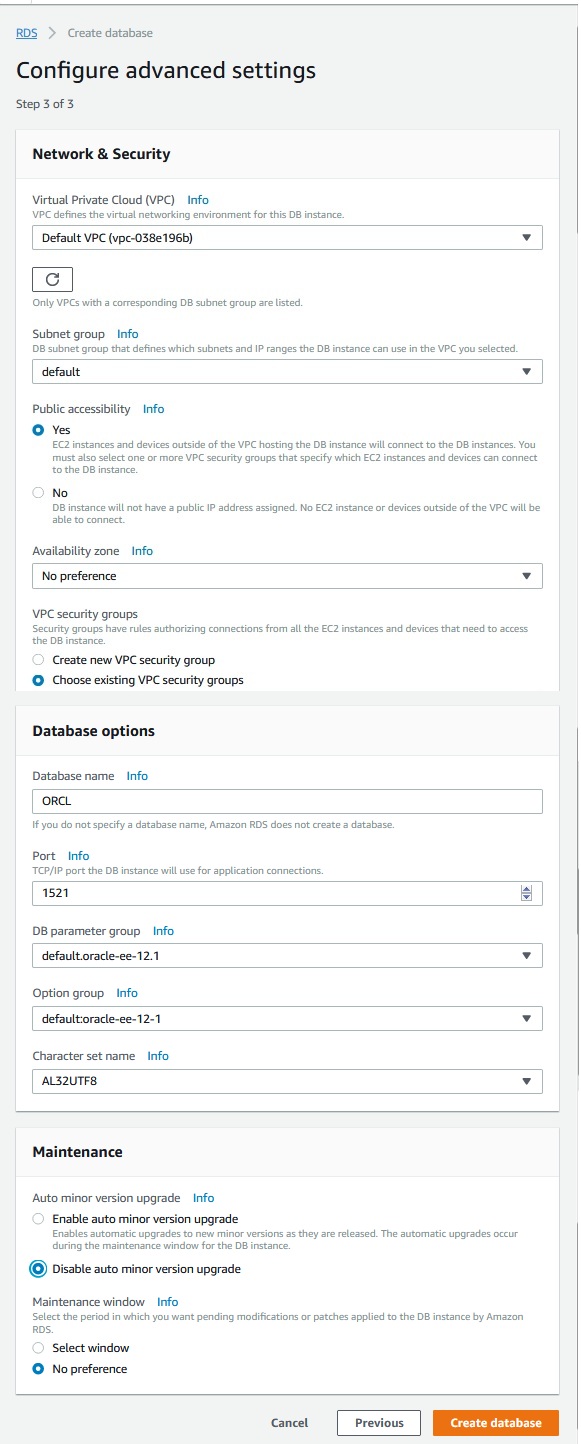
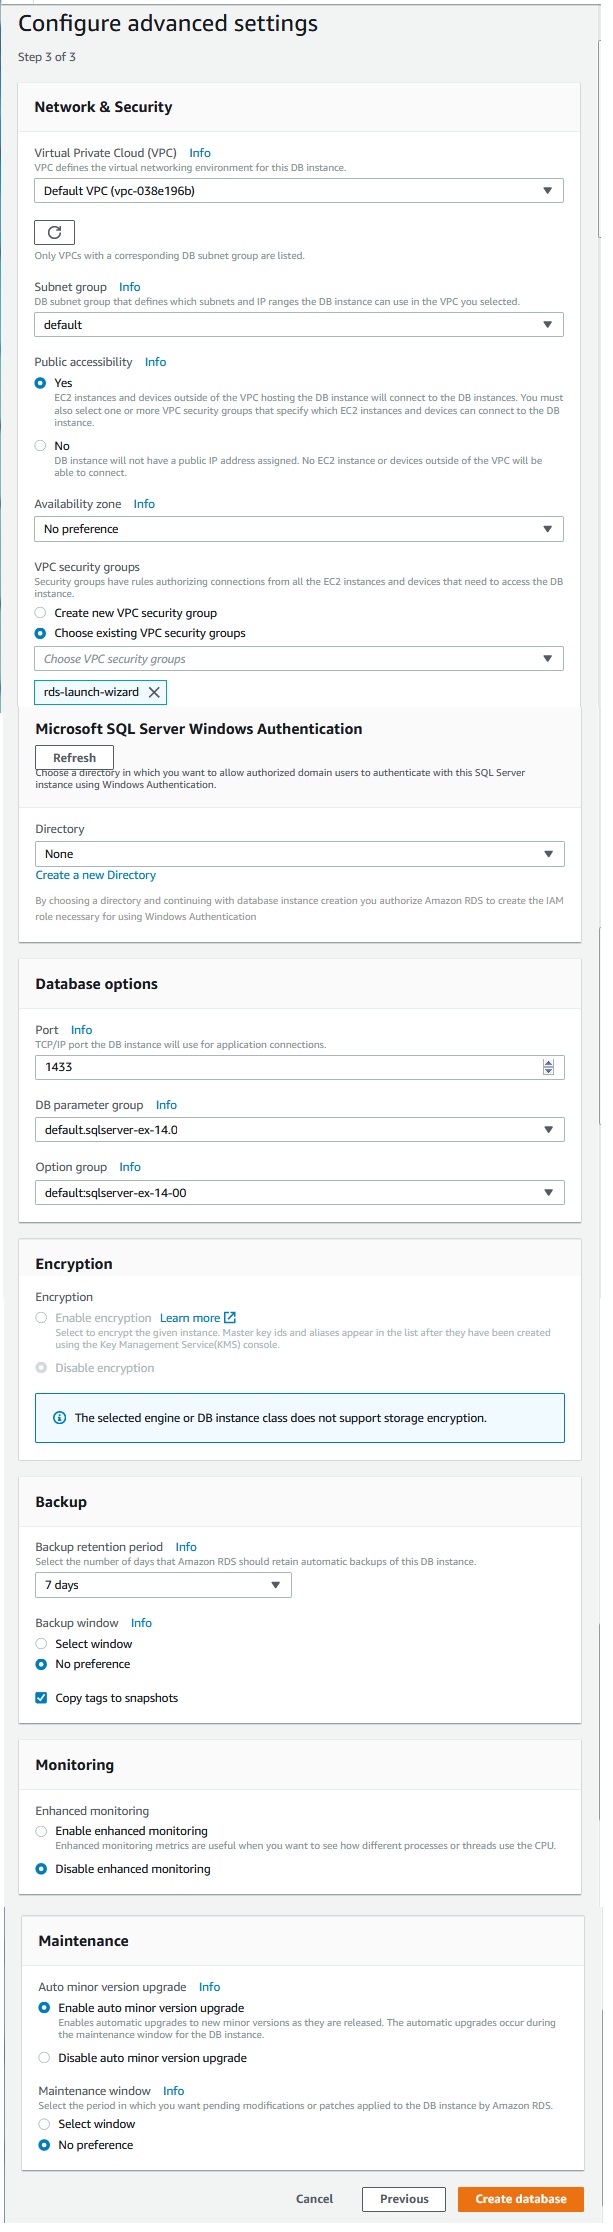
Stpe—4
This is the final step when you mention the vpc and security settings, encryption, backup options and log export etc. For brevity the screen shot has been shortened showing only the important options.

Using CLI
To create a Oracle DB instance by using the AWS CLI, call the create-db-instance command with the parameters below.
aws rds create-db-instance
    --engine oracle-se1
    --db-instance-identifier mydbinstance
    --allocated-storage 20
    --db-instance-class db.m1.small
    --db-security-groups mydbsecuritygroup
    --db-subnet-group mydbsubnetgroup
    --master-username masterawsuser
    --master-user-password masteruserpassword
    --backup-retention-period 3
Using API
To create a Oracle DB instance by using the Amazon RDS API, we call the CreateDBInstance action with the parameters as shown below.
https://rds.amazonaws.com/
    ?Action=CreateDBInstance
    &AllocatedStorage=250
    &BackupRetentionPeriod=3
    &DBInstanceClass=db.m1.large
    &DBInstanceIdentifier=mydbinstance
    &DBSecurityGroups.member.1=mysecuritygroup
    &DBSubnetGroup=mydbsubnetgroup
    &Engine=oracle-se1
    &MasterUserPassword=masteruserpassword
    &MasterUsername=masterawsuser
    &SignatureMethod=HmacSHA256
    &SignatureVersion=4
    &Version=2014-10-31
    &X-Amz-Algorithm=AWS4-HMAC-SHA256
    &X-Amz-Credential=AKIADQKE4SARGYLE/20140305/us-west-1/rds/aws4_request
    &X-Amz-Date=20140305T185838Z
    &X-Amz-SignedHeaders=content-type;host;user-agent;x-amz-content-sha256;x-amz-date
    &X-Amz-Signature=b441901545441d3c7a48f63b5b1522c5b2b37c137500c93c45e209d4b3a064a3
Khóa học lập trình tại Toidayhoc vừa học vừa làm dự án vừa nhận lương: Khóa học lập trình nhận lương tại trung tâm Toidayhoc