Your cart is currently empty!
Author: alien
-
Khóa học miễn phí MongoDB – Deployment nhận dự án làm có lương
MongoDB – Deployment
When you are preparing a MongoDB deployment, you should try to understand how your application is going to hold up in production. It’s a good idea to develop a consistent, repeatable approach to managing your deployment environment so that you can minimize any surprises once you’re in production.
The best approach incorporates prototyping your set up, conducting load testing, monitoring key metrics, and using that information to scale your set up. The key part of the approach is to proactively monitor your entire system – this will help you understand how your production system will hold up before deploying, and determine where you will need to add capacity. Having insight into potential spikes in your memory usage, for example, could help put out a write-lock fire before it starts.
To monitor your deployment, MongoDB provides some of the following commands −
mongostat
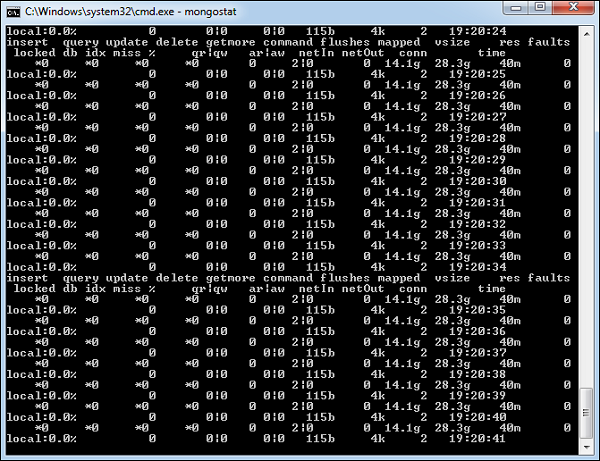
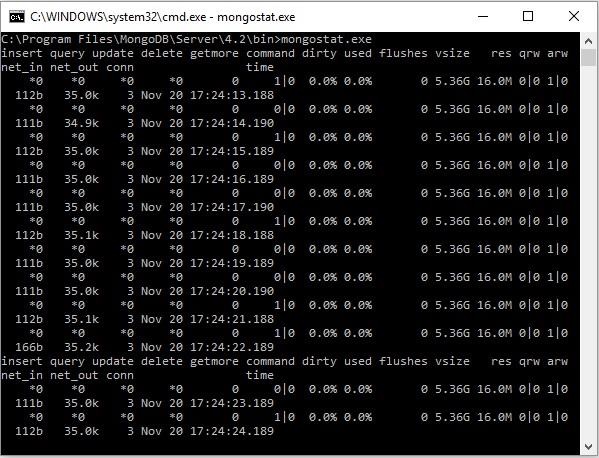
This command checks the status of all running mongod instances and return counters of database operations. These counters include inserts, queries, updates, deletes, and cursors. Command also shows when you’re hitting page faults, and showcase your lock percentage. This means that you”re running low on memory, hitting write capacity or have some performance issue.
To run the command, start your mongod instance. In another command prompt, go to bin directory of your mongodb installation and type mongostat.
D:set upmongodbbin>mongostat
Following is the output of the command −
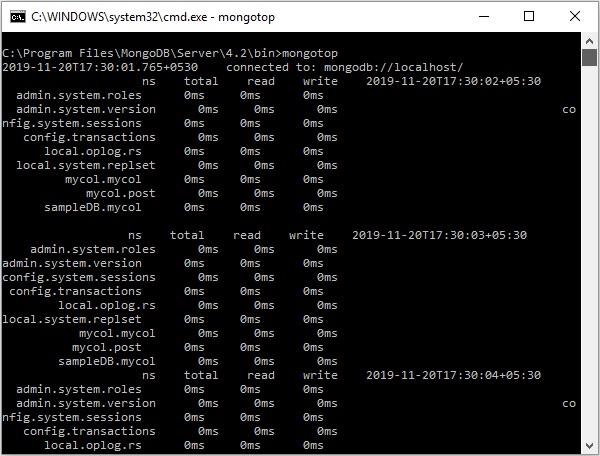
mongotop
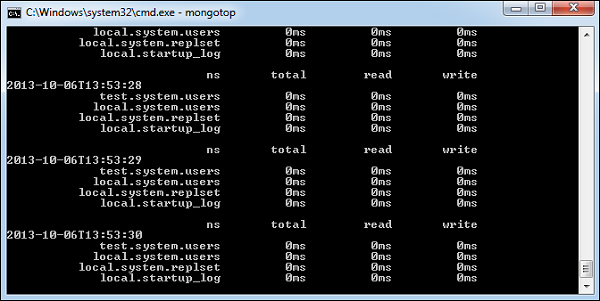
This command tracks and reports the read and write activity of MongoDB instance on a collection basis. By default, mongotop returns information in each second, which you can change it accordingly. You should check that this read and write activity matches your application intention, and you’re not firing too many writes to the database at a time, reading too frequently from a disk, or are exceeding your working set size.
To run the command, start your mongod instance. In another command prompt, go to bin directory of your mongodb installation and type mongotop.
D:set upmongodbbin>mongotop
Following is the output of the command −
To change mongotop command to return information less frequently, specify a specific number after the mongotop command.
D:set upmongodbbin>mongotop 30
The above example will return values every 30 seconds.
Apart from the MongoDB tools, 10gen provides a free, hosted monitoring service, MongoDB Management Service (MMS), that provides a dashboard and gives you a view of the metrics from your entire cluster.
Khóa học lập trình tại Toidayhoc vừa học vừa làm dự án vừa nhận lương: Khóa học lập trình nhận lương tại trung tâm Toidayhoc
Khóa học miễn phí MongoDB – Sharding nhận dự án làm có lương
MongoDB – Sharding
Sharding is the process of storing data records across multiple machines and it is MongoDB”s approach to meeting the demands of data growth. As the size of the data increases, a single machine may not be sufficient to store the data nor provide an acceptable read and write throughput. Sharding solves the problem with horizontal scaling. With sharding, you add more machines to support data growth and the demands of read and write operations.
Why Sharding?
-
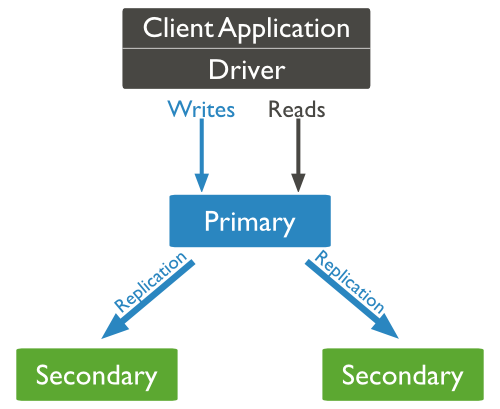
In replication, all writes go to master node
-
Latency sensitive queries still go to master
-
Single replica set has limitation of 12 nodes
-
Memory can”t be large enough when active dataset is big
-
Local disk is not big enough
-
Vertical scaling is too expensive
Sharding in MongoDB
The following diagram shows the Sharding in MongoDB using sharded cluster.
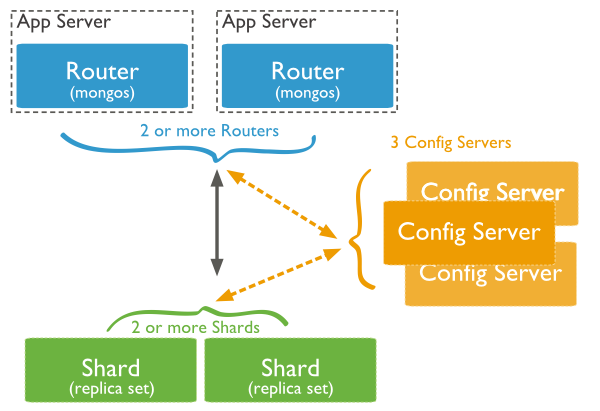
In the following diagram, there are three main components −
-
Shards − Shards are used to store data. They provide high availability and data consistency. In production environment, each shard is a separate replica set.
-
Config Servers − Config servers store the cluster”s metadata. This data contains a mapping of the cluster”s data set to the shards. The query router uses this metadata to target operations to specific shards. In production environment, sharded clusters have exactly 3 config servers.
-
Query Routers − Query routers are basically mongo instances, interface with client applications and direct operations to the appropriate shard. The query router processes and targets the operations to shards and then returns results to the clients. A sharded cluster can contain more than one query router to divide the client request load. A client sends requests to one query router. Generally, a sharded cluster have many query routers.
Khóa học lập trình tại Toidayhoc vừa học vừa làm dự án vừa nhận lương: Khóa học lập trình nhận lương tại trung tâm Toidayhoc