Your cart is currently empty!
Author: alien
-
Khóa học miễn phí MySQL – Show Database nhận dự án làm có lương
MySQL – SHOW Databases

Table of content
MySQL SHOW Databases Statement
To display the list of all databases present in a MySQL server, we need to use the SHOW DATABASES statement. It returns the result in a tabular form with one column. The databases in the result set will be sorted in alphabetical order.
Syntax
Following is the syntax to list all databases in MySQL sever −
SHOW DATABASES [LIKE ''pattern'' | WHERE expr]
Example
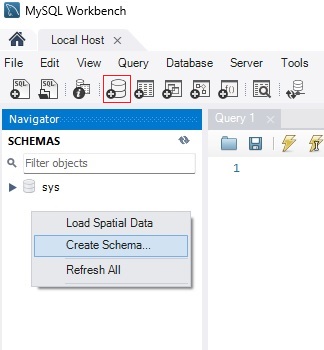
First of all, let us create a database with a name TUTORIALS using the following query −
CREATE DATABASE TUTORIALS;
Make sure you have the admin privilege before creating any database. Once a database is created, you can check it in the list of databases by using the following query −
SHOW DATABASES;
Output
The above query displayed all the databases present in the current MySQL server.
Database information_schema mysql performance_schema tutorials MySQL SHOW SCHEMAS Statement
We can also use the SHOW SCHEMAS statement to list out the databases in MySQL.
Syntax
Following is the syntax of the MySQL SHOW SCHEMAS statement −
SHOW SCHEMAS [LIKE ''pattern'' | WHERE expr]
Example
Lets try to verify the list of databases once again you can using the following query −
SHOW SCHEMAS;
Output
The output of the above query will be as shown below −
Database information_schema mysql performance_schema tutorials Showing Databases Using a Client Program
Besides fetching the list of all databases in current MySQL server with a MySQL query, we can also use a client program to perform the SHOW DATABASES operation.
Syntax
Following are the syntaxes of this operation in various programming languages −
To show the list of all databases present in current MySQL through PHP program, we need to execute the SHOW DATABASES statement using the mysqli function query() as follows −
$sql = "SHOW Database_name";
$mysqli->query($sql);
To show the list of all databases present in current MySQL through Node.js program, we need to execute the SHOW DATABASES statement using the query() function of the mysql2 library as follows −
sql= "SHOW {DATABASES | SCHEMAS} LIKE ''pattern'' | WHERE expr]";
con.query(sql);
To show the list of all databases present in current MySQL through Java program, we need to execute the SHOW DATABASES statement using the JDBC function executeUpdate() as follows −
String sql = "SHOW Database_name";
st.executeQuery(sql);
To show the list of all databases present in current MySQL through Python program, we need to execute the SHOW DATABASES statement using the execute() function of the MySQL Connector/Python as follows −
sql = "SHOW Database_name";
cursorObj.execute(sql)
Example
Following are the programs −
$dbhost = ''localhost
$dbuser = ''root
$dbpass = ''password
$mysqli = new mysqli($dbhost, $dbuser, $dbpass);

if($mysqli->connect_errno ) {
   printf("Connect failed: %s
", $mysqli->connect_error);
   exit();
}
//printf(''Connected successfully.
'');
if ($result = $mysqli->query("SHOW DATABASES")) {
   printf("Show Database executed successfully..!");
   echo "Database list are: ";
   while($row = mysqli_fetch_array($result)){
       print_r($row);
   }
}
if ($mysqli->errno) {
    printf("Could not find database: %s
", $mysqli->error);
}
$mysqli->close();
Output
The output obtained is as follows −
Show Database executed successfully..!Database list are:
Array
(
    [0] => bank
    [Database] => bank
)
Array
(
    [0] => company
    [Database] => company
)
Array
(
    [0] => information_schema
    [Database] => information_schema
)
Array
(
    [0] => mydb
    [Database] => mydb
)
Array
(
    [0] => mysql
    [Database] => mysql
)
Array
(
    [0] => performance_schema
    [Database] => performance_schema
)
Array
(
    [0] => sys
    [Database] => sys
)
Array
(
    [0] => testdb
    [Database] => testdb
)
Array
(
    [0] => tutorials
    [Database] => tutorials
)
Array
(
    [0] => usersdb
    [Database] => usersdb
)
var mysql = require(''mysql2''); var con = mysql.createConnection({ host: "localhost", user: "root", password: "Nr5a0204@123" }); //Connecting to MySQL con.connect(function (err) { if (err) throw err; console.log("Connected!"); console.log("--------------------------"); //Creating a Database sql = "create database testDB1" con.query(sql); sql = "create database testDB2" con.query(sql); sql = "create database testDB3" con.query(sql); sql = "create database testDB4" con.query(sql); //Displaying Databases sql = "show databases;" con.query(sql, function(err, result){ if (err) throw err console.log(result) }); });Output
The output produced is as follows −
Connected!
--------------------------
[
  { Database: ''customers'' },
  { Database: ''information_schema'' },
  { Database: ''mysql'' },
  { Database: ''performance_schema'' },
  { Database: ''testdb1'' },
  { Database: ''testdb2'' },
  { Database: ''testdb3'' },
  { Database: ''testdb4'' }
]
import java.sql.Connection; import java.sql.DriverManager; import java.sql.ResultSet; import java.sql.Statement; public class ShowDatabase { public static void main(String[] args) { String url = "jdbc:mysql://localhost:3306/TUTORIALS"; String user = "root"; String password = "password"; ResultSet rs; try { Class.forName("com.mysql.cj.jdbc.Driver"); Connection con = DriverManager.getConnection(url, user, password); Statement st1 = con.createStatement(); //System.out.println("Database connected successfully...!"); String sql = "SHOW DATABASES"; rs = st1.executeQuery(sql); System.out.println("Show query executed successfully...!"); System.out.println("Databases are: "); while(rs.next()) { String db = rs.getNString(1); System.out.println(db); } }catch(Exception e) { e.printStackTrace(); } } }Output
The output obtained is as shown below −
Show query executed successfully...!
Databases are:
bank
company
information_schema
mydb
mysql
performance_schema
sys
testdb
tutorials
usersdb
import mysql.connector
# Creating the connection object
connection = mysql.connector.connect(
host ="localhost",
user ="root",
password ="password"
)
# Creating cursor object
cursorObj = connection.cursor()
# Show databases
cursorObj.execute("SHOW DATABASES")
# Fetch all the databases
databases = cursorObj.fetchall()
# Printing the list of databases
print("The list of databases are: ")
for database in databases:
    print(database[0])
# Disconnecting from server
connection.close()
Output
Following is the output of the above code −
The list of databases are:
information_schema
mysql
mysqlpythondb
performance_schema
sqlserver
stdi
sys
textx
tut
tutorials
Khóa học lập trình tại Toidayhoc vừa học vừa làm dự án vừa nhận lương: Khóa học lập trình nhận lương tại trung tâm Toidayhoc
Khóa học miễn phí MySQL – Database Import nhận dự án làm có lương
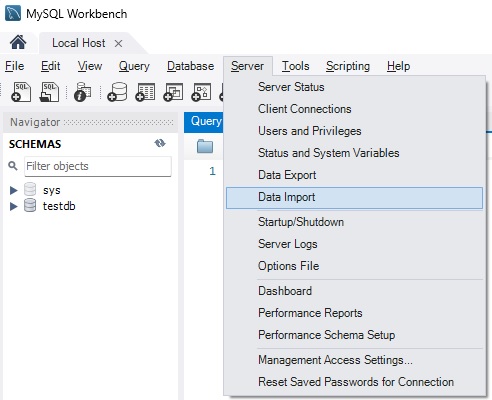
MySQL – Database Import
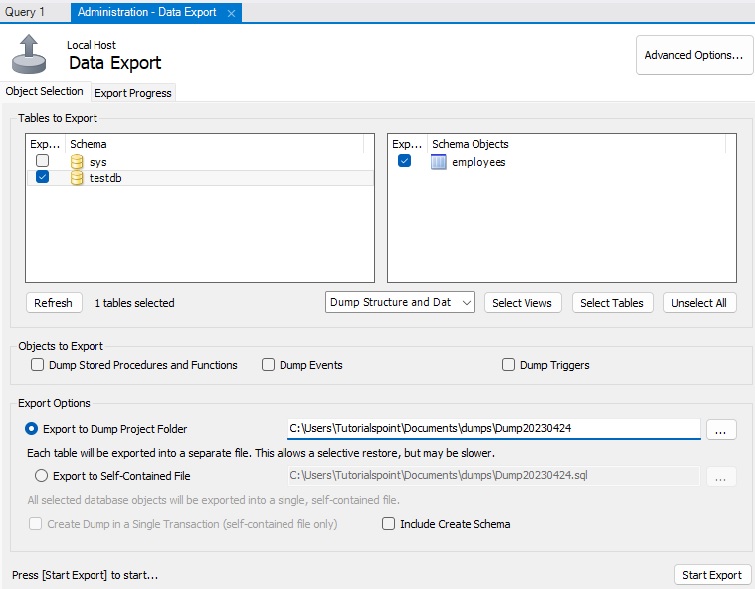
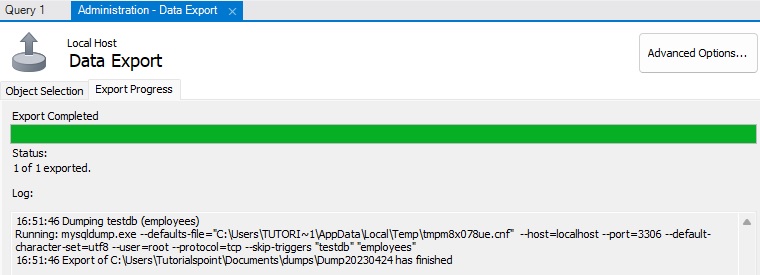
As we learned in the previous tutorial about ”Database Export”, now we”ll learn how to import the exported data, or backup, into an existing MySQL database. This process is known as database import.
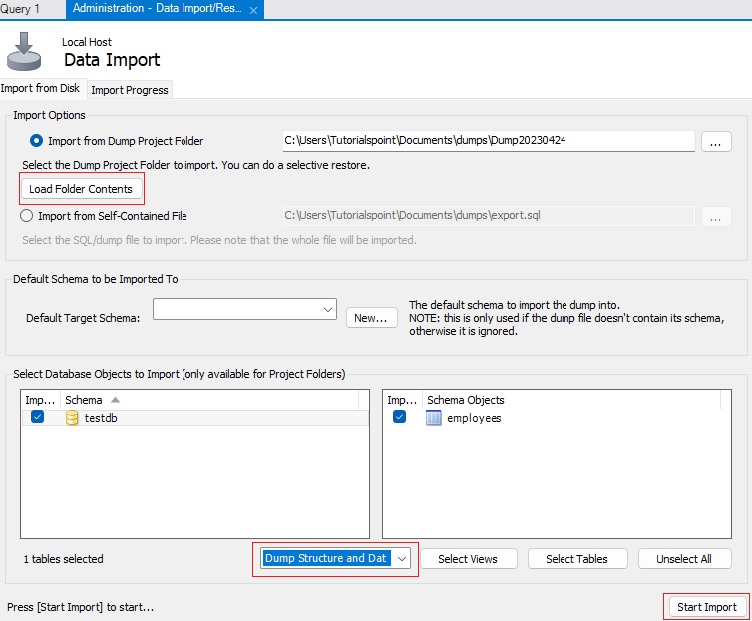
In MySQL, to import an existing dump or backup file into a database, we use the mysql command-line tool.
Importing Backup Data
We can import the backup data into an MySQL database using the mysql command-line tool. It takes the username, database name, and the backup file with the data.
Syntax
Following is the syntax of mysql command-line tool −
$ mysql -u username -p new_database_name < dumpfile_path
Where,
-
username: This is the MySQL username to use when connecting to the MySQL server.
-
new_database_name: The name of the database where you want to import the data.
-
dumpfile_path: It is the path of the backup file. The data will be imported from this file.
-
<: This symbol imports the data from the file named output_file_path.
Example
In this example, we will import the file named “data-dump.sql” that was generated in the previous tutorial (Database Export). The file contains a table named ”CUSTOMERS”.
Before doing that, let us login to MySQL server as a user to create a new databases −
$ mysql -u root -p
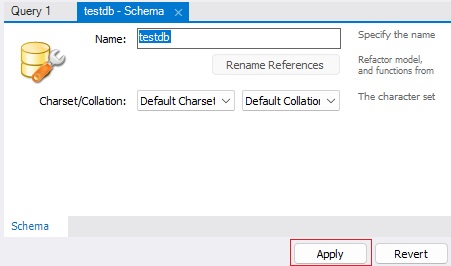
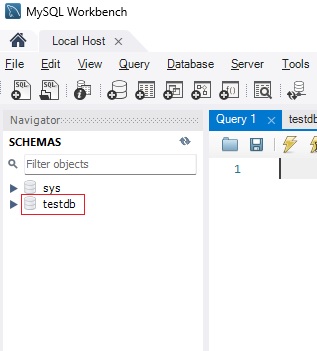
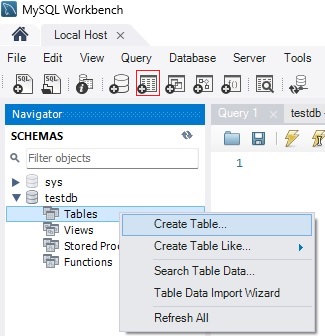
After logging in, it will bring you into MySQL command-line. Now, create a new database named testdb using the below query −
CREATE DATABASE testdb;
When we execute the above query, the output is obtained as follows −
Query OK, 1 row affected (0.01 sec)
To exit from the MySQL command-line, execute q. Now, from the normal command line, we can import the dump file ”data-dump.sql” using the following query.
Once we execute the below statement, we need to enter our MySQL server password.
$ mysql -u root -p testdb < data-dump.sql
If the above command is runs successfully, it won”t show any visible output. Instead, it imports the data. If any error occur during the execution, MySQL will display them to the terminal.
Verification
To verify whether the import was successful, execute the following query to login into MySQL command-line −
$ mysql -u root -p
Now, select the current database to ”testdb” using the following MySQL ”Use” query −
Use testdb;
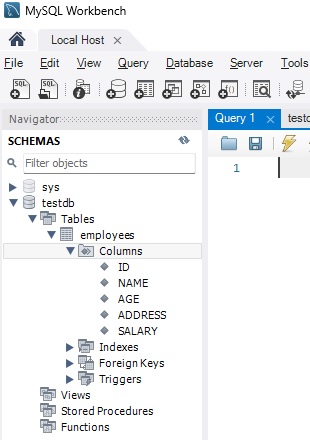
Execute the following query to check whether the table named CUSTOMERS in “data-dump.sql” file has been imported or not −
Show Tables;
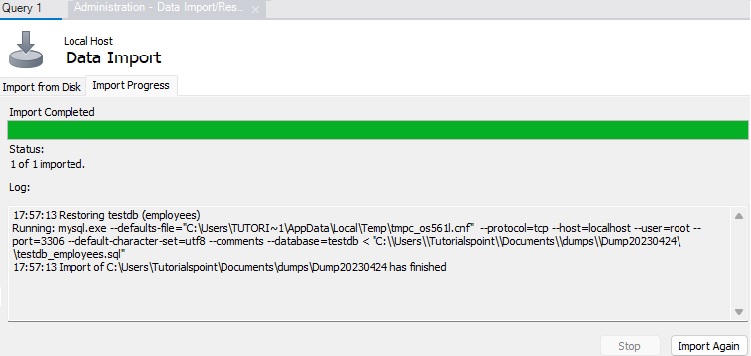
As we can see the output below, the CUSTOMERS table has been succesfully imported into the new database ”testdb”.
| Tables_in_testdb |
|---|
| customers |
Let us also verify whether the records has been imported or not by executing the below query −
select * from customers;
The records are also successfully imported.
| ID | NAME | AGE | ADDRESS | SALARY |
|---|---|---|---|---|
| 1 | Ramesh | 32 | Ahmedabad | 2000.00 |
| 2 | Khilan | 25 | Delhi | 1500.00 |
| 3 | Kaushik | 23 | Kota | 2000.00 |
| 4 | Chaitali | 25 | Mumbai | 6500.00 |
| 5 | Hardik | 27 | Bhopal | 8500.00 |
| 6 | Komal | 22 | Hyderabad | 4500.00 |
| 7 | Muffy | 24 | Indore | 10000.00 |
Khóa học lập trình tại Toidayhoc vừa học vừa làm dự án vừa nhận lương: Khóa học lập trình nhận lương tại trung tâm Toidayhoc