Author: alien

  • Khóa học miễn phí PL/SQL – Exceptions nhận dự án làm có lương

    PL/SQL – Exceptions


    In this chapter, we will discuss Exceptions in PL/SQL. An exception is an error condition during a program execution. PL/SQL supports programmers to catch such conditions using EXCEPTION block in the program and an appropriate action is taken against the error condition. There are two types of exceptions −

    • System-defined exceptions
    • User-defined exceptions

    Syntax for Exception Handling

    The general syntax for exception handling is as follows. Here you can list down as many exceptions as you can handle. The default exception will be handled using WHEN others THEN

    DECLARE
       <declarations section>
    BEGIN
       <executable command(s)>
    EXCEPTION
       <exception handling goes here >
       WHEN exception1 THEN
          exception1-handling-statements
       WHEN exception2  THEN
          exception2-handling-statements
       WHEN exception3 THEN
          exception3-handling-statements
       ........
       WHEN others THEN
          exception3-handling-statements
    END;
    

    Example

    Let us write a code to illustrate the concept. We will be using the CUSTOMERS table we had created and used in the previous chapters −

    DECLARE
       c_id customers.id%type := 8;
       c_name customerS.Name%type;
       c_addr customers.address%type;
    BEGIN
       SELECT  name, address INTO  c_name, c_addr
       FROM customers
       WHERE id = c_id;
       DBMS_OUTPUT.PUT_LINE (''Name: ''||  c_name);
       DBMS_OUTPUT.PUT_LINE (''Address: '' || c_addr);
    
    EXCEPTION
       WHEN no_data_found THEN
          dbms_output.put_line(''No such customer!'');
       WHEN others THEN
          dbms_output.put_line(''Error!'');
    END;
    /
    

    When the above code is executed at the SQL prompt, it produces the following result −

    No such customer!
    
    PL/SQL procedure successfully completed.
    

    The above program displays the name and address of a customer whose ID is given. Since there is no customer with ID value 8 in our database, the program raises the run-time exception NO_DATA_FOUND, which is captured in the EXCEPTION block.

    Raising Exceptions

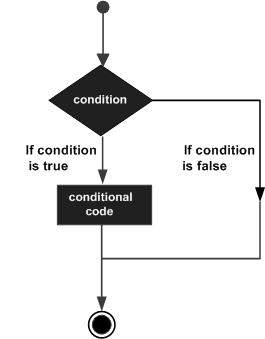
    Exceptions are raised by the database server automatically whenever there is any internal database error, but exceptions can be raised explicitly by the programmer by using the command RAISE. Following is the simple syntax for raising an exception −

    DECLARE
       exception_name EXCEPTION;
    BEGIN
       IF condition THEN
          RAISE exception_name;
       END IF;
    EXCEPTION
       WHEN exception_name THEN
       statement;
    END;
    

    You can use the above syntax in raising the Oracle standard exception or any user-defined exception. In the next section, we will give you an example on raising a user-defined exception. You can raise the Oracle standard exceptions in a similar way.

    User-defined Exceptions

    PL/SQL allows you to define your own exceptions according to the need of your program. A user-defined exception must be declared and then raised explicitly, using either a RAISE statement or the procedure DBMS_STANDARD.RAISE_APPLICATION_ERROR.

    The syntax for declaring an exception is −

    DECLARE
       my-exception EXCEPTION;
    

    Example

    The following example illustrates the concept. This program asks for a customer ID, when the user enters an invalid ID, the exception invalid_id is raised.

    DECLARE
       c_id customers.id%type := &cc_id;
       c_name customerS.Name%type;
       c_addr customers.address%type;
       -- user defined exception
       ex_invalid_id  EXCEPTION;
    BEGIN
       IF c_id <= 0 THEN
          RAISE ex_invalid_id;
       ELSE
          SELECT  name, address INTO  c_name, c_addr
          FROM customers
          WHERE id = c_id;
          DBMS_OUTPUT.PUT_LINE (''Name: ''||  c_name);
          DBMS_OUTPUT.PUT_LINE (''Address: '' || c_addr);
       END IF;
    
    EXCEPTION
       WHEN ex_invalid_id THEN
          dbms_output.put_line(''ID must be greater than zero!'');
       WHEN no_data_found THEN
          dbms_output.put_line(''No such customer!'');
       WHEN others THEN
          dbms_output.put_line(''Error!'');
    END;
    /
    

    When the above code is executed at the SQL prompt, it produces the following result −

    Enter value for cc_id: -6 (let''s enter a value -6)
    old  2: c_id customers.id%type := &cc_id;
    new  2: c_id customers.id%type := -6;
    ID must be greater than zero!
    
    PL/SQL procedure successfully completed.
    

    Pre-defined Exceptions

    PL/SQL provides many pre-defined exceptions, which are executed when any database rule is violated by a program. For example, the predefined exception NO_DATA_FOUND is raised when a SELECT INTO statement returns no rows. The following table lists few of the important pre-defined exceptions −

    Exception Oracle Error SQLCODE Description
    ACCESS_INTO_NULL 06530 -6530 It is raised when a null object is automatically assigned a value.
    CASE_NOT_FOUND 06592 -6592 It is raised when none of the choices in the WHEN clause of a CASE statement is selected, and there is no ELSE clause.
    COLLECTION_IS_NULL 06531 -6531 It is raised when a program attempts to apply collection methods other than EXISTS to an uninitialized nested table or varray, or the program attempts to assign values to the elements of an uninitialized nested table or varray.
    DUP_VAL_ON_INDEX 00001 -1 It is raised when duplicate values are attempted to be stored in a column with unique index.
    INVALID_CURSOR 01001 -1001 It is raised when attempts are made to make a cursor operation that is not allowed, such as closing an unopened cursor.
    INVALID_NUMBER 01722 -1722 It is raised when the conversion of a character string into a number fails because the string does not represent a valid number.
    LOGIN_DENIED 01017 -1017 It is raised when a program attempts to log on to the database with an invalid username or password.
    NO_DATA_FOUND 01403 +100 It is raised when a SELECT INTO statement returns no rows.
    NOT_LOGGED_ON 01012 -1012 It is raised when a database call is issued without being connected to the database.
    PROGRAM_ERROR 06501 -6501 It is raised when PL/SQL has an internal problem.
    ROWTYPE_MISMATCH 06504 -6504 It is raised when a cursor fetches value in a variable having incompatible data type.
    SELF_IS_NULL 30625 -30625 It is raised when a member method is invoked, but the instance of the object type was not initialized.
    STORAGE_ERROR 06500 -6500 It is raised when PL/SQL ran out of memory or memory was corrupted.
    TOO_MANY_ROWS 01422 -1422 It is raised when a SELECT INTO statement returns more than one row.
    VALUE_ERROR 06502 -6502 It is raised when an arithmetic, conversion, truncation, or sizeconstraint error occurs.
    ZERO_DIVIDE 01476 1476 It is raised when an attempt is made to divide a number by zero.

    Khóa học lập trình tại Toidayhoc vừa học vừa làm dự án vừa nhận lương: Khóa học lập trình nhận lương tại trung tâm Toidayhoc

  • Khóa học miễn phí PL/SQL – Cursors nhận dự án làm có lương

    PL/SQL – Cursors


    In this chapter, we will discuss the cursors in PL/SQL. Oracle creates a memory area, known as the context area, for processing an SQL statement, which contains all the information needed for processing the statement; for example, the number of rows processed, etc.

    A cursor is a pointer to this context area. PL/SQL controls the context area through a cursor. A cursor holds the rows (one or more) returned by a SQL statement. The set of rows the cursor holds is referred to as the active set.

    You can name a cursor so that it could be referred to in a program to fetch and process the rows returned by the SQL statement, one at a time. There are two types of cursors −

    • Implicit cursors
    • Explicit cursors

    Implicit Cursors

    Implicit cursors are automatically created by Oracle whenever an SQL statement is executed, when there is no explicit cursor for the statement. Programmers cannot control the implicit cursors and the information in it.

    Whenever a DML statement (INSERT, UPDATE and DELETE) is issued, an implicit cursor is associated with this statement. For INSERT operations, the cursor holds the data that needs to be inserted. For UPDATE and DELETE operations, the cursor identifies the rows that would be affected.

    In PL/SQL, you can refer to the most recent implicit cursor as the SQL cursor, which always has attributes such as %FOUND, %ISOPEN, %NOTFOUND, and %ROWCOUNT. The SQL cursor has additional attributes, %BULK_ROWCOUNT and %BULK_EXCEPTIONS, designed for use with the FORALL statement. The following table provides the description of the most used attributes −

    S.No Attribute & Description
    1

    %FOUND

    Returns TRUE if an INSERT, UPDATE, or DELETE statement affected one or more rows or a SELECT INTO statement returned one or more rows. Otherwise, it returns FALSE.

    2

    %NOTFOUND

    The logical opposite of %FOUND. It returns TRUE if an INSERT, UPDATE, or DELETE statement affected no rows, or a SELECT INTO statement returned no rows. Otherwise, it returns FALSE.

    3

    %ISOPEN

    Always returns FALSE for implicit cursors, because Oracle closes the SQL cursor automatically after executing its associated SQL statement.

    4

    %ROWCOUNT

    Returns the number of rows affected by an INSERT, UPDATE, or DELETE statement, or returned by a SELECT INTO statement.

    Any SQL cursor attribute will be accessed as sql%attribute_name as shown below in the example.

    Example

    We will be using the CUSTOMERS table we had created and used in the previous chapters.

    Select * from customers;
    
    +----+----------+-----+-----------+----------+
    | ID | NAME     | AGE | ADDRESS   | SALARY   |
    +----+----------+-----+-----------+----------+
    |  1 | Ramesh   |  32 | Ahmedabad |  2000.00 |
    |  2 | Khilan   |  25 | Delhi     |  1500.00 |
    |  3 | kaushik  |  23 | Kota      |  2000.00 |
    |  4 | Chaitali |  25 | Mumbai    |  6500.00 |
    |  5 | Hardik   |  27 | Bhopal    |  8500.00 |
    |  6 | Komal    |  22 | MP        |  4500.00 |
    +----+----------+-----+-----------+----------+
    

    The following program will update the table and increase the salary of each customer by 500 and use the SQL%ROWCOUNT attribute to determine the number of rows affected −

    DECLARE
       total_rows number(2);
    BEGIN
       UPDATE customers
       SET salary = salary + 500;
       IF sql%notfound THEN
          dbms_output.put_line(''no customers selected'');
       ELSIF sql%found THEN
          total_rows := sql%rowcount;
          dbms_output.put_line( total_rows || '' customers selected '');
       END IF;
    END;
    /
    

    When the above code is executed at the SQL prompt, it produces the following result −

    6 customers selected
    
    PL/SQL procedure successfully completed.
    

    If you check the records in customers table, you will find that the rows have been updated −

    Select * from customers;
    
    +----+----------+-----+-----------+----------+
    | ID | NAME     | AGE | ADDRESS   | SALARY   |
    +----+----------+-----+-----------+----------+
    |  1 | Ramesh   |  32 | Ahmedabad |  2500.00 |
    |  2 | Khilan   |  25 | Delhi     |  2000.00 |
    |  3 | kaushik  |  23 | Kota      |  2500.00 |
    |  4 | Chaitali |  25 | Mumbai    |  7000.00 |
    |  5 | Hardik   |  27 | Bhopal    |  9000.00 |
    |  6 | Komal    |  22 | MP        |  5000.00 |
    +----+----------+-----+-----------+----------+
    

    Explicit Cursors

    Explicit cursors are programmer-defined cursors for gaining more control over the context area. An explicit cursor should be defined in the declaration section of the PL/SQL Block. It is created on a SELECT Statement which returns more than one row.

    The syntax for creating an explicit cursor is −

    CURSOR cursor_name IS select_statement;
    

    Working with an explicit cursor includes the following steps −

    • Declaring the cursor for initializing the memory
    • Opening the cursor for allocating the memory
    • Fetching the cursor for retrieving the data
    • Closing the cursor to release the allocated memory

    Declaring the Cursor

    Declaring the cursor defines the cursor with a name and the associated SELECT statement. For example −

    CURSOR c_customers IS
       SELECT id, name, address FROM customers;
    

    Opening the Cursor

    Opening the cursor allocates the memory for the cursor and makes it ready for fetching the rows returned by the SQL statement into it. For example, we will open the above defined cursor as follows −

    OPEN c_customers;
    

    Fetching the Cursor

    Fetching the cursor involves accessing one row at a time. For example, we will fetch rows from the above-opened cursor as follows −

    FETCH c_customers INTO c_id, c_name, c_addr;
    

    Closing the Cursor

    Closing the cursor means releasing the allocated memory. For example, we will close the above-opened cursor as follows −

    CLOSE c_customers;
    

    Example

    Following is a complete example to illustrate the concepts of explicit cursors &minua;

    DECLARE
       c_id customers.id%type;
       c_name customers.name%type;
       c_addr customers.address%type;
       CURSOR c_customers is
          SELECT id, name, address FROM customers;
    BEGIN
       OPEN c_customers;
       LOOP
       FETCH c_customers into c_id, c_name, c_addr;
          EXIT WHEN c_customers%notfound;
          dbms_output.put_line(c_id || '' '' || c_name || '' '' || c_addr);
       END LOOP;
       CLOSE c_customers;
    END;
    /
    

    When the above code is executed at the SQL prompt, it produces the following result −

    1 Ramesh Ahmedabad
    2 Khilan Delhi
    3 kaushik Kota
    4 Chaitali Mumbai
    5 Hardik Bhopal
    6 Komal MP
    
    PL/SQL procedure successfully completed.
    

    Khóa học lập trình tại Toidayhoc vừa học vừa làm dự án vừa nhận lương: Khóa học lập trình nhận lương tại trung tâm Toidayhoc

  • Khóa học miễn phí PL/SQL – Arrays nhận dự án làm có lương

    PL/SQL – Arrays


    In this chapter, we will discuss arrays in PL/SQL. The PL/SQL programming language provides a data structure called the VARRAY, which can store a fixed-size sequential collection of elements of the same type. A varray is used to store an ordered collection of data, however it is often better to think of an array as a collection of variables of the same type.

    All varrays consist of contiguous memory locations. The lowest address corresponds to the first element and the highest address to the last element.

    Varrays in PL/SQL

    An array is a part of collection type data and it stands for variable-size arrays. We will study other collection types in a later chapter ”PL/SQL Collections”.

    Each element in a varray has an index associated with it. It also has a maximum size that can be changed dynamically.

    Creating a Varray Type

    A varray type is created with the CREATE TYPE statement. You must specify the maximum size and the type of elements stored in the varray.

    The basic syntax for creating a VARRAY type at the schema level is −

    CREATE OR REPLACE TYPE varray_type_name IS VARRAY(n) of <element_type>
    

    Where,

    • varray_type_name is a valid attribute name,
    • n is the number of elements (maximum) in the varray,
    • element_type is the data type of the elements of the array.

    Maximum size of a varray can be changed using the ALTER TYPE statement.

    For example,

    CREATE Or REPLACE TYPE namearray AS VARRAY(3) OF VARCHAR2(10);
    /
    
    Type created.
    

    The basic syntax for creating a VARRAY type within a PL/SQL block is −

    TYPE varray_type_name IS VARRAY(n) of <element_type>
    

    For example −

    TYPE namearray IS VARRAY(5) OF VARCHAR2(10);
    Type grades IS VARRAY(5) OF INTEGER;
    

    Let us now work out on a few examples to understand the concept −

    Example 1

    The following program illustrates the use of varrays −

    DECLARE
       type namesarray IS VARRAY(5) OF VARCHAR2(10);
       type grades IS VARRAY(5) OF INTEGER;
       names namesarray;
       marks grades;
       total integer;
    BEGIN
       names := namesarray(''Kavita'', ''Pritam'', ''Ayan'', ''Rishav'', ''Aziz'');
       marks:= grades(98, 97, 78, 87, 92);
       total := names.count;
       dbms_output.put_line(''Total ''|| total || '' Students'');
       FOR i in 1 .. total LOOP
          dbms_output.put_line(''Student: '' || names(i) || ''
          Marks: '' || marks(i));
       END LOOP;
    END;
    /
    

    When the above code is executed at the SQL prompt, it produces the following result −

    Total 5 Students
    Student: Kavita  Marks: 98
    Student: Pritam  Marks: 97
    Student: Ayan  Marks: 78
    Student: Rishav  Marks: 87
    Student: Aziz  Marks: 92
    
    PL/SQL procedure successfully completed.
    

    Please note

    • In Oracle environment, the starting index for varrays is always 1.

    • You can initialize the varray elements using the constructor method of the varray type, which has the same name as the varray.

    • Varrays are one-dimensional arrays.

    • A varray is automatically NULL when it is declared and must be initialized before its elements can be referenced.

    Example 2

    Elements of a varray could also be a %ROWTYPE of any database table or %TYPE of any database table field. The following example illustrates the concept.

    We will use the CUSTOMERS table stored in our database as −

    Select * from customers;
    
    +----+----------+-----+-----------+----------+
    | ID | NAME     | AGE | ADDRESS   | SALARY   |
    +----+----------+-----+-----------+----------+
    |  1 | Ramesh   |  32 | Ahmedabad |  2000.00 |
    |  2 | Khilan   |  25 | Delhi     |  1500.00 |
    |  3 | kaushik  |  23 | Kota      |  2000.00 |
    |  4 | Chaitali |  25 | Mumbai    |  6500.00 |
    |  5 | Hardik   |  27 | Bhopal    |  8500.00 |
    |  6 | Komal    |  22 | MP        |  4500.00 |
    +----+----------+-----+-----------+----------+
    

    Following example makes the use of cursor, which you will study in detail in a separate chapter.

    DECLARE
       CURSOR c_customers is
       SELECT  name FROM customers;
       type c_list is varray (6) of customers.name%type;
       name_list c_list := c_list();
       counter integer :=0;
    BEGIN
       FOR n IN c_customers LOOP
          counter := counter + 1;
          name_list.extend;
          name_list(counter)  := n.name;
          dbms_output.put_line(''Customer(''||counter ||''):''||name_list(counter));
       END LOOP;
    END;
    /
    

    When the above code is executed at the SQL prompt, it produces the following result −

    Customer(1): Ramesh
    Customer(2): Khilan
    Customer(3): kaushik
    Customer(4): Chaitali
    Customer(5): Hardik
    Customer(6): Komal
    
    PL/SQL procedure successfully completed.
    

    Khóa học lập trình tại Toidayhoc vừa học vừa làm dự án vừa nhận lương: Khóa học lập trình nhận lương tại trung tâm Toidayhoc

  • Khóa học miễn phí PL/SQL – Functions nhận dự án làm có lương

    PL/SQL – Functions


    In this chapter, we will discuss the functions in PL/SQL. A function is same as a procedure except that it returns a value. Therefore, all the discussions of the previous chapter are true for functions too.

    Creating a Function

    A standalone function is created using the CREATE FUNCTION statement. The simplified syntax for the CREATE OR REPLACE PROCEDURE statement is as follows −

    CREATE [OR REPLACE] FUNCTION function_name
    [(parameter_name [IN | OUT | IN OUT] type [, ...])]
    RETURN return_datatype
    {IS | AS}
    BEGIN
       < function_body >
    END [function_name];
    

    Where,

    • function-name specifies the name of the function.

    • [OR REPLACE] option allows the modification of an existing function.

    • The optional parameter list contains name, mode and types of the parameters. IN represents the value that will be passed from outside and OUT represents the parameter that will be used to return a value outside of the procedure.

    • The function must contain a return statement.

    • The RETURN clause specifies the data type you are going to return from the function.

    • function-body contains the executable part.

    • The AS keyword is used instead of the IS keyword for creating a standalone function.

    Example

    The following example illustrates how to create and call a standalone function. This function returns the total number of CUSTOMERS in the customers table.

    We will use the CUSTOMERS table, which we had created in the chapter −

    Select * from customers;
    
    +----+----------+-----+-----------+----------+
    | ID | NAME     | AGE | ADDRESS   | SALARY   |
    +----+----------+-----+-----------+----------+
    |  1 | Ramesh   |  32 | Ahmedabad |  2000.00 |
    |  2 | Khilan   |  25 | Delhi     |  1500.00 |
    |  3 | kaushik  |  23 | Kota      |  2000.00 |
    |  4 | Chaitali |  25 | Mumbai    |  6500.00 |
    |  5 | Hardik   |  27 | Bhopal    |  8500.00 |
    |  6 | Komal    |  22 | MP        |  4500.00 |
    +----+----------+-----+-----------+----------+
    
    CREATE OR REPLACE FUNCTION totalCustomers
    RETURN number IS
       total number(2) := 0;
    BEGIN
       SELECT count(*) into total
       FROM customers;
    
       RETURN total;
    END;
    /
    

    When the above code is executed using the SQL prompt, it will produce the following result −

    Function created.
    

    Calling a Function

    While creating a function, you give a definition of what the function has to do. To use a function, you will have to call that function to perform the defined task. When a program calls a function, the program control is transferred to the called function.

    A called function performs the defined task and when its return statement is executed or when the last end statement is reached, it returns the program control back to the main program.

    To call a function, you simply need to pass the required parameters along with the function name and if the function returns a value, then you can store the returned value. Following program calls the function totalCustomers from an anonymous block −

    DECLARE
       c number(2);
    BEGIN
       c := totalCustomers();
       dbms_output.put_line(''Total no. of Customers: '' || c);
    END;
    /
    

    When the above code is executed at the SQL prompt, it produces the following result −

    Total no. of Customers: 6
    
    PL/SQL procedure successfully completed.
    

    Example

    The following example demonstrates Declaring, Defining, and Invoking a Simple PL/SQL Function that computes and returns the maximum of two values.

    DECLARE
       a number;
       b number;
       c number;
    FUNCTION findMax(x IN number, y IN number)
    RETURN number
    IS
        z number;
    BEGIN
       IF x > y THEN
          z:= x;
       ELSE
          Z:= y;
       END IF;
       RETURN z;
    END;
    BEGIN
       a:= 23;
       b:= 45;
       c := findMax(a, b);
       dbms_output.put_line('' Maximum of (23,45): '' || c);
    END;
    /
    

    When the above code is executed at the SQL prompt, it produces the following result −

    Maximum of (23,45): 45
    
    PL/SQL procedure successfully completed.
    

    PL/SQL Recursive Functions

    We have seen that a program or subprogram may call another subprogram. When a subprogram calls itself, it is referred to as a recursive call and the process is known as recursion.

    To illustrate the concept, let us calculate the factorial of a number. Factorial of a number n is defined as −

    n! = n*(n-1)!
       = n*(n-1)*(n-2)!
          ...
       = n*(n-1)*(n-2)*(n-3)... 1
    

    The following program calculates the factorial of a given number by calling itself recursively −

    DECLARE
       num number;
       factorial number;
    
    FUNCTION fact(x number)
    RETURN number
    IS
       f number;
    BEGIN
       IF x=0 THEN
          f := 1;
       ELSE
          f := x * fact(x-1);
       END IF;
    RETURN f;
    END;
    
    BEGIN
       num:= 6;
       factorial := fact(num);
       dbms_output.put_line('' Factorial ''|| num || '' is '' || factorial);
    END;
    /
    

    When the above code is executed at the SQL prompt, it produces the following result −

    Factorial 6 is 720
    
    PL/SQL procedure successfully completed.
    

    Khóa học lập trình tại Toidayhoc vừa học vừa làm dự án vừa nhận lương: Khóa học lập trình nhận lương tại trung tâm Toidayhoc

  • Khóa học miễn phí PL/SQL – Procedures nhận dự án làm có lương

    PL/SQL – Procedures


    In this chapter, we will discuss Procedures in PL/SQL. A subprogram is a program unit/module that performs a particular task. These subprograms are combined to form larger programs. This is basically called the ”Modular design”. A subprogram can be invoked by another subprogram or program which is called the calling program.

    A subprogram can be created −

    • At the schema level
    • Inside a package
    • Inside a PL/SQL block

    At the schema level, subprogram is a standalone subprogram. It is created with the CREATE PROCEDURE or the CREATE FUNCTION statement. It is stored in the database and can be deleted with the DROP PROCEDURE or DROP FUNCTION statement.

    A subprogram created inside a package is a packaged subprogram. It is stored in the database and can be deleted only when the package is deleted with the DROP PACKAGE statement. We will discuss packages in the chapter ”PL/SQL – Packages”.

    PL/SQL subprograms are named PL/SQL blocks that can be invoked with a set of parameters. PL/SQL provides two kinds of subprograms −

    • Functions − These subprograms return a single value; mainly used to compute and return a value.

    • Procedures − These subprograms do not return a value directly; mainly used to perform an action.

    This chapter is going to cover important aspects of a PL/SQL procedure. We will discuss PL/SQL function in the next chapter.

    Parts of a PL/SQL Subprogram

    Each PL/SQL subprogram has a name, and may also have a parameter list. Like anonymous PL/SQL blocks, the named blocks will also have the following three parts −

    S.No Parts & Description
    1

    Declarative Part

    It is an optional part. However, the declarative part for a subprogram does not start with the DECLARE keyword. It contains declarations of types, cursors, constants, variables, exceptions, and nested subprograms. These items are local to the subprogram and cease to exist when the subprogram completes execution.

    2

    Executable Part

    This is a mandatory part and contains statements that perform the designated action.

    3

    Exception-handling

    This is again an optional part. It contains the code that handles run-time errors.

    Creating a Procedure

    A procedure is created with the CREATE OR REPLACE PROCEDURE statement. The simplified syntax for the CREATE OR REPLACE PROCEDURE statement is as follows −

    CREATE [OR REPLACE] PROCEDURE procedure_name
    [(parameter_name [IN | OUT | IN OUT] type [, ...])]
    {IS | AS}
    BEGIN
      < procedure_body >
    END procedure_name;
    

    Where,

    • procedure-name specifies the name of the procedure.

    • [OR REPLACE] option allows the modification of an existing procedure.

    • The optional parameter list contains name, mode and types of the parameters. IN represents the value that will be passed from outside and OUT represents the parameter that will be used to return a value outside of the procedure.

    • procedure-body contains the executable part.

    • The AS keyword is used instead of the IS keyword for creating a standalone procedure.

    Example

    The following example creates a simple procedure that displays the string ”Hello World!” on the screen when executed.

    CREATE OR REPLACE PROCEDURE greetings
    AS
    BEGIN
       dbms_output.put_line(''Hello World!'');
    END;
    /
    

    When the above code is executed using the SQL prompt, it will produce the following result −

    Procedure created.
    

    Executing a Standalone Procedure

    A standalone procedure can be called in two ways −

    • Using the EXECUTE keyword

    • Calling the name of the procedure from a PL/SQL block

    The above procedure named ”greetings” can be called with the EXECUTE keyword as −

    EXECUTE greetings;
    

    The above call will display −

    Hello World
    
    PL/SQL procedure successfully completed.
    

    The procedure can also be called from another PL/SQL block −

    BEGIN
       greetings;
    END;
    /
    

    The above call will display −

    Hello World
    
    PL/SQL procedure successfully completed.
    

    Deleting a Standalone Procedure

    A standalone procedure is deleted with the DROP PROCEDURE statement. Syntax for deleting a procedure is −

    DROP PROCEDURE procedure-name;
    

    You can drop the greetings procedure by using the following statement −

    DROP PROCEDURE greetings;
    

    Parameter Modes in PL/SQL Subprograms

    The following table lists out the parameter modes in PL/SQL subprograms −

    S.No Parameter Mode & Description
    1

    IN

    An IN parameter lets you pass a value to the subprogram. It is a read-only parameter. Inside the subprogram, an IN parameter acts like a constant. It cannot be assigned a value. You can pass a constant, literal, initialized variable, or expression as an IN parameter. You can also initialize it to a default value; however, in that case, it is omitted from the subprogram call. It is the default mode of parameter passing. Parameters are passed by reference.

    2

    OUT

    An OUT parameter returns a value to the calling program. Inside the subprogram, an OUT parameter acts like a variable. You can change its value and reference the value after assigning it. The actual parameter must be variable and it is passed by value.

    3

    IN OUT

    An IN OUT parameter passes an initial value to a subprogram and returns an updated value to the caller. It can be assigned a value and the value can be read.

    The actual parameter corresponding to an IN OUT formal parameter must be a variable, not a constant or an expression. Formal parameter must be assigned a value. Actual parameter is passed by value.

    IN & OUT Mode Example 1

    This program finds the minimum of two values. Here, the procedure takes two numbers using the IN mode and returns their minimum using the OUT parameters.

    DECLARE
       a number;
       b number;
       c number;
    PROCEDURE findMin(x IN number, y IN number, z OUT number) IS
    BEGIN
       IF x < y THEN
          z:= x;
       ELSE
          z:= y;
       END IF;
    END;
    BEGIN
       a:= 23;
       b:= 45;
       findMin(a, b, c);
       dbms_output.put_line('' Minimum of (23, 45) : '' || c);
    END;
    /
    

    When the above code is executed at the SQL prompt, it produces the following result −

    Minimum of (23, 45) : 23
    
    PL/SQL procedure successfully completed.
    

    IN & OUT Mode Example 2

    This procedure computes the square of value of a passed value. This example shows how we can use the same parameter to accept a value and then return another result.

    DECLARE
       a number;
    PROCEDURE squareNum(x IN OUT number) IS
    BEGIN
      x := x * x;
    END;
    BEGIN
       a:= 23;
       squareNum(a);
       dbms_output.put_line('' Square of (23): '' || a);
    END;
    /
    

    When the above code is executed at the SQL prompt, it produces the following result −

    Square of (23): 529
    
    PL/SQL procedure successfully completed.
    

    Methods for Passing Parameters

    Actual parameters can be passed in three ways −

    • Positional notation
    • Named notation
    • Mixed notation

    Positional Notation

    In positional notation, you can call the procedure as −

    findMin(a, b, c, d);
    

    In positional notation, the first actual parameter is substituted for the first formal parameter; the second actual parameter is substituted for the second formal parameter, and so on. So, a is substituted for x, b is substituted for y, c is substituted for z and d is substituted for m.

    Named Notation

    In named notation, the actual parameter is associated with the formal parameter using the arrow symbol ( => ). The procedure call will be like the following −

    findMin(x => a, y => b, z => c, m => d);
    

    Mixed Notation

    In mixed notation, you can mix both notations in procedure call; however, the positional notation should precede the named notation.

    The following call is legal −

    findMin(a, b, c, m => d);
    

    However, this is not legal:

    findMin(x => a, b, c, d);
    

    Khóa học lập trình tại Toidayhoc vừa học vừa làm dự án vừa nhận lương: Khóa học lập trình nhận lương tại trung tâm Toidayhoc

  • Khóa học miễn phí PL/SQL – Strings nhận dự án làm có lương

    PL/SQL – Strings


    The string in PL/SQL is actually a sequence of characters with an optional size specification. The characters could be numeric, letters, blank, special characters or a combination of all. PL/SQL offers three kinds of strings −

    • Fixed-length strings − In such strings, programmers specify the length while declaring the string. The string is right-padded with spaces to the length so specified.

    • Variable-length strings − In such strings, a maximum length up to 32,767, for the string is specified and no padding takes place.

    • Character large objects (CLOBs) − These are variable-length strings that can be up to 128 terabytes.

    PL/SQL strings could be either variables or literals. A string literal is enclosed within quotation marks. For example,

    ''This is a string literal.'' Or ''hello world''
    

    To include a single quote inside a string literal, you need to type two single quotes next to one another. For example,

    ''this isn''''t what it looks like''
    

    Declaring String Variables

    Oracle database provides numerous string datatypes, such as CHAR, NCHAR, VARCHAR2, NVARCHAR2, CLOB, and NCLOB. The datatypes prefixed with an ”N” are ”national character set” datatypes, that store Unicode character data.

    If you need to declare a variable-length string, you must provide the maximum length of that string. For example, the VARCHAR2 data type. The following example illustrates declaring and using some string variables −

    DECLARE
       name varchar2(20);
       company varchar2(30);
       introduction clob;
       choice char(1);
    BEGIN
       name := ''John Smith
       company := ''Infotech
       introduction := '' Hello! I''''m John Smith from Infotech.
       choice := ''y
       IF choice = ''y'' THEN
          dbms_output.put_line(name);
          dbms_output.put_line(company);
          dbms_output.put_line(introduction);
       END IF;
    END;
    /
    

    When the above code is executed at the SQL prompt, it produces the following result −

    John Smith
    Infotech
    Hello! I''m John Smith from Infotech.
    
    PL/SQL procedure successfully completed
    

    To declare a fixed-length string, use the CHAR datatype. Here you do not have to specify a maximum length for a fixed-length variable. If you leave off the length constraint, Oracle Database automatically uses a maximum length required. The following two declarations are identical −

    red_flag CHAR(1) := ''Y
     red_flag CHAR   := ''Y
    

    PL/SQL String Functions and Operators

    PL/SQL offers the concatenation operator (||) for joining two strings. The following table provides the string functions provided by PL/SQL −

    S.No Function & Purpose
    1

    ASCII(x);

    Returns the ASCII value of the character x.

    2

    CHR(x);

    Returns the character with the ASCII value of x.

    3

    CONCAT(x, y);

    Concatenates the strings x and y and returns the appended string.

    4

    INITCAP(x);

    Converts the initial letter of each word in x to uppercase and returns that string.

    5

    INSTR(x, find_string [, start] [, occurrence]);

    Searches for find_string in x and returns the position at which it occurs.

    6

    INSTRB(x);

    Returns the location of a string within another string, but returns the value in bytes.

    7

    LENGTH(x);

    Returns the number of characters in x.

    8

    LENGTHB(x);

    Returns the length of a character string in bytes for single byte character set.

    9

    LOWER(x);

    Converts the letters in x to lowercase and returns that string.

    10

    LPAD(x, width [, pad_string]) ;

    Pads x with spaces to the left, to bring the total length of the string up to width characters.

    11

    LTRIM(x [, trim_string]);

    Trims characters from the left of x.

    12

    NANVL(x, value);

    Returns value if x matches the NaN special value (not a number), otherwise x is returned.

    13

    NLS_INITCAP(x);

    Same as the INITCAP function except that it can use a different sort method as specified by NLSSORT.

    14

    NLS_LOWER(x) ;

    Same as the LOWER function except that it can use a different sort method as specified by NLSSORT.

    15

    NLS_UPPER(x);

    Same as the UPPER function except that it can use a different sort method as specified by NLSSORT.

    16

    NLSSORT(x);

    Changes the method of sorting the characters. Must be specified before any NLS function; otherwise, the default sort will be used.

    17

    NVL(x, value);

    Returns value if x is null; otherwise, x is returned.

    18

    NVL2(x, value1, value2);

    Returns value1 if x is not null; if x is null, value2 is returned.

    19

    REPLACE(x, search_string, replace_string);

    Searches x for search_string and replaces it with replace_string.

    20

    RPAD(x, width [, pad_string]);

    Pads x to the right.

    21

    RTRIM(x [, trim_string]);

    Trims x from the right.

    22

    SOUNDEX(x) ;

    Returns a string containing the phonetic representation of x.

    23

    SUBSTR(x, start [, length]);

    Returns a substring of x that begins at the position specified by start. An optional length for the substring may be supplied.

    24

    SUBSTRB(x);

    Same as SUBSTR except that the parameters are expressed in bytes instead of characters for the single-byte character systems.

    25

    TRIM([trim_char FROM) x);

    Trims characters from the left and right of x.

    26

    UPPER(x);

    Converts the letters in x to uppercase and returns that string.

    Let us now work out on a few examples to understand the concept −

    Example 1

    DECLARE
       greetings varchar2(11) := ''hello world
    BEGIN
       dbms_output.put_line(UPPER(greetings));
    
       dbms_output.put_line(LOWER(greetings));
    
       dbms_output.put_line(INITCAP(greetings));
    
       /* retrieve the first character in the string */
       dbms_output.put_line ( SUBSTR (greetings, 1, 1));
    
       /* retrieve the last character in the string */
       dbms_output.put_line ( SUBSTR (greetings, -1, 1));
    
       /* retrieve five characters,
          starting from the seventh position. */
       dbms_output.put_line ( SUBSTR (greetings, 7, 5));
    
       /* retrieve the remainder of the string,
          starting from the second position. */
       dbms_output.put_line ( SUBSTR (greetings, 2));
    
       /* find the location of the first "e" */
       dbms_output.put_line ( INSTR (greetings, ''e''));
    END;
    /
    

    When the above code is executed at the SQL prompt, it produces the following result −

    HELLO WORLD
    hello world
    Hello World
    h
    d
    World
    ello World
    2
    
    PL/SQL procedure successfully completed.
    

    Example 2

    DECLARE
       greetings varchar2(30) := ''......Hello World.....
    BEGIN
       dbms_output.put_line(RTRIM(greetings,''.''));
       dbms_output.put_line(LTRIM(greetings, ''.''));
       dbms_output.put_line(TRIM( ''.'' from greetings));
    END;
    /
    

    When the above code is executed at the SQL prompt, it produces the following result −

    ......Hello World
    Hello World.....
    Hello World
    
    PL/SQL procedure successfully completed.
    

    Khóa học lập trình tại Toidayhoc vừa học vừa làm dự án vừa nhận lương: Khóa học lập trình nhận lương tại trung tâm Toidayhoc

  • Khóa học miễn phí PL/SQL – Operators nhận dự án làm có lương

    PL/SQL – Operators


    In this chapter, we will discuss operators in PL/SQL. An operator is a symbol that tells the compiler to perform specific mathematical or logical manipulation. PL/SQL language is rich in built-in operators and provides the following types of operators −

    • Arithmetic operators
    • Relational operators
    • Comparison operators
    • Logical operators
    • String operators

    Here, we will understand the arithmetic, relational, comparison and logical operators one by one. The String operators will be discussed in a later chapter − PL/SQL – Strings.

    Arithmetic Operators

    Following table shows all the arithmetic operators supported by PL/SQL. Let us assume variable A holds 10 and variable B holds 5, then −

    Operator Description Example
    + Adds two operands A + B will give 15
    Subtracts second operand from the first A – B will give 5
    * Multiplies both operands A * B will give 50
    / Divides numerator by de-numerator A / B will give 2
    ** Exponentiation operator, raises one operand to the power of other A ** B will give 100000

    Relational Operators

    Relational operators compare two expressions or values and return a Boolean result. Following table shows all the relational operators supported by PL/SQL. Let us assume variable A holds 10 and variable B holds 20, then −

    Operator Description Example
    = Checks if the values of two operands are equal or not, if yes then condition becomes true. (A = B) is not true.

    !=

    <>

    ~=

    Checks if the values of two operands are equal or not, if values are not equal then condition becomes true. (A != B) is true.
    > Checks if the value of left operand is greater than the value of right operand, if yes then condition becomes true. (A > B) is not true.
    < Checks if the value of left operand is less than the value of right operand, if yes then condition becomes true. (A < B) is true.
    >= Checks if the value of left operand is greater than or equal to the value of right operand, if yes then condition becomes true. (A >= B) is not true.
    <= Checks if the value of left operand is less than or equal to the value of right operand, if yes then condition becomes true. (A <= B) is true

    Comparison Operators

    Comparison operators are used for comparing one expression to another. The result is always either TRUE, FALSE or NULL.

    Operator Description Example
    LIKE The LIKE operator compares a character, string, or CLOB value to a pattern and returns TRUE if the value matches the pattern and FALSE if it does not. If ”Zara Ali” like ”Z% A_i” returns a Boolean true, whereas, ”Nuha Ali” like ”Z% A_i” returns a Boolean false.
    BETWEEN The BETWEEN operator tests whether a value lies in a specified range. x BETWEEN a AND b means that x >= a and x <= b. If x = 10 then, x between 5 and 20 returns true, x between 5 and 10 returns true, but x between 11 and 20 returns false.
    IN The IN operator tests set membership. x IN (set) means that x is equal to any member of set. If x = ”m” then, x in (”a”, ”b”, ”c”) returns Boolean false but x in (”m”, ”n”, ”o”) returns Boolean true.
    IS NULL The IS NULL operator returns the BOOLEAN value TRUE if its operand is NULL or FALSE if it is not NULL. Comparisons involving NULL values always yield NULL. If x = ”m”, then ”x is null” returns Boolean false.

    Logical Operators

    Following table shows the Logical operators supported by PL/SQL. All these operators work on Boolean operands and produce Boolean results. Let us assume variable A holds true and variable B holds false, then −

    Operator Description Examples
    and Called the logical AND operator. If both the operands are true then condition becomes true. (A and B) is false.
    or Called the logical OR Operator. If any of the two operands is true then condition becomes true. (A or B) is true.
    not Called the logical NOT Operator. Used to reverse the logical state of its operand. If a condition is true then Logical NOT operator will make it false. not (A and B) is true.

    PL/SQL Operator Precedence

    Operator precedence determines the grouping of terms in an expression. This affects how an expression is evaluated. Certain operators have higher precedence than others; for example, the multiplication operator has higher precedence than the addition operator.

    For example, x = 7 + 3 * 2; here, x is assigned 13, not 20 because operator * has higher precedence than +, so it first gets multiplied with 3*2 and then adds into 7.

    Here, operators with the highest precedence appear at the top of the table, those with the lowest appear at the bottom. Within an expression, higher precedence operators will be evaluated first.

    The precedence of operators goes as follows: =, <, >, <=, >=, <>, !=, ~=, ^=, IS NULL, LIKE, BETWEEN, IN.

    Operator Operation
    ** exponentiation
    +, – identity, negation
    *, / multiplication, division
    +, -, || addition, subtraction, concatenation
    comparison
    NOT logical negation
    AND conjunction
    OR inclusion

    Khóa học lập trình tại Toidayhoc vừa học vừa làm dự án vừa nhận lương: Khóa học lập trình nhận lương tại trung tâm Toidayhoc

  • Khóa học miễn phí PL/SQL – Constants and Literals nhận dự án làm có lương

    PL/SQL – Constants and Literals


    In this chapter, we will discuss constants and literals in PL/SQL. A constant holds a value that once declared, does not change in the program. A constant declaration specifies its name, data type, and value, and allocates storage for it. The declaration can also impose the NOT NULL constraint.

    Declaring a Constant

    A constant is declared using the CONSTANT keyword. It requires an initial value and does not allow that value to be changed. For example −

    PI CONSTANT NUMBER := 3.141592654;
    DECLARE
       -- constant declaration
       pi constant number := 3.141592654;
       -- other declarations
       radius number(5,2);
       dia number(5,2);
       circumference number(7, 2);
       area number (10, 2);
    BEGIN
       -- processing
       radius := 9.5;
       dia := radius * 2;
       circumference := 2.0 * pi * radius;
       area := pi * radius * radius;
       -- output
       dbms_output.put_line(''Radius: '' || radius);
       dbms_output.put_line(''Diameter: '' || dia);
       dbms_output.put_line(''Circumference: '' || circumference);
       dbms_output.put_line(''Area: '' || area);
    END;
    /
    

    When the above code is executed at the SQL prompt, it produces the following result −

    Radius: 9.5
    Diameter: 19
    Circumference: 59.69
    Area: 283.53
    
    Pl/SQL procedure successfully completed.
    

    The PL/SQL Literals

    A literal is an explicit numeric, character, string, or Boolean value not represented by an identifier. For example, TRUE, 786, NULL, ”tutorialspoint” are all literals of type Boolean, number, or string. PL/SQL, literals are case-sensitive. PL/SQL supports the following kinds of literals −

    • Numeric Literals
    • Character Literals
    • String Literals
    • BOOLEAN Literals
    • Date and Time Literals

    The following table provides examples from all these categories of literal values.

    S.No Literal Type & Example
    1

    Numeric Literals

    050 78 -14 0 +32767

    6.6667 0.0 -12.0 3.14159 +7800.00

    6E5 1.0E-8 3.14159e0 -1E38 -9.5e-3

    2

    Character Literals

    ”A” ”%” ”9” ” ” ”z” ”(”

    3

    String Literals

    ”Hello, world!”

    ”Tutorials Point”

    ”19-NOV-12”

    4

    BOOLEAN Literals

    TRUE, FALSE, and NULL.

    5

    Date and Time Literals

    DATE ”1978-12-25

    TIMESTAMP ”2012-10-29 12:01:01

    To embed single quotes within a string literal, place two single quotes next to each other as shown in the following program −

    DECLARE
       message  varchar2(30):= ''That''''s tutorialspoint.com!
    BEGIN
       dbms_output.put_line(message);
    END;
    /
    

    When the above code is executed at the SQL prompt, it produces the following result −

    That''s tutorialspoint.com!
    
    PL/SQL procedure successfully completed.
    

    Khóa học lập trình tại Toidayhoc vừa học vừa làm dự án vừa nhận lương: Khóa học lập trình nhận lương tại trung tâm Toidayhoc

  • Khóa học miễn phí PL/SQL – Environment nhận dự án làm có lương

    PL/SQL – Environment Setup


    In this chapter, we will discuss the Environment Setup of PL/SQL. PL/SQL is not a standalone programming language; it is a tool within the Oracle programming environment. SQL* Plus is an interactive tool that allows you to type SQL and PL/SQL statements at the command prompt. These commands are then sent to the database for processing. Once the statements are processed, the results are sent back and displayed on screen.

    To run PL/SQL programs, you should have the Oracle RDBMS Server installed in your machine. This will take care of the execution of the SQL commands. The most recent version of Oracle RDBMS is 11g. You can download a trial version of Oracle 11g from the following link −

    You will have to download either the 32-bit or the 64-bit version of the installation as per your operating system. Usually there are two files. We have downloaded the 64-bit version. You will also use similar steps on your operating system, does not matter if it is Linux or Solaris.

    • win64_11gR2_database_1of2.zip

    • win64_11gR2_database_2of2.zip

    After downloading the above two files, you will need to unzip them in a single directory database and under that you will find the following sub-directories −

    Oracle Sub Directries

    Step 1

    Let us now launch the Oracle Database Installer using the setup file. Following is the first screen. You can provide your email ID and check the checkbox as shown in the following screenshot. Click the Next button.

    Oracle Install 1

    Step 2

    You will be directed to the following screen; uncheck the checkbox and click the Continue button to proceed.

    Oracle install error

    Step 3

    Just select the first option Create and Configure Database using the radio button and click the Next button to proceed.

    Oracle Install 2

    Step 4

    We assume you are installing Oracle for the basic purpose of learning and that you are installing it on your PC or Laptop. Thus, select the Desktop Class option and click the Next button to proceed.

    Oracle Install 3

    Step 5

    Provide a location, where you will install the Oracle Server. Just modify the Oracle Base and the other locations will set automatically. You will also have to provide a password; this will be used by the system DBA. Once you provide the required information, click the Next button to proceed.

    Oracle Install 4

    Step 6

    Again, click the Next button to proceed.

    Oracle Install 5

    Step 7

    Click the Finish button to proceed; this will start the actual server installation.

    Oracle Install 6

    Step 8

    This will take a few moments, until Oracle starts performing the required configuration.

    Oracle Install 7

    Step 9

    Here, Oracle installation will copy the required configuration files. This should take a moment −

    Oracle Configuration

    Step 10

    Once the database files are copied, you will have the following dialogue box. Just click the OK button and come out.

    Oracle Configuration

    Step 11

    Upon installation, you will have the following final window.

    Oracle Install 8

    Final Step

    It is now time to verify your installation. At the command prompt, use the following command if you are using Windows −

    sqlplus "/ as sysdba"
    

    You should have the SQL prompt where you will write your PL/SQL commands and scripts −

    PL/SQL Command Prompt

    Text Editor

    Running large programs from the command prompt may land you in inadvertently losing some of the work. It is always recommended to use the command files. To use the command files −

    • Type your code in a text editor, like Notepad, Notepad+, or EditPlus, etc.

    • Save the file with the .sql extension in the home directory.

    • Launch the SQL*Plus command prompt from the directory where you created your PL/SQL file.

    • Type @file_name at the SQL*Plus command prompt to execute your program.

    If you are not using a file to execute the PL/SQL scripts, then simply copy your PL/SQL code and right-click on the black window that displays the SQL prompt; use the paste option to paste the complete code at the command prompt. Finally, just press Enter to execute the code, if it is not already executed.


    Khóa học lập trình tại Toidayhoc vừa học vừa làm dự án vừa nhận lương: Khóa học lập trình nhận lương tại trung tâm Toidayhoc

  • Khóa học miễn phí PL/SQL – Conditions nhận dự án làm có lương

    PL/SQL – Conditions


    In this chapter, we will discuss conditions in PL/SQL. Decision-making structures require that the programmer specify one or more conditions to be evaluated or tested by the program, along with a statement or statements to be executed if the condition is determined to be true, and optionally, other statements to be executed if the condition is determined to be false.

    Following is the general form of a typical conditional (i.e., decision making) structure found in most of the programming languages −

    Decision making statements in PL/SQL

    PL/SQL programming language provides following types of decision-making statements. Click the following links to check their detail.

    S.No Statement & Description
    1

    The IF statement associates a condition with a sequence of statements enclosed by the keywords THEN and END IF. If the condition is true, the statements get executed and if the condition is false or NULL then the IF statement does nothing.

    2

    IF statement adds the keyword ELSE followed by an alternative sequence of statement. If the condition is false or NULL, then only the alternative sequence of statements get executed. It ensures that either of the sequence of statements is executed.

    3

    It allows you to choose between several alternatives.

    4

    Like the IF statement, the CASE statement selects one sequence of statements to execute.

    However, to select the sequence, the CASE statement uses a selector rather than multiple Boolean expressions. A selector is an expression whose value is used to select one of several alternatives.

    5

    The searched CASE statement has no selector, and it”s WHEN clauses contain search conditions that yield Boolean values.

    6

    You can use one IF-THEN or IF-THEN-ELSIF statement inside another IF-THEN or IF-THEN-ELSIF statement(s).


    Khóa học lập trình tại Toidayhoc vừa học vừa làm dự án vừa nhận lương: Khóa học lập trình nhận lương tại trung tâm Toidayhoc