Your cart is currently empty!
Author: alien
-
Khóa học miễn phí PouchDB – Adding Attachment nhận dự án làm có lương
PouchDB – Adding Attachment
You can attach a binary object to a document using the putAttachment() method in PouchDB.
Syntax
Following is the syntax of the putAttachment(). To this method, we have to pass the document id, attachment id, MIME type along with the attachment. This method also accepts an optional callback function.
db.putAttachment( docId, attachmentId, attachment, type, [callback] );
We can prepare attachment using blob or buffer objects, where blob is used while working with the browser and buffer is used while working with Node.js, since we are demonstrating our programs in Node.js, we use buffer objects to prepare documents.
Example
Following is an example of creating a document with an attachment, within a database named my_database in PouchDB using putAttachment() method.
//Requiring the package
var PouchDB = require(''PouchDB'');

//Creating the database object var db = new PouchDB(''my_database'');

//Preparing the attachment
var my_attachment = new Buffer([''Welcome to tutorialspoint''], {type: ''text/plain''});

//Adding attachment to a document
db.putAttachment(''001'', ''att_1.txt'', my_attachment, ''text/plain'', function(err, res) {
   if (err) {
      return console.log(err);
   } else {
      console.log(res+"Attachment added successfully")
   }
});
Save the above code in a file with name Add_Attachment.js. Open the command prompt and execute the JavaScript file using node as shown below.
C:PouchDB_Examples >node Add_Attachment.js
This creates an empty document adding an attachment to it, in the database named my_database which is stored in PouchDB, and displays the following message.
Attachment added successfully
You can verify whether the attachment is added by reading the document using the following code.
//Requiring the package
var PouchDB = require(''PouchDB'');

//Creating the database object var db = new PouchDB(''my_database'');

//Reading the Document
db.get(''001'',{attachments: true}, function(err, doc) {
   if (err) {
      return console.log(err);
   } else {
      console.log(doc);
   }
});
Save the above code as read_doc.js and execute it. Executing this program, you can see the following contents of the document.
{
   _attachments: {
      att_1.txt: {
         content_type: ''text/plain'',
         digest: ''md5-k7iFrf4NoInN9jSQT9WfcQ=='',
         data: ''AA==''
      }
   },
   _id: ''001'',
   _rev: ''1-620fd5f41d3328fcbf9ce7504338a51d''
}
Adding Attachment to an Existing Document
Suppose, there is a document in a database by the name my_database PouchDB with id ‘002’. You can get the contents of it by executing the read_doc.js by changing the id value to 002, as shown below.
{
   name: ''Raju'',
   age: 23,
   designation: ''Designer'',
   _id: ''002'',
   _rev: ''1-05ca7b5f3f4762a9fb2d119cd34c8d40''
}
Now, you can add an attachment to this document using its _rev value.
//Requiring the package
var PouchDB = require(''PouchDB'');

//Creating the database object var db = new PouchDB(''my_database'');

//Adding attachment to existing document
var my_attachment = new Buffer ([''Welcome to tutorialspoint''], {type: ''text/plain''});

rev = ''1-05ca7b5f3f4762a9fb2d119cd34c8d40
db.putAttachment(''002'', ''att_1.txt'', rev, my_attachment, ''text/plain'', function(err, res) {
   if (err) {
      return console.log(err);
   } else {
      console.log (res + "Attachment added successfully")
   }
});
Save the above code in a file with the name Add_Attachment_to_doc.js. Open the command prompt and execute the JavaScript file using node as shown below.
C:PouchDB_Examples >node Add_Attachment_to_doc.js
This adds an attachment to the specified document displaying the following message.
Attachment added successfully
If you change the id value in read_doc.js to 002 and execute it, you will get the following output.
{
   name: ''Raju'',
   age: 23,
   designation: ''Designer'',
   _attachments: {
      att_1: {
         content_type: ''text/plain'',
         digest: ''md5-k7iFrf4NoInN9jSQT9WfcQ=='',
         data: ''AA==''
      }
   },
   _id: ''002'',
   _rev: ''2-3bb4891b954699bce28346723cc7a709''
}
Adding Attachment to a Remote Document
You can even add an attachment to the document existing in a database that is stored remotely on the server (CouchDB).
To do so, instead of a database name, you need to pass the path to the database in CouchDB, which contains the document that is to be read.
Example
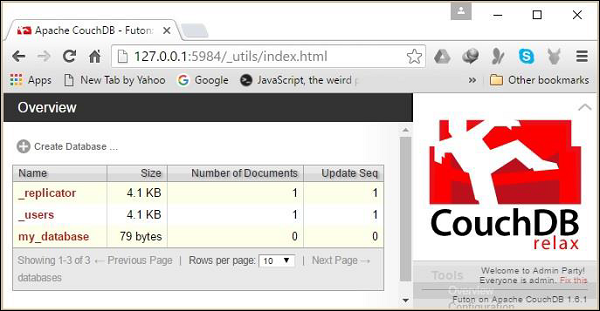
Suppose there is a database named my_database in the CouchDB server. Then, if you verify the list of databases in CouchDB using the URL http://127.0.0.1:5984/_utils/index.html you will get the following screenshot.

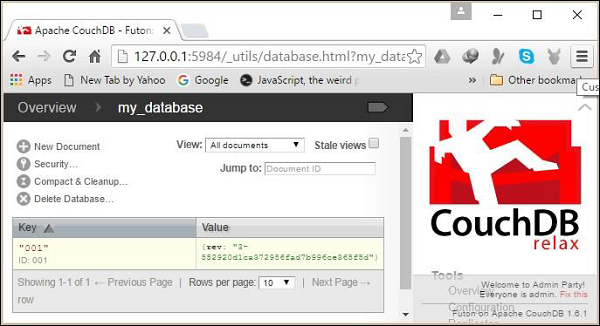
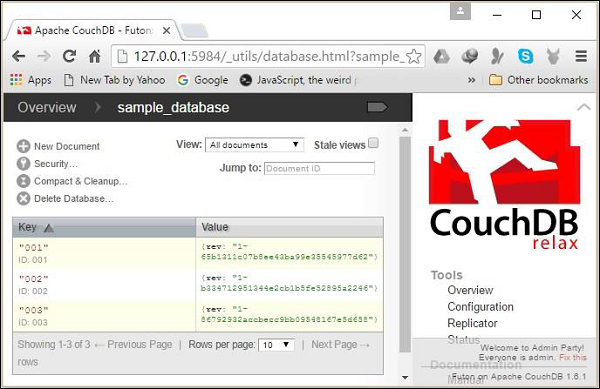
And if you select the database named my_database, you can view its contents as shown below.

Following is an example of adding an attachment to the document 001 stored in a database named my_database which is stored in the CouchDB server.
//Requiring the package
var PouchDB = require(''PouchDB'');

//Creating the database object
var db = new PouchDB(''http://localhost:5984/my_database'');

//Adding attachment to existing document
var my_attachment = new Buffer ([''Welcome to tutorialspoint''], {type: ''text/plain''});

rev = ''1-36c34fdcf29a652876219065f9681602
db.putAttachment(''001'', ''att_1.txt'',rev, my_attachment, ''text/plain'', function(err, res) {
   if (err) {
      return console.log(err);
   } else {
      console.log (res+ "Attachment added successfully")
   }
});
Save the above code in a file with the name Remote_Add_Attachment.js. Open the command prompt and execute the JavaScript file using node as shown below.
C:PouchDB_Examples >node Remote_Add_Attachment.js
This adds an attachment to the specified document displaying the following message.
Attachment added successfully
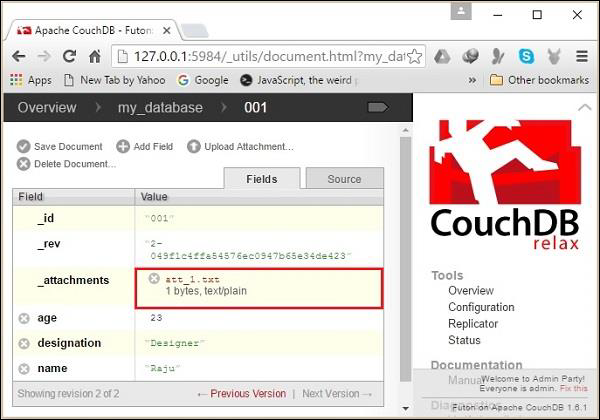
Now, if you verify the document, you can observe the attachment added to it as shown in the following screenshot.
Khóa học lập trình tại Toidayhoc vừa học vừa làm dự án vừa nhận lương: Khóa học lập trình nhận lương tại trung tâm Toidayhoc
Khóa học miễn phí PouchDB – Replication nhận dự án làm có lương
PouchDB – Replication
One of the most important features of PouchDB is replication, i.e. you can make a copy of a database. You can replicate either a PouchDB instance stored locally or a CouchDB instance stored remotely.
Syntax
Following is the syntax of replicating a database in PouchDB. Here, a copy of the source database is the target. To this method, you can directly pass the location of source and destination databases in String format, or you can pass objects representing them.
PouchDB.replicate(source, target, [options])
Both the source and targets can be either PouchDB instances or CouchDB instances.
Replicating LocalDB to CouchDB
Suppose there is a database with the name sample_database in PouchDB, and it contains 3 documents doc1, doc2, and doc3, having contents as shown below.
doc1 = {_id: ''001'', name: ''Ram'', age: 23, Designation: ''Programmer''}
doc2 = {_id: ''002'', name: ''Robert'', age: 24, Designation: ''Programmer''}
doc3 = {_id: ''003'', name: ''Rahim'', age: 25, Designation: ''Programmer''}
Following is an example which makes a copy of the database named sample_database that is stored locally in CouchDB.
//Requiring the package
var PouchDB = require(''PouchDB'');

var localdb = ''sample_database

//Creating remote database object
var remotedb = ''http://localhost:5984/sample_database

//Replicating a local database to Remote
PouchDB.replicate(localDB, remoteDB);
console.log ("Database replicated successfully");
Save the above code in a file with name Replication_example.js. Open the command prompt and execute the JavaScript file using node as shown below.
C:PouchDB_Examples >node Replication_example.js
This makes a copy of the database named sample_database in CouchDB instance and displays a message on the console as shown below.
Database replicated successfully
You can verify whether the database is replicated in your CouchDB instance by clicking the following link http://127.0.0.1:5984/_utils/index.html.
On clicking, you can see the list of databases in your CouchDB. You can also observe that a copy of the database sample_database is created here.
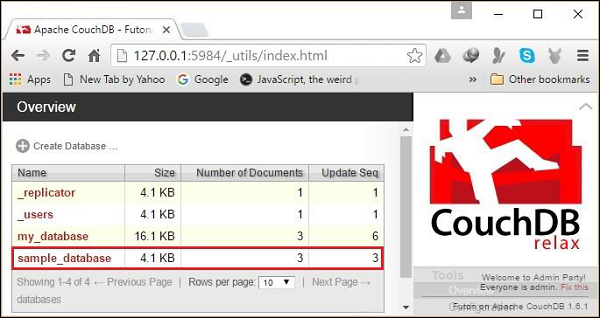
If you select the replicated database, you can view its contents as shown below.
Replicating CouchDB to PouchDB
Suppose there is a database with the name Remote_Database in CouchDB and it contains 3 documents, doc1, doc2, and doc3, having contents as shown below.
doc1 = {_id: ''001'', name: ''Geeta'', age: 25, Designation: ''Programmer''}
doc2 = {_id: ''002'', name: ''Zara Ali'', age: 24, Designation: ''Manager''}
doc3 = {_id: ''003'', name: ''Mary'', age: 23, Designation: ''Admin''}
Following is an example which makes a copy of the database named Remote_Database that is stored in CouchDB in the local storage.
//Requiring the package
var PouchDB = require(''PouchDB'');

var localdb = ''sample_database

var remotedb = ''http://localhost:5984/sample_database1

//Replicating a local database to Remote
PouchDB.replicate(remotedb, localdb);
console.log("Database replicated successfully");
Save the above code in a file with the name Replication_example2.js. Open the command prompt and execute the JavaScript file using node as shown below.
C:PouchDB_Examples >node Replication_example2.js
This makes a copy of the database named remote_database in PouchDB instance and displays a message on the console as shown below.
Database replicated successfully
You can verify whether the database is replicated in your Pouch instance by executing the following code.
//Requiring the package
var PouchDB = require(''PouchDB'');

//Creating the database object
var db = new PouchDB(''remote_database'');

//Retrieving all the documents in PouchDB
db.allDocs({include_docs: true, attachments: true}, function(err, docs) {
   if (err) {
      return console.log(err);
   } else {
      console.log(docs.rows);
   }
});
If the database is replicated on executing the above code, you will get the contents of the replicated database as shown below.
[
   {
      id: ''001'',
      key: ''001'',
      value: { rev: ''1-23cf3767e32a682c247053b16caecedb'' },
      doc: {
         name: ''Geeta'',
         age: 25,
         Designation: ''Programmer'',
         _id: ''001'',
         _rev: ''1-23cf3767e32a682c247053b16caecedb''
      }
   },
   {
      id: ''002'',
      key: ''002'',
      value: { rev: ''1-d5bcfafbd4d4fae92fd7fc4fdcaa3a79'' },
      doc: {
         name: ''Zara Ali'',
         age: 24,
         Designation: ''Manager'',
         _id: ''002'',
         _rev: ''1-d5bcfafbd4d4fae92fd7fc4fdcaa3a79''
      }
   },
   {
      id: ''003'',
      key: ''003'',
      value: { rev: ''1-c4cce025dbd30d21e40882d41842d5a4'' },
      doc: {
         name: ''Mary'',
         age: 23,
         Designation: ''Admin'',
         _id: ''003'',
         _rev: ''1-c4cce025dbd30d21e40882d41842d5a4''
      }
   }
]
Khóa học lập trình tại Toidayhoc vừa học vừa làm dự án vừa nhận lương: Khóa học lập trình nhận lương tại trung tâm Toidayhoc