Your cart is currently empty!
Author: alien
-
Khóa học miễn phí Amazon RDS – MySQL Connecting to DB nhận dự án làm có lương
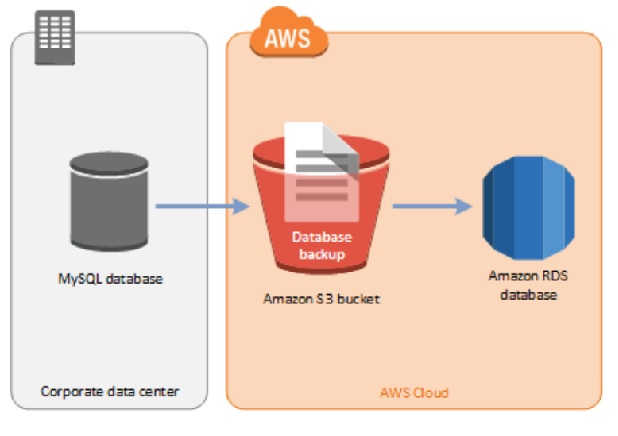
Amazon RDS – MySQL Connecting to DB
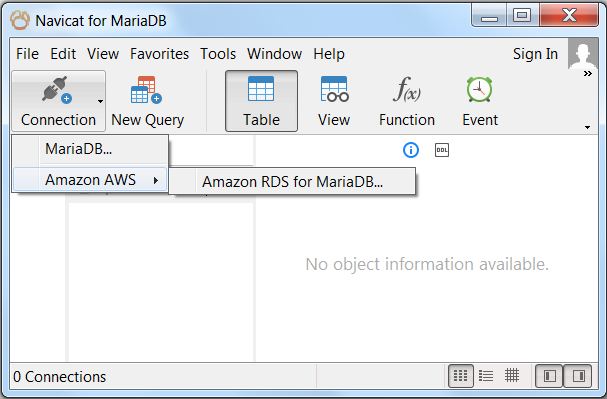
To connect to Amazon RDS MySQL DB we need a client software. In this case we use MySQL Workbench. Install it using the link .
After it is successfully installed we follow the steps below to connect it to the Amazon RDS.
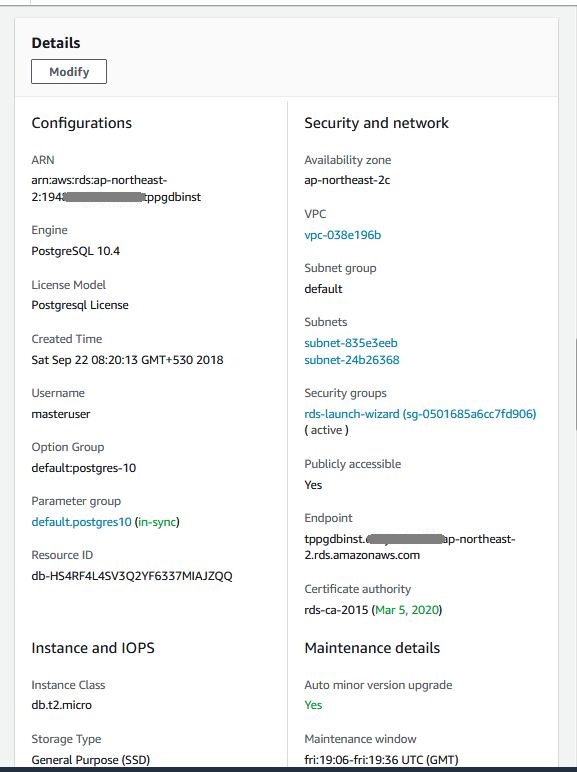
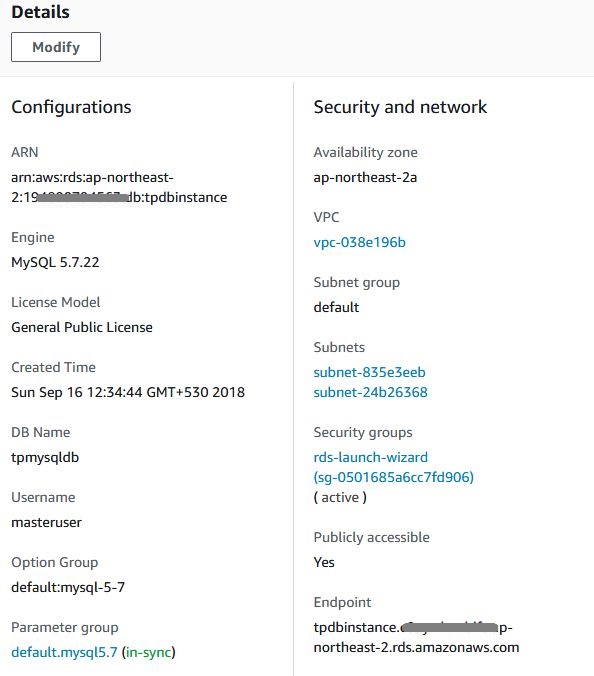
Step-1
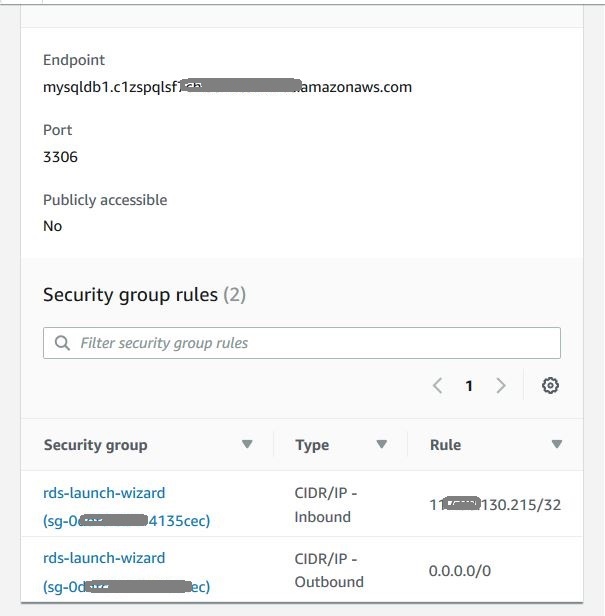
From the DB instance details get the end point.
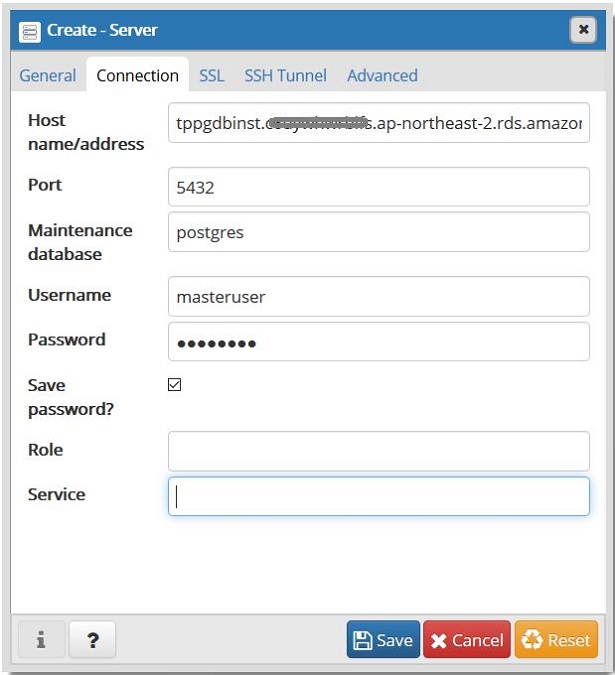
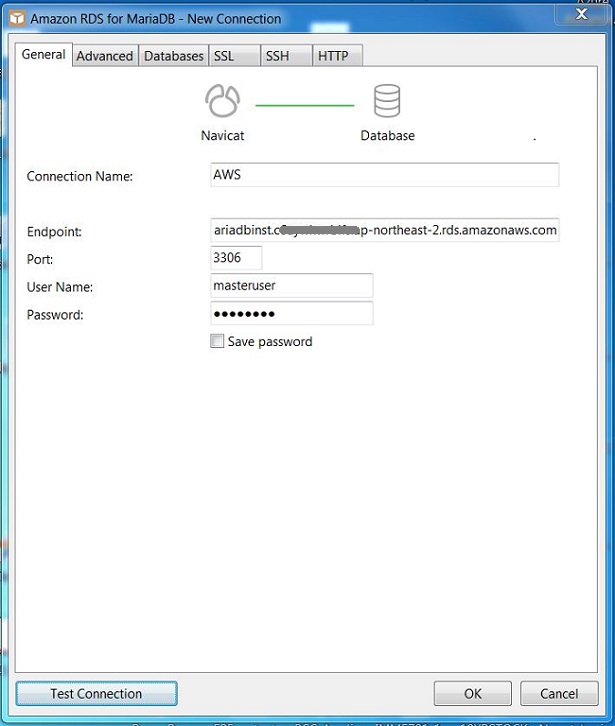
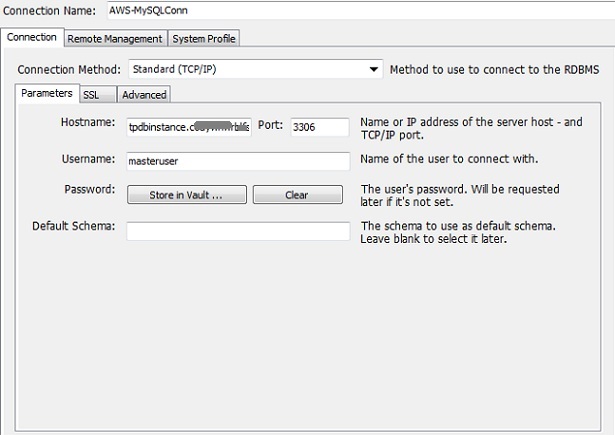
Step-2
Use the end point and the master user credentials as the connection details.
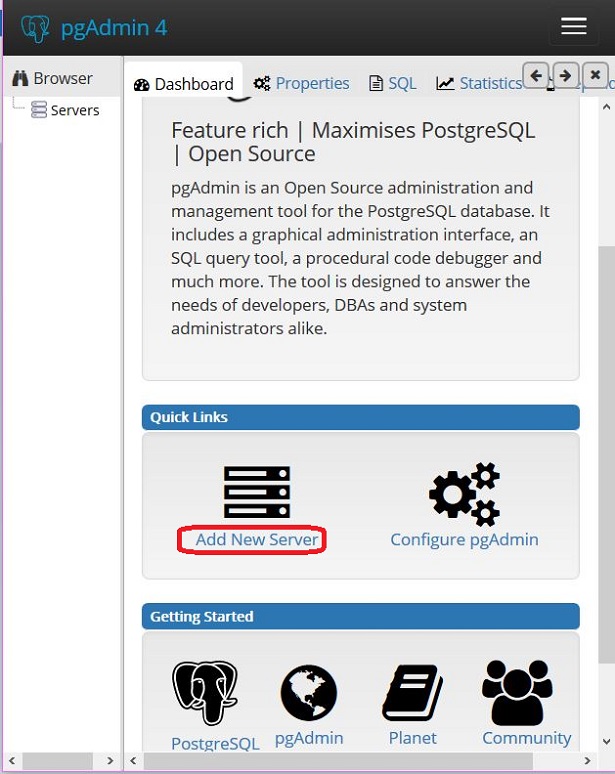
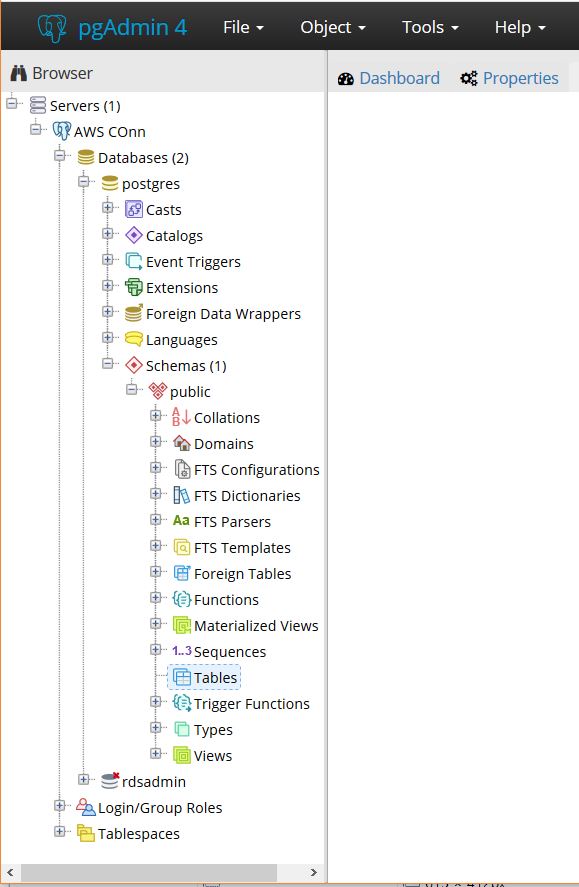
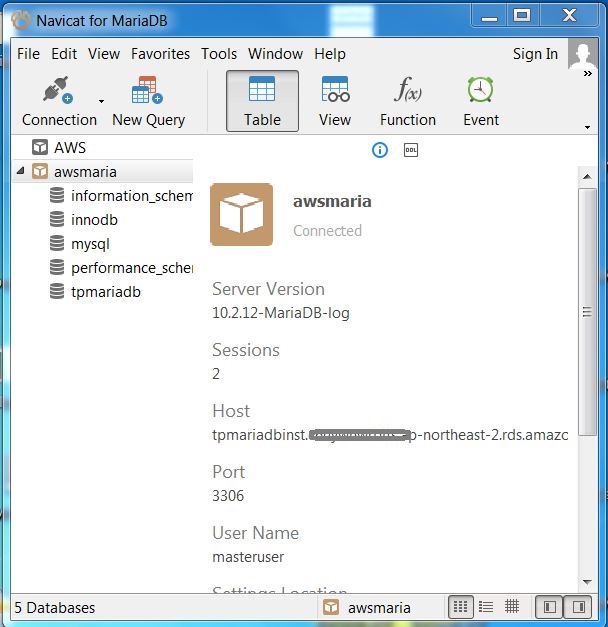
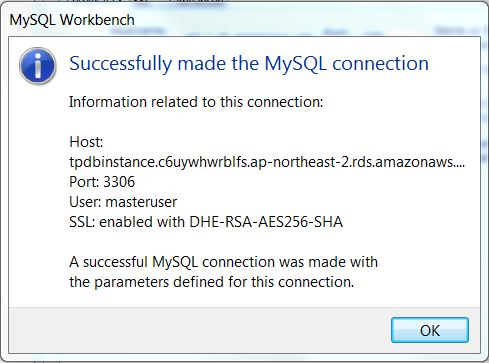
Step-3
Once connected, we get the following window.
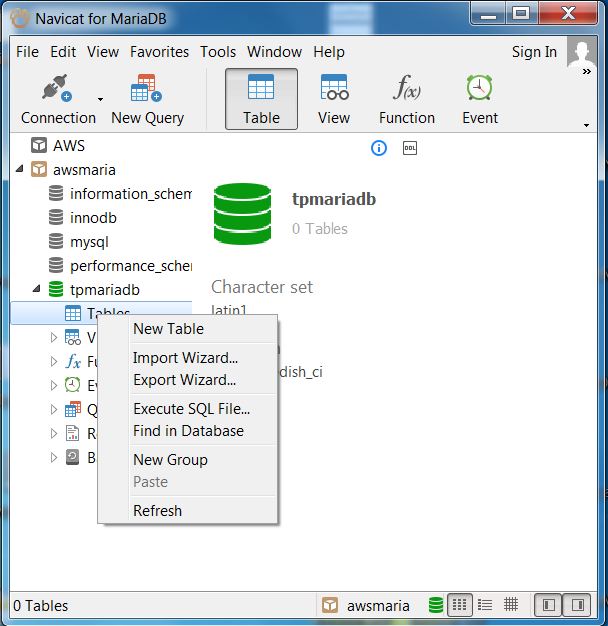
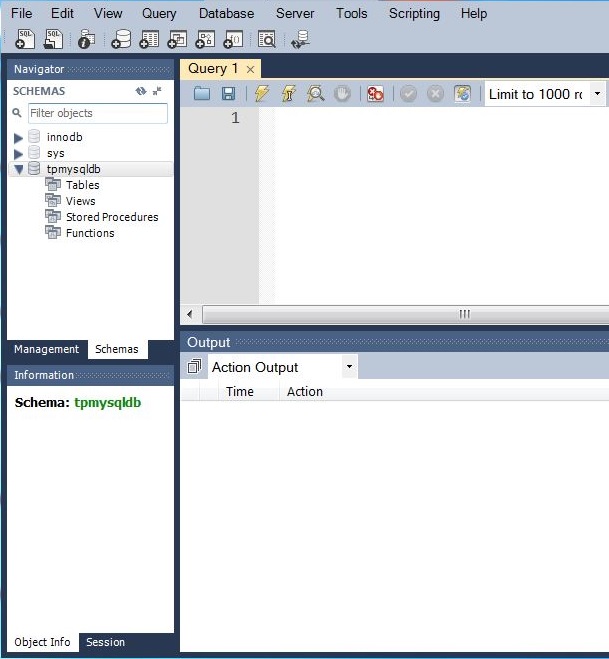
Step-4
We can browse the DB and query the DB now.
Khóa học lập trình tại Toidayhoc vừa học vừa làm dự án vừa nhận lương: Khóa học lập trình nhận lương tại trung tâm Toidayhoc
Khóa học miễn phí Amazon RDS – MySQL Creating DB nhận dự án làm có lương
Amazon RDS – MySQL Creating DB
As a cloud platform AWS gives you very minimal number of steps to setup a DB in RDS. Creating a MYSqlDB can be done in three ways. Using AWS management console, AWS CLI or AWS API. We will look at each of these approaches one by one.
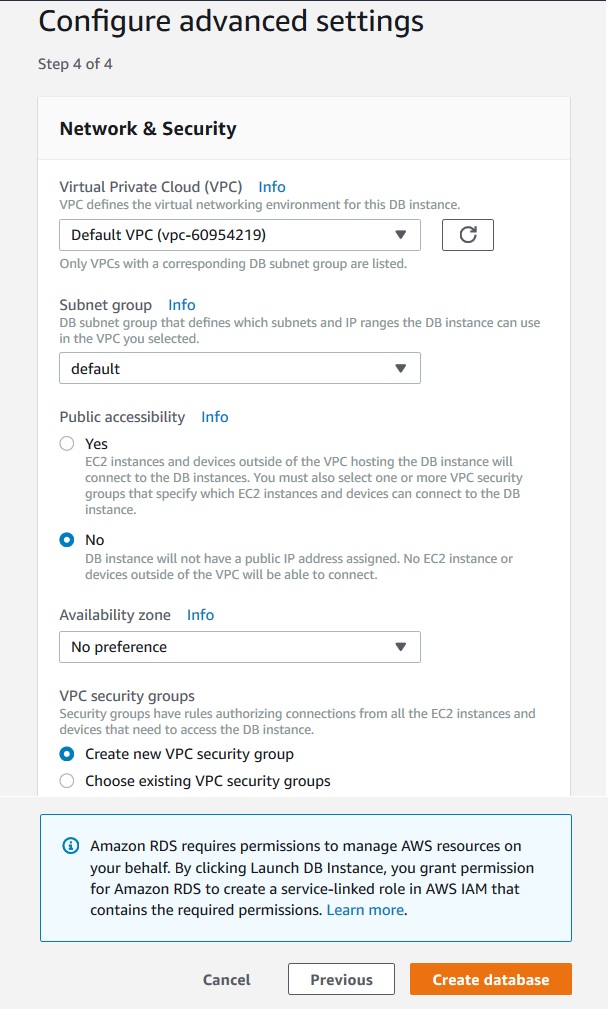
Using AWS management Console
AWS management console is the most convenient way to get started with RDS. You login to the AWS console using your AWS account details, locate the RDS service and then follow the steps shown below to create a MariaDB instance.
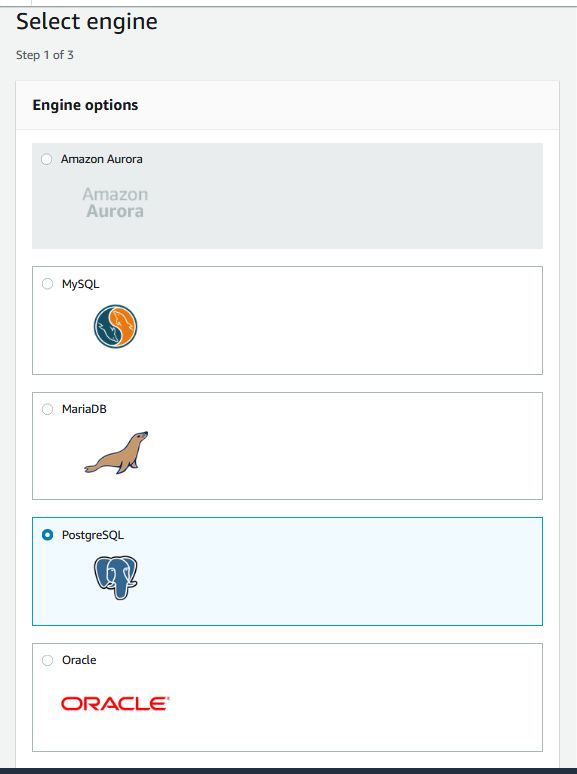
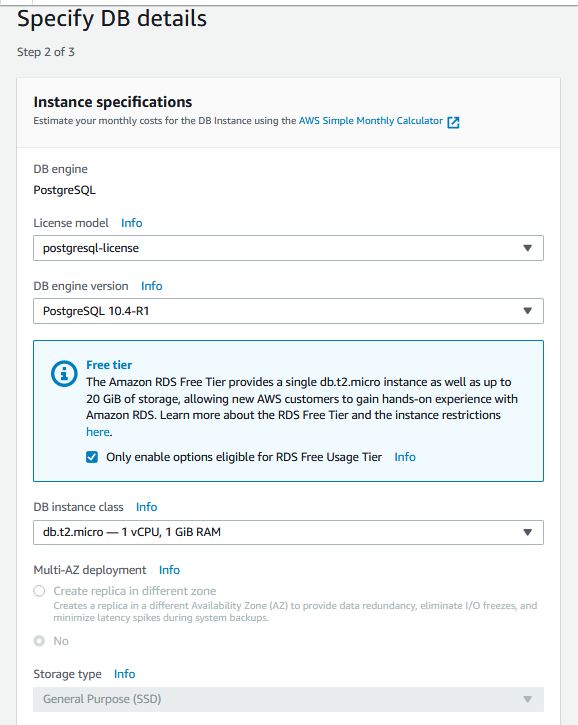
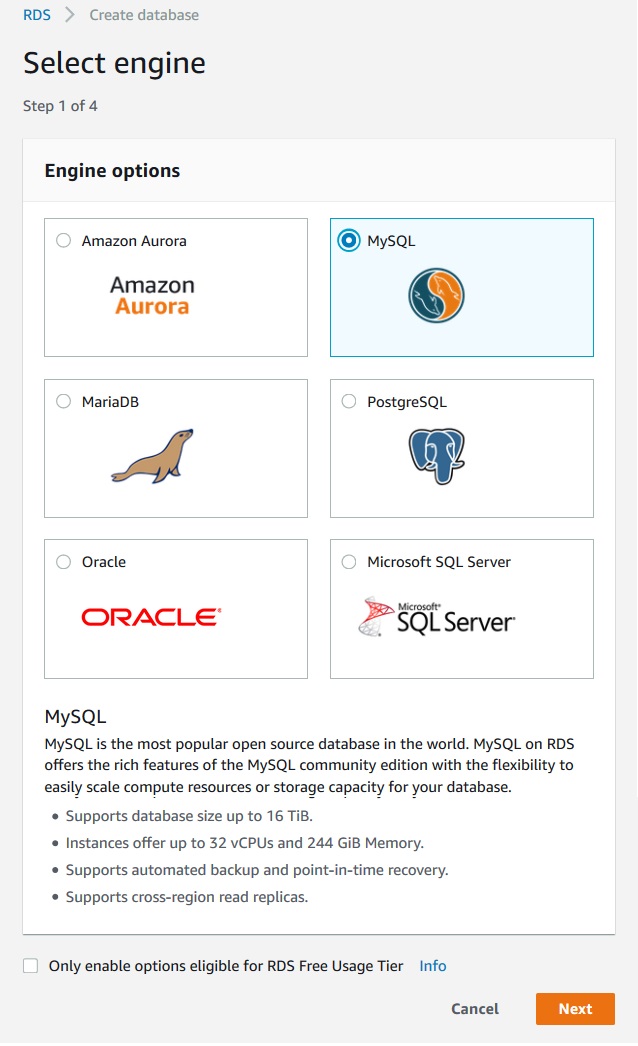
Step-1
Select the MSSql Engine form the console.
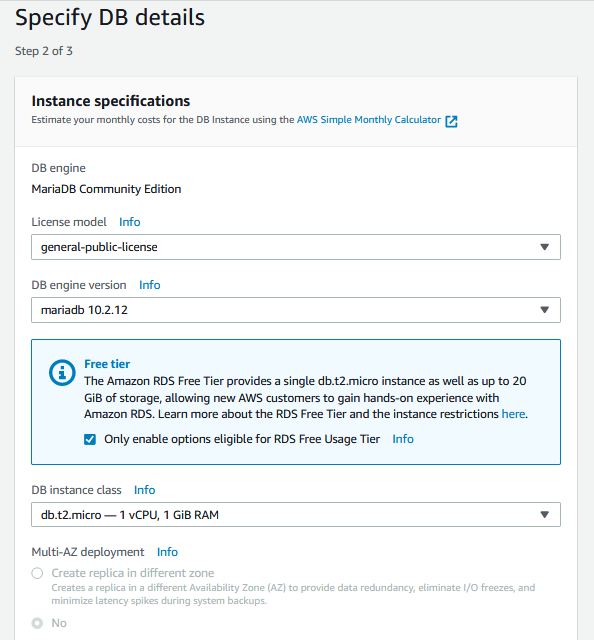
Step-2
Specify the required DB details.
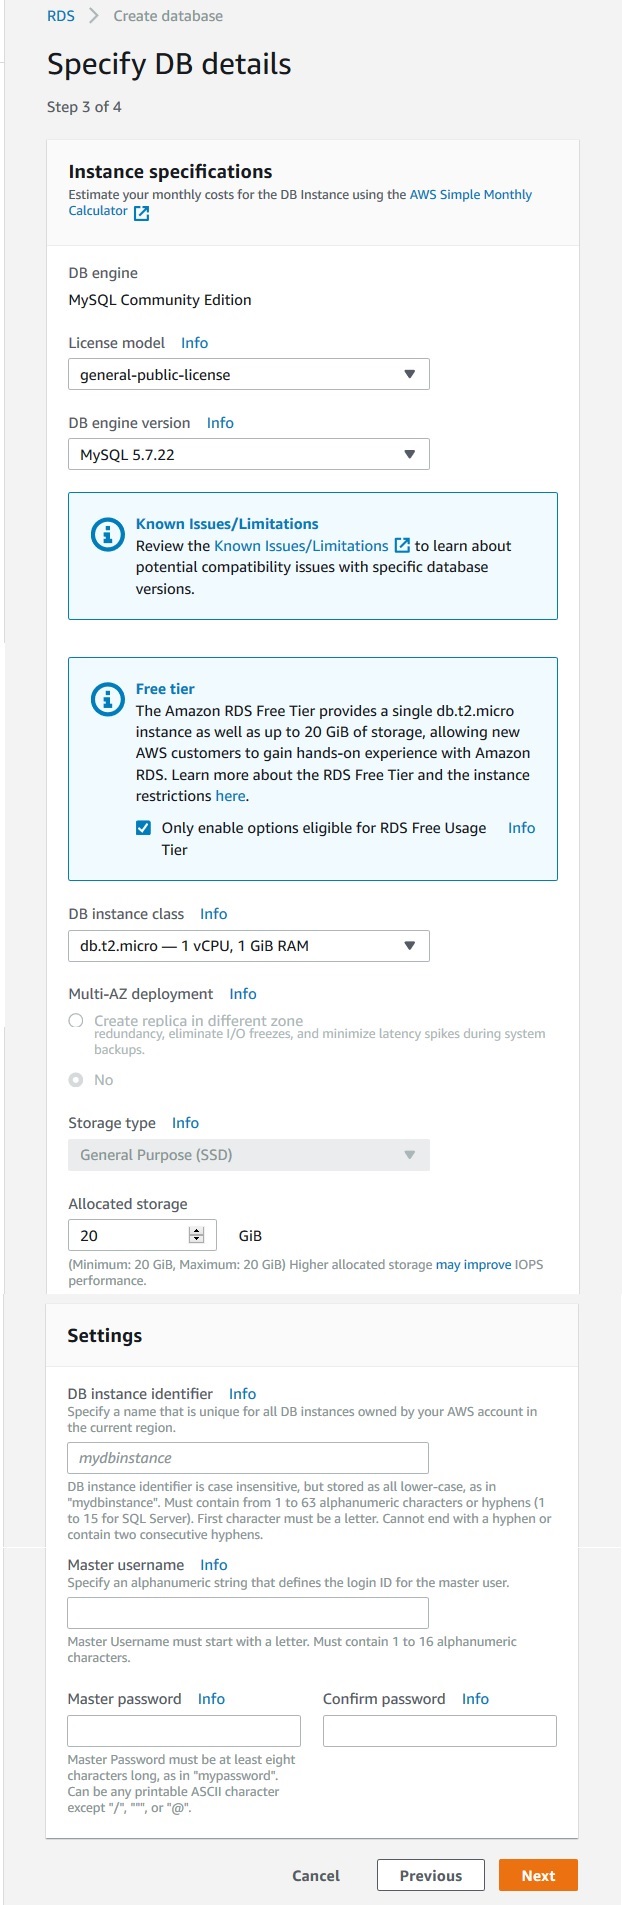
Step-3
In this step you decide on the db instance class, amount of storage allocated also set the master password along with few other details.
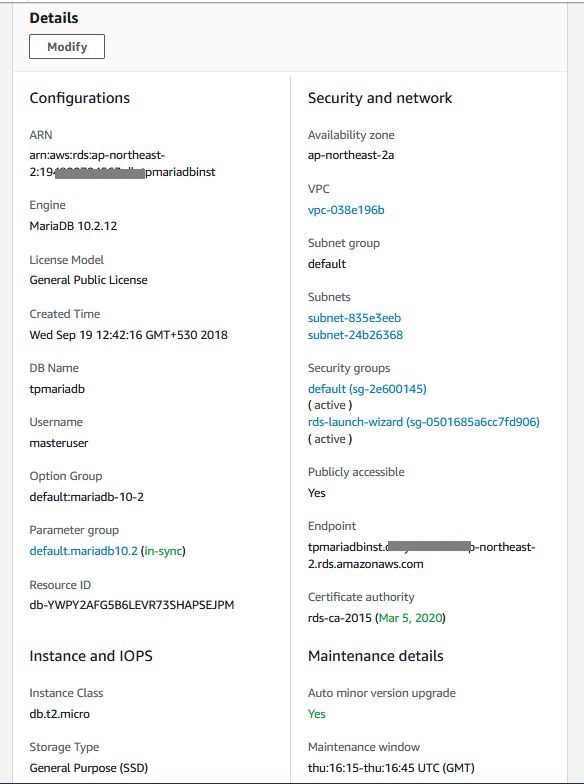
Stpe—4
The final step is to click create database, after which the MySql DB is created with a available end point as shown below.
Using CLI
To create a MySql DB instance by using the AWS CLI, call the create-db-instance command with the parameters below.
aws rds create-db-instance
    --db-instance-identifier mydbinstance
    --db-instance-class db.m1.small
    --engine MySQL
    --allocated-storage 20
    --master-username masterawsuser
    --master-user-password masteruserpassword
    --backup-retention-period 3
Using API
To create a MariaDB instance by using the Amazon RDS API, we call the CreateDBInstance action with the parameters as shown below.
https://rds.us-west-2.amazonaws.com/
    ?Action=CreateDBInstance
    &AllocatedStorage=20
    &BackupRetentionPeriod=3
    &DBInstanceClass=db.m3.medium
    &DBInstanceIdentifier=mydbinstance
    &DBName=mydatabase
    &DBSecurityGroups.member.1=mysecuritygroup
    &DBSubnetGroup=mydbsubnetgroup
    &Engine=mysql
    &MasterUserPassword=masteruserpassword
    &MasterUsername=masterawsuser
    &Version=2014-10-31
    &X-Amz-Algorithm=AWS4-HMAC-SHA256
    &X-Amz-Credential=AKIADQKE4SARGYLE/20140213/us-west-2/rds/aws4_request
    &X-Amz-Date=20140213T162136Z
    &X-Amz-SignedHeaders=content-type;host;user-agent;x-amz-content-sha256;x-amz-date
    &X-Amz-Signature=8052a76dfb18469393c5f0182cdab0ebc224a9c7c5c949155376c1c250fc7ec3
Khóa học lập trình tại Toidayhoc vừa học vừa làm dự án vừa nhận lương: Khóa học lập trình nhận lương tại trung tâm Toidayhoc