Author: alien

  • Khóa học miễn phí DB2 – Views nhận dự án làm có lương

    DB2 – Views


    This chapter describes introduction of views, creating, modifying and dropping the views.

    Introduction

    A view is an alternative way of representing the data stored in the tables. It is not an actual table and it does not have any permanent storage. View provides a way of looking at the data in one or more tables. It is a named specification of a result table.

    Creating a view

    You can create a view using the following syntax:

    Syntax:

    db2 create view <view_name> (<col_name>,
    <col_name1...) as select <cols>..
    from <table_name>
    

    Example: Creating view for shopper.sales1 table

    db2 create view view_sales1(id, itemname, qty, price)
    as select id, itemname, qty, price from
    shopper.sales1
    

    Modifying a view

    You can modify a view using the following syntax:

    Syntax:

    db2 alter view <view_name> alter <col_name>
    add scope <table_or_view_name>
    

    Example: [To add new table column to existing view ‘view_sales1’]

    db2 alter view view_sales1 alter id add
    scope shopper.sales1
    

    Dropping the view

    You can drop a view using the following syntax:

    Syntax:

    db2 drop view <view_name>
    

    Example:

    db2 drop view sales1_view
    

    Khóa học lập trình tại Toidayhoc vừa học vừa làm dự án vừa nhận lương: Khóa học lập trình nhận lương tại trung tâm Toidayhoc

  • Khóa học miễn phí DB2 – Backup and Recovery nhận dự án làm có lương

    DB2 – Backup and Recovery


    This chapter describes backup and restore methods of database.
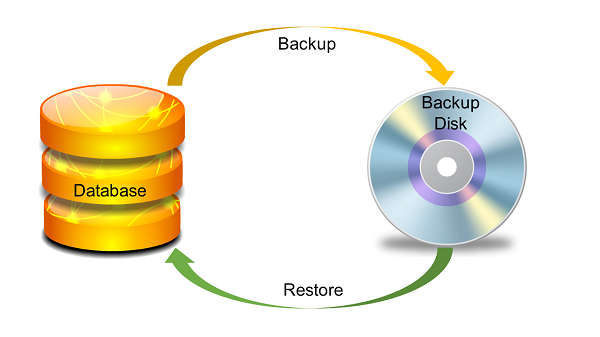
    backup

    Introduction

    Backup and recovery methods are designed to keep our information safe. In Command Line Interface (CLI) or Graphical User Interface (GUI) using backup and recovery utilities you can take backup or restore the data of databases in DB2 UDB.

    Logging

    Log files consist of error logs, which are used to recover from application errors. The logs keep the record of changes in the database. There are two types of logging as described below:

    Circular logging

    It is a method where the old transaction logs are overwritten when there is a need to allocate a new transaction log file, thus erasing the sequences of log files and reusing them. You are permitted to take only full back-up in offline mode. i.e., the database must be offline to take the full backup.

    Archive logging

    This mode supports for Online Backup and database recovery using log files called roll forward recovery. The mode of backup can be changed from circular to archive by setting logretain or userexit to ON. For archive logging, backup setting database require a directory that is writable for DB2 process.

    Backup

    Using Backup command you can take copy of entire database. This backup copy includes database system files, data files, log files, control information and so on.

    You can take backup while working offline as well as online.

    Offline backup

    Syntax: [To list the active applications/databases]

    db2 list application
    

    Output:

    Auth Id  Application    Appl.      Application Id
    DB       # of
             Name           Handle
    Name    Agents
    -------- -------------- ---------- ---------------------
    ----------------------------------------- -------- -----
    DB2INST1 db2bp          39
    *LOCAL.db2inst1.140722043938
    ONE      1
    

    Syntax: [To force application using app. Handled id]

    db2 "force application (39)"
    

    Output:

    DB20000I  The FORCE APPLICATION command completed
    successfully.
    
    DB21024I  This command is asynchronous and may not
    be effective immediately.
    

    Syntax: [To terminate Database Connection]

    db2 terminate
    

    Syntax: [To deactivate Database]

    db2 deactivate database one
    

    Syntax: [To take the backup file]

    db2 backup database <db_name> to <location>
    

    Example:

    db2 backup database one to /home/db2inst1/
    

    Output:

    Backup successful. The timestamp for this backup image is :
    20140722105345
    

    Online backup

    To start, you need to change the mode from Circular logging to Archive Logging.

    Syntax: [To check if the database is using circular or archive logging]

    db2 get db cfg for one | grep LOGARCH
    

    Output:

    First log archive method (LOGARCHMETH1) = OFF
     Archive compression for logarchmeth1  (LOGARCHCOMPR1) = OFF
     Options for logarchmeth1              (LOGARCHOPT1) =
     Second log archive method             (LOGARCHMETH2) = OFF
     Archive compression for logarchmeth2  (LOGARCHCOMPR2) = OFF
     Options for logarchmeth2              (LOGARCHOPT2) =
    

    In the above output, the highlighted values are [logarchmeth1 and logarchmeth2] in off mode, which implies that the current database in “CIRCULLAR LOGGING” mode. If you need to work with ‘ARCHIVE LOGGING’ mode, you need to change or add path in the variables logarchmeth1 and logarchmeth2 present in the configuration file.

    Updating logarchmeth1 with required archive directory

    Syntax: [To make directories]

    mkdir backup
    mkdir backup/ArchiveDest
    

    Syntax: [To provide user permissions for folder]

    chown db2inst1:db2iadm1 backup/ArchiveDest
    

    Syntax: [To update configuration LOGARCHMETH1]

    db2 update database configuration for one using LOGARCHMETH1
    ''DISK:/home/db2inst1/backup/ArchiveDest''
    

    You can take offline backup for safety, activate the database and connect to it.

    Syntax: [To take online backup]

    db2 backup database one online to
    /home/db2inst1/onlinebackup/ compress include logs
    

    Output:

    db2 backup database one online to
    /home/db2inst1/onlinebackup/ compress include logs
    

    Verify Backup file using following command:

    Syntax:

    db2ckbkp <location/backup file>
    

    Example:

    db2ckbkp
    /home/db2inst1/ONE.0.db2inst1.DBPART000.20140722112743.001
    

    Listing the history of backup files

    Syntax:

    db2 list history backup all for one
    

    Output:

                        List History File for one
    
    Number of matching file entries = 4
    
    Op Obj Timestamp+Sequence Type Dev Earliest Log Current Log
    Backup ID
     -- --- ------------------ ---- --- ------------ ------------
     --------------
      B  D  20140722105345001   F    D  S0000000.LOG S0000000.LOG
    
     ------------------------------------------------------------
     ----------------
    
     Contains 4 tablespace(s):
     00001 SYSCATSPACE
    
     00002 USERSPACE1
    
     00003 SYSTOOLSPACE
    
     00004 TS1
      ------------------------------------------------------------
      ----------------
      Comment: DB2 BACKUP ONE OFFLINE
    
     Start Time: 20140722105345
    
       End Time: 20140722105347
    
         Status: A
     ------------------------------------------------------------
     ----------------
     EID: 3 Location: /home/db2inst1
    
    
     Op Obj Timestamp+Sequence Type Dev Earliest Log Current Log
     Backup ID
     -- --- ------------------ ---- --- ------------ ------------
     --------------
      B  D  20140722112239000   N       S0000000.LOG S0000000.LOG
     ------------------------------------------------------------
     -------------------------------------------------------------
     -------------------------------
    
     Comment: DB2 BACKUP ONE ONLINE
    
     Start Time: 20140722112239
    
       End Time: 20140722112240
    
         Status: A
     ------------------------------------------------------------
     ----------------
      EID: 4 Location:
    SQLCA Information
    
     sqlcaid : SQLCA     sqlcabc: 136   sqlcode: -2413   sqlerrml: 0
    
     sqlerrmc:
     sqlerrp : sqlubIni
     sqlerrd : (1) 0                (2) 0                (3) 0
    
               (4) 0                (5) 0                (6) 0
    
     sqlwarn : (1)      (2)      (3)      (4)        (5)       (6)
    
               (7)      (8)      (9)      (10)       (11)
     sqlstate:
    
     Op Obj Timestamp+Sequence Type Dev Earliest Log Current Log
     Backup ID
      -- --- ------------------ ---- --- ------------ ------------
      --------------
       B  D  20140722112743001   F    D  S0000000.LOG S0000000.LOG
    
     ------------------------------------------------------------
     ----------------
     Contains 4 tablespace(s):
    
     00001 SYSCATSPACE
    
     00002 USERSPACE1
    
     00003 SYSTOOLSPACE
    
     00004 TS1
      -------------------------------------------------------------
      ----------------
      Comment: DB2 BACKUP ONE OFFLINE
    
     Start Time: 20140722112743
    
       End Time: 20140722112743
    
         Status: A
     -------------------------------------------------------------
      ----------------
     EID: 5 Location: /home/db2inst1
    
     Op Obj Timestamp+Sequence Type Dev Earliest Log Current Log
     Backup ID
      -------------------------------------------------------------
      ----------------
    
    R  D  20140722114519001   F
    20140722112743
    
     ------------------------------------------------------------
     ----------------
     Contains 4 tablespace(s):
    
     00001 SYSCATSPACE
    
      00002 USERSPACE1
    
     00003 SYSTOOLSPACE
    
     00004 TS1
     ------------------------------------------------------------
     ----------------
    Comment: RESTORE ONE WITH RF
    
     Start Time: 20140722114519
    
       End Time: 20140722115015
         Status: A
    
     ------------------------------------------------------------
     ----------------
      EID: 6 Location:
    

    Restoring the database from backup

    To restore the database from backup file, you need to follow the given syntax:

    Syntax:

    db2 restore database <db_name> from <location>
    taken at <timestamp>
    

    Example:

    db2 restore database one from /home/db2inst1/ taken at
    20140722112743
    

    Output:

    SQL2523W  Warning!  Restoring to an existing database that is
    different from
    
    the database on the backup image, but have matching names.
    The target database
    
    will be overwritten by the backup version.  The Roll-forward
    recovery logs
    
    associated with the target database will be deleted.
    
    Do you want to continue ? (y/n) y
    
    DB20000I  The RESTORE DATABASE command completed successfully.
    

    Roll forward all the logs located in the log directory, including latest changes just before the disk drive failure.

    Syntax:

    db2 rollforward db <db_name> to end of logs and stop
    

    Example:

    db2 rollforward db one to end of logs and stop
    

    Output:

                                     Rollforward Status
     Input database alias                   = one
     Number of members have returned status = 1
     Member ID                              = 0
     Rollforward status                     = not pending
     Next log file to be read               =
     Log files processed                    = S0000000.LOG -
     S0000001.LOG
     Last committed transaction            = 2014-07-22-
     06.00.33.000000 UTC
    DB20000I  The ROLLFORWARD command completed successfully.
    

    Khóa học lập trình tại Toidayhoc vừa học vừa làm dự án vừa nhận lương: Khóa học lập trình nhận lương tại trung tâm Toidayhoc

  • Khóa học miễn phí DB2 – Sequences nhận dự án làm có lương

    DB2 – Sequences


    This chapter introduces you to the concept of sequence, creation of sequence, viewing the sequence, and dropping them.

    Introduction

    A sequence is a software function that generates integer numbers in either ascending or descending order, within a definite range, to generate primary key and coordinate other keys among the table. You use sequence for availing integer numbers say, for employee_id or transaction_id. A sequence can support SMALLINT, BIGINT, INTEGER, and DECIMAL data types. A sequence can be shared among multiple applications. A sequence is incremented or decremented irrespective of transactions.

    A sequence is created by CREATE SEQUENCE statement.

    Types of Sequences

    There are two type of sequences available:

    • NEXTVAL: It returns an incremented value for a sequence number.

    • PREVIOUS VALUE: It returns recently generated value.

    Parameters of sequences

    The following parameters are used for sequences:

    Data type: This is the data type of the returned incremented value. (SMALLINT, BIGINT, INTEGER, NUMBER, DOUBLE)

    START WITH: The reference value, with which the sequence starts.

    MINVALUE: A minimum value for a sequence to start with.

    MAXVALUE: A maximum value for a sequence.

    INCREMENT BY: step value by which a sequence is incremented.

    Sequence cycling: the CYCLE clause causes generation of the sequence repeatedly. The sequence generation is conducted by referring the returned value, which is stored into the database by previous sequence generation.

    Creating a sequence

    You can create sequence using the following syntax:

    Syntax:

    db2 create sequence <seq_name>
    

    Example: [To create a new sequence with the name ‘sales1_seq’ and increasing values from 1]

    db2 create sequence sales1_seq as int start
    with 1 increment by 1
    

    Viewing the sequences

    You can view a sequence using the syntax given below:

    Syntax:

    db2 value <previous/next> value for <seq_name>
    

    Example: [To see list of previous updated value in sequence ‘sales1_seq’]

    db2 values previous value for sales1_seq
    

    Output:

     1
    -----------
      4
      1 record(s) selected.
    

    Dropping the sequence

    To remove the sequence, you need to use the “DROP SEQUENCE ” command. Here is how you do it:

    Syntax:

    db2 drop sequence <seq_name>>
    

    Example: [To drop sequence ‘sales1_seq’ from database]

    db2 drop sequence sales1_seq
    

    Output:

     DB20000I The SQL command completed successfully.
    

    Khóa học lập trình tại Toidayhoc vừa học vừa làm dự án vừa nhận lương: Khóa học lập trình nhận lương tại trung tâm Toidayhoc

  • Khóa học miễn phí DB2 – Alias nhận dự án làm có lương

    DB2 – Alias


    This chapter describes the creation of alias and retrieving data using alias of database objects.

    Introduction

    Alias is an alternative name for database objects. It can be used to reference the database object. You can say, it is a nick name for database objects. Alias are defined for the objects to make their name short, thereby reducing the query size and increasing readability of the query.

    Creating database object aliases

    You can create database object alias as shown below:

    Syntax:

    db2 create alias <alias_name> for <table_name>
    

    Example: Creating alias name for table “professional.customer” table

    db2 create alias pro_cust for professional.customer
    

    If you pass “SELECT * FROM PRO_CUST” or “SELECT * FROM PROFESSIONAL.CUSTOMER” the database server will show the same result.

    Syntax: [To retrieve values from a table directly with schema name]

    db2 select * from <schema_name>.<table_name>
    

    Example: [To retrieve values from table customer]

    db2 select * from professional.customer
    

    Output:

    CUSTID  FULLNAME    PHONE
    ------- ---------   ------------
    100     ravi        9898989
    101     krathi      87996659
    102     gopal       768678687
    
      3 record(s) selected.
    

    Retrieving values using alias name of the table

    You can retrieve values from database using alias name as shown below:

    Syntax: [To retrieve values from table by calling alias name of the table]

    db2 select * from <alias_name>
    

    Example: [To retrieve values from table customer using alias name]

    db2 select * from pro_cust
    

    Output:

    CUSTID  FULLNAME    PHONE
    ------- ---------   ------------
    100     ravi        9898989
    101     krathi      87996659
    102     gopal       768678687
    
      3 record(s) selected.
    

    Khóa học lập trình tại Toidayhoc vừa học vừa làm dự án vừa nhận lương: Khóa học lập trình nhận lương tại trung tâm Toidayhoc

  • Khóa học miễn phí DB2 – Triggers nhận dự án làm có lương

    DB2 – Triggers


    This chapter describes triggers, their types, creation and dropping of the triggers.

    Introduction

    A trigger is a set of actions, which are performed for responding to an INSERT, UPDATE or DELETE operation on a specified table in the database. Triggers are stored in the database at once. They handle governance of data. They can be accessed and shared among multiple applications. The advantage of using triggers is, if any change needs to be done in the application, it is done at the trigger; instead of changing each application that is accessing the trigger. Triggers are easy to maintain and they enforce faster application development. Triggers are defined using an SQL statement “CREATE TRIGGER”.

    Types of triggers

    There are two types of triggers:

    1. BEFORE triggers

    They are executed before any SQL operation.

    2. AFTER triggers

    They are executed after any SQL operation.

    Creating a BEFORE trigger

    Let us see how to create a sequence of trigger:

    Syntax:

    db2 create sequence <seq_name>
    

    Example: Creating a sequence of triggers for table shopper.sales1

    db2 create sequence sales1_seq as int start with 1 increment by 1
    

    Syntax:

    db2 create trigger <trigger_name> no cascade before insert on
    <table_name> referencing new as <table_object> for each row set
    <table_object>.<col_name>=nextval for <sequence_name>
    

    Example: Creating trigger for shopper.sales1 table to insert primary key numbers automatically

    db2 create trigger sales1_trigger no cascade before insert on
    shopper.sales1 referencing new as obj for each row set
    obj.id=nextval for sales1_seq
    

    Now try inserting any values:

    db2 insert into shopper.sales1(itemname, qty, price)
    values(''bicks'', 100, 24.00)
    

    Retrieving values from table

    Let us see how to retrieve values from a table:

    Syntax:

    db2 select * from <tablename>
    

    Example:

    db2 select * from shopper.sales1
    

    Output:

      ID       ITEMNAME       QTY
    -------  ------------   ----------
        3      bicks            100
        2      bread            100
    
      2 record(s) selected.
    

    Creating an AFTER trigger

    Let us see how to create an after trigger:

    Syntax:

    db2 create trigger <trigger_name> no cascade before insert on
    <table_name> referencing new as <table_object> for each row set
     <table_object>.<col_name>=nextval for <sequence_name>
    

    Example: [To insert and retrieve the values]

    db2 create trigger sales1_tri_after after insert on shopper.sales1
    for each row mode db2sql begin atomic update shopper.sales1
    set price=qty*price; end
    

    Output:

    //inseting values in shopper.sales1
    db2 insert into shopper.sales1(itemname,qty,price)
    values(''chiken'',100,124.00)
    //output
    ID    ITEMNAME       QTY         PRICE
    ----- -------------- ----------- -----------
        3 bicks          100         2400.00
        4 chiken         100         12400.00
        2 bread          100         2400.00
    
    	3 record(s) selected.
    

    Dropping a trigger

    Here is how a database trigger is dropped:

    Syntax:

    db2 drop trigger <trigger_name>
    

    Example:

    db2 drop trigger slaes1_trigger
    

    Khóa học lập trình tại Toidayhoc vừa học vừa làm dự án vừa nhận lương: Khóa học lập trình nhận lương tại trung tâm Toidayhoc

  • Khóa học miễn phí DB2 – Tables nhận dự án làm có lương

    DB2 – Tables


    Tables are logical structure maintained by Database manager. In a table each vertical block called as column (Tuple) and each horizontal block called as row (Entity). The collection of data stored in the form of columns and rows is known as a table. In tables, each column has different data type. Tables are used to store persistent data.

    Type of tables

    • Base Tables: They hold persistent data. There are different kinds of base tables, including:
      • Regular Tables: General purpose tables, Common tables with indexes are general purpose tables.
      • Multidimensional Clustering Table (MDC): This type of table physically clustered on more than one key, and it used to maintain large database environments. These type of tables are not supported in DB2 pureScale.
      • Insert time clustering Table (ITC): Similar to MDC tables, rows are clustered by the time they are inserted into the tables. They can be partitioned tables. They too, do not support pureScale environment.
      • Range-Clustered tables Table (RCT): These type of tables provide fast and direct access of data. These are implemented as sequential clusters. Each record in the table has a record ID. These type of tables are used where the data is clustered tightly with one or more columns in the table. This type of tables also do not support in DB2 pureScale.
      • Partitioned Tables: These type of tables are used in data organization schema, in which table data is divided into multiple storage objects. Data partitions can be added to, attached to and detached from a partitioned table. You can store multiple data partition from a table in one tablespace.
      • Temporal Tables: History of a table in a database is stored in temporal tables such as details of the modifications done previously.
    • Temporary Tables: For temporary work of different database operations, you need to use temporary tables. The temporary tables (DGTTs) do not appear in system catalog, XML columns cannot be used in created temporary tables.
    • Materialized Query Tables: MQT can be used to improve the performance of queries. These types of tables are defined by a query, which is used to determine the data in the tables.

    Creating Tables

    The following syntax creates table:

    Syntax: [To create a new table]

    db2 create table <schema_name>.<table_name>
    (column_name column_type....) in <tablespace_name>
    

    Example: We create a table to store “employee” details in the schema of “professional”. This table has “id, name, jobrole, joindate, salary” fields and this table data would be stored in tablespace “ts1”.

    db2 create table professional.employee(id int, name
    varchar(50),jobrole varchar(30),joindate date,
    salary double) in ts1
    

    Output:

    DB20000I The SQL command completed successfully.
    

    Listing table details

    The following syntax is used to list table details:

    Syntax: [To see the list of tables created with schemas]

    db2 select tabname, tabschema, tbspace from syscat.tables
    

    Example: [To see the list of tables in the current database]

    db2 select tabname, tabschema, tbspace from syscat.tables
    

    Output:

    TABNAME      TABSCHEMA     TBSPACE
    ------------ ------------- --------
    EMPLOYEE     PROFESSIONAL    TS1
    
    
     1 record(s) selected.
    

    Listing columns in a table

    The following syntax lists columns in a table:

    Syntax: [To see columns and data types of a table]

    db2 describe table <table_name>
    

    Example: [To see the columns and data types of table ‘employee’]

    db2 describe table professional.employee
    

    Output:

                 Data type                   Column
    Column name  schema    Data type name    Length    Scale Nulls
    ------ ----- --------- ----------------- --------- ----- ------
    ID           SYSIBM    INTEGER             4         0     Yes
    NAME         SYSIBM    VARCHAR             50        0     Yes
    JOBROLE      SYSIBM    VARCHAR             30        0     Yes
    JOINDATE     SYSIBM    DATE                4         0     Yes
    SALARY       SYSIBM    DOUBLE              8         0     Yes
    
      5 record(s) selected.
    

    Hidden Columns

    You can hide an entire column of a table. If you call “select * from” query, the hidden columns are not returned in the resulting table. When you insert data into a table, an “INSERT” statement without a column list does not expect values for any implicitly hidden columns. These type of columns are highly referenced in materialized query tables. These type of columns do not support to create temporary tables.

    Creating table with hidden column

    The following syntax creates table with hidden columns:

    Syntax: [To create a table with hidden columns]

    db2 create table <tab_name> (col1 datatype,col2 datatype
    implicitly hidden)
    

    Example: [To create a ‘customer’ table with hidden columns ‘phone’]

    db2 create table professional.customer(custid integer not
    null, fullname varchar(100), phone char(10)
    implicitly hidden)
    

    Inserting data values in table

    The following syntax inserts values in the table:

    Syntax: [To insert values into a table]

    db2 insert into <tab_name>(col1,col2,...)
     values(val1,val2,..)
    

    Example: [To insert values in ‘customer’ table]

    db2 insert into professional.customer(custid, fullname, phone)
    values(100,''ravi'',''9898989'')
    
    
    db2 insert into professional.customer(custid, fullname, phone)
    values(101,''krathi'',''87996659'')
    
    
    db2 insert into professional.customer(custid, fullname, phone)
    values(102,''gopal'',''768678687'')
    

    Output:

    DB20000I  The SQL command completed successfully.
    

    Retrieving values from table

    The following syntax retrieves values from the table:

    Syntax: [To retrieve values form a table]

    db2 select * from &lttab_name>
    

    Example: [To retrieve values from ‘customer’ table]

    db2 select * from professional.customer
    

    Output:

    CUSTID      FULLNAME
    ----------- ------------------------
            100 ravi
    
            101 krathi
    
            102 gopal
    
      3 record(s) selected.
    

    Retrieving values from a table including hidden columns

    The following syntax retrieves values from selected columns:

    Syntax: [To retrieve selected hidden columns values from a table]

    db2 select col1,col2,col3 from <tab_name>
    

    Example: [To retrieve selected columns values result from a table]

    db2 select custid,fullname,phone from professional.customer
    

    Output:

    CUSTID  FULLNAME    PHONE
    ------- ---------   ------------
    100     ravi        9898989
    
    101     krathi      87996659
    
    102     gopal       768678687
    
      3 record(s) selected.
    

    If you want to see the data in the hidden columns, you need to execute “DESCRIBE” command.

    Syntax:

    db2 describe table <table_name> show detail
    

    Example:

    db2 describe table professional.customer show detail
    

    Output:

    Column name     Data type schema     Data type name  Column
               column    Partitionkey  code
                                           Length   Scale    Nulls
    number     sequence      page     Hidden      Default
    --------------- -------------------- --------------- -------- ----
    ---- -------- ---------- ------------- -------- ----------- ------
    ---
    CUSTID          SYSIBM               INTEGER         4        0
    No       0          0         0        No
    FULLNAME        SYSIBM               VARCHAR         100      0
    Yes      1          0        1208     No
    
    PHONE           SYSIBM               CHARACTER       10       0
    Yes      2          0             1208     Implicitly
    
    3 record(s) selected.
    

    Altering the type of table columns

    You can modify our table structure using this “alter” command as follows:

    Syntax:

    db2 alter table <tab_name> alter column <col_name> set data type <data_type>
    

    Example: [To modify the data type for column “id” from “int” to “bigint” for employee table]

    db2 alter table professional.employee alter column id set data type bigint
    

    Output::

    DB20000I The SQL command completed successfully.
    

    Altering column name

    You can change column name as shown below:

    Syntax: [To modify the column name from old name to new name of a table]

    db2 alter table <tab_name> rename column <old_name> to <new_name>
    

    Example: [To modify the column name from “fullname” to “custname” in “customers” table.]

    db2 alter table professional.customer rename column fullname to custname
    

    Dropping the tables

    To delete any table, you need to use the “DROP” command as follows:

    Syntax:

    db2 drop table <tab_name>
    

    Example: [To drop customer table form database]

    db2 drop table professional.customers
    

    To delete the entire hierarchy of the table (including triggers and relation), you need to use “DROP TABLE HIERARCHY” command.

    Syntax:

    db2 drop table hierarchy <tab_name>
    

    Example: [To drop entire hierarchy of a table ‘customer’]

    db2 drop table hierarchy professional.customers
    

    Khóa học lập trình tại Toidayhoc vừa học vừa làm dự án vừa nhận lương: Khóa học lập trình nhận lương tại trung tâm Toidayhoc

  • Khóa học miễn phí DB2 – Constraints nhận dự án làm có lương

    DB2 – Constraints


    This chapter describes various constraints in the database.

    Introduction

    To enforce database integrity, a set of rules is defined, called constraints. The constraints either permit or prohibit the values in the columns.

    In a Real time database activities, the data should be added with certain restrictions. For example, in a sales database, sales-id or transaction-id should be unique. The constraints types are:

    • NOT NULL
    • Unique
    • Primary key
    • Foreign Key
    • Check
    • Informational

    Constraints are only associated with tables. They are applied to only particular tables. They are defined and applied to the table at the time of table creation.

    Explanation of each constraint:

    NOT NULL

    It is a rule to prohibit null values from one or more columns within the table.

    Syntax:

    db2 create table <table_name>(col_name col_type not null,..)
    

    Example: [To create a sales table, with four columns (id, itemname, qty, price) in this adding “not null” constraints to all columns to avoid forming any null cell in the table.]

    db2 create table shopper.sales(id bigint not null, itemname
    varchar(40) not null, qty int not null,price double not null)
    

    Inserting NOT NULL values into table

    You can insert values in the table as shown below:

    Example: [ERRORoneous Query]

    db2 insert into shopper.sales(id,itemname,qty)
    values(1,''raagi'',12)
    

    Output: [Correct query]

    DB21034E  The command was processed as an SQL statement because
    it was not a
    
    valid Command Line Processor command.  During SQL processing
    it returned:
    
    SQL0407N  Assignment of a NULL value to a NOT NULL column
    "TBSPACEID=5,
    
    TABLEID=4, COLNO=3" is not allowed.  SQLSTATE=23502


    Example: [Correct query]

    db2 insert into shopper.sales(id,itemname,qty,price)
    values(1,''raagi'',12, 120.00)
    
    db2 insert into shopper.sales(id,itemname,qty,price)
    values(1,''raagi'',12, 120.00)
    

    Output:

    DB20000I The SQL command completed successfully.
    

    Unique constraints

    Using these constraints, you can set values of columns uniquely. For this, the unique constraints are declared with “not null” constraint at the time of creating table.

    Syntax:

    db2 create table <tab_name>(<col> <col_type> not null unique, ...)
    

    Example:

    db2 create table shopper.sales1(id bigint not null unique,
    itemname varchar(40) not null, qty int not null,price
    double not null)
    

    Inserting the values into table

    Example: To insert four different rows with unique ids as 1, 2, 3 and 4.

    db2 insert into shopper.sales1(id, itemname, qty, price)
    values(1, ''sweet'', 100, 89)
    
    db2 insert into shopper.sales1(id, itemname, qty, price)
    values(2, ''choco'', 50, 60)
    
    db2 insert into shopper.sales1(id, itemname, qty, price)
    values(3, ''butter'', 30, 40)
    
    db2 insert into shopper.sales1(id, itemname, qty, price)
    values(4, ''milk'', 1000, 12)
    

    Example: To insert a new row with “id” value 3

    db2 insert into shopper.sales1(id, itemname, qty, price)
    values(3, ''cheese'', 60, 80)
    

    Output: when you try to insert a new row with existed id value it will show this result:

    DB21034E  The command was processed as an SQL statement
    because it was not a
    
    valid Command Line Processor command.  During
    SQL processing it returned:
    
    SQL0803N  One or more values in the INSERT statement,
    UPDATE statement, or foreign key update caused by a
    DELETE statement are not valid because the primary key,
    unique constraint or unique index identified by "1" constrains
    table "SHOPPER.SALES1" from having duplicate values for the
    index key. SQLSTATE=23505
    

    Primary key

    Similar to the unique constraints, you can use a “primary key” and a “foreign key” constraint to declare relationships between multiple tables.

    Syntax:

    db2 create table <tab_name>( ,.., primary
    key ())
    

    Example: To create ‘salesboys’ table with “sid” as a primary key

    db2 create table shopper.salesboys(sid int not null, name
    varchar(40) not null, salary double not null, constraint
    pk_boy_id primary key (sid))
    

    Foreign key

    A foreign key is a set of columns in a table which are required to match at least one primary key of a row in another table. It is a referential constraint or referential integrity constraint. It is a logical rule about values in multiple columns in one or more tables. It enables required relationship between the tables.

    Earlier, you created a table named “shopper.salesboys” . For this table, the primary key is “sid”. Now you are creating a new table that has sales boy’s personal details with different schema named “employee” and table named “salesboys”. In this case, “sid” is the foreign key.

    Syntax:

    db2 create table <tab_name>(<col> <col_type>,constraint
    <const_name> foreign key (<col_name>)
                      reference <ref_table> (<ref_col>)
    

    Example: [To create a table named ‘salesboys’ with foreign key column ‘sid’]

    db2 create table employee.salesboys(
                sid int,
                name varchar(30) not null,
                phone int not null,
                constraint fk_boy_id
                foreign key (sid)
                references shopper.salesboys (sid)
    			 on delete restrict
                           )
    

    Example: [Inserting values into primary key table “shopper.salesboys”]

    db2 insert into shopper.salesboys values(100,''raju'',20000.00),
    (101,''kiran'',15000.00),
    (102,''radha'',10000.00),
    (103,''wali'',20000.00),
    (104,''rayan'',15000.00)
    

    Example: [Inserting values into foreign key table “employee.salesboys” [without error]]

    db2 insert into employee.salesboys values(100,''raju'',98998976),
    (101,''kiran'',98911176),
    (102,''radha'',943245176),
    (103,''wali'',89857330),
    (104,''rayan'',89851130)
    

    If you entered an unknown number, which is not stored in “shopper.salesboys” table, it will show you SQL error.

    Example: [error execution]

    db2 insert into employee.salesboys values(105,''rayan'',89851130)
    

    Output:

    DB21034E  The command was processed as an SQL statement because it
    was not a valid Command Line Processor command.  During SQL
    processing it returned: SQL0530N  The insert or update value of
    the FOREIGN KEY "EMPLOYEE.SALESBOYS.FK_BOY_ID" is not equal to any
    value of the parent key of the parent table.  SQLSTATE=23503
    

    Checking constraint

    You need to use this constraint to add conditional restrictions for a specific column in a table.

    Syntax:

    db2 create table 
     ( 
      primary key (),
      constraint  check (condition or condition)
     )
     

    Example: [To create emp1 table with constraints values]

    db2 create table empl
     (id           smallint not null,
      name         varchar(9),
      dept         smallint check (dept between 10 and 100),
      job          char(5)  check (job in (''sales'', ''mgr'', ''clerk'')),
      hiredate     date,
      salary       decimal(7,2),
      comm         decimal(7,2),
      primary key (id),
      constraint yearsal check (year(hiredate) > 1986 or salary > 40500)
     )
     

    Inserting values

    You can insert values into a table as shown below:

    db2 insert into empl values (1,''lee'', 15, ''mgr'', ''1985-01-01'' ,
    40000.00, 1000.00)
    

    Dropping the constraint

    Let us see the syntaxes for dropping various constraints.

    Dropping UNIQUE constraint

    Syntax:

    db2 alter table <tab_name> drop unique <const_name>
    

    Dropping primary key

    Syntax:

    db2 alter table <tab_name> drop primary key
    

    Dropping check constraint

    Syntax:

    db2 alter table <tab_name> drop check <check_const_name>
    

    Dropping foreign key

    Syntax:

    db2 alter table <tab_name> drop foreigh key <foreign_key_name>
    

    Khóa học lập trình tại Toidayhoc vừa học vừa làm dự án vừa nhận lương: Khóa học lập trình nhận lương tại trung tâm Toidayhoc

  • Khóa học miễn phí DB2 – Data Types nhận dự án làm có lương

    DB2 – Data Types


    This chapter introduces various data types used in DB2.

    Introduction

    In DB2 Database tables, each column has its own data type depending on developer’s requirements. The data type is said to be type and range of the values in columns of a table.

    Built-in data types

    • Datetime
      • TIME: It represents the time of the day in hours, minutes and seconds.
      • TIMESTAMP: It represents seven values of the date and time in the form of year, month, day, hours, minutes, seconds and microseconds.
      • DATE: It represents date of the day in three parts in the form of year, month and day.
    • String
      • Character
    • CHAR (fixed length): Fixed length of Character strings.
      • Varying length
    • VARCHAR: Varying length character strings.
    • CLOB: large object strings, you use this when a character string might exceed the limits of the VARCHAR data type.
      • Graphic
    • GRAPHIC
      • Fixed length: Fixed length graphic strings that contains double-byte characters
      • Varying length
    • VARGRAPHIC: Varying character graphic string that contains double bye characters.
    • DBCLOB: large object type
      • Binary
    • BLOB (varying length): binary string in large object
    • BOOLEAN: In the form of 0 and 1.
    • Signed numeric
      • Exact
    • Binary integer
      • SMALLINT [16BIT]: Using this you can insert small int values into columns
      • INTEGER [32BIT]: Using this you can insert large int values into columns
      • BIGINT [64BIT]: Using this you can insert larger int values into columns
    • Decimal
      • DECIMAL (packed)
      • DECFLOAT (decimal floating point): Using this, you can insert decimal floating point numbers
      • Approximate
    • Floating points
      • REAL (single precision): Using this data type, you can insert single precision floating point numbers.
      • DOUBLE (double precision): Using this data type, you can insert double precision floating point numbers.
    • eXtensible Mark-up Language
      • XML: You can store XML data into this data type column.

    Khóa học lập trình tại Toidayhoc vừa học vừa làm dự án vừa nhận lương: Khóa học lập trình nhận lương tại trung tâm Toidayhoc

  • Khóa học miễn phí DB2 – Indexes nhận dự án làm có lương

    DB2 – Indexes


    This chapter covers introduction to indexes, their types, creation and dropping.

    Introduction

    Index is a set of pointers, which can refer to rows in a table, blocks in MDC or ITC tables, XML data in an XML storage object that are logically ordered by the values of one or more keys. It is created on DB2 table columns to speed up the data access for the queries, and to cluster and partition the data efficiently. It can also improve the performance of operation on the view. A table with a unique index can have rows with unique keys. Depending on the table requirements, you can take different types of indexes.

    Types of indexes

    • Unique and Non-Unique indexes
    • Clustered and non-clustered indexes

    Creating indexes

    For creating unique indexes, you use following syntax:

    Syntax:

    db2 create unique index <index_name> on
    <table_name>(<unique_column>) include (<column_names..>)
    

    Example: To create index for “shopper.sales1” table.

    db2 create unique index sales1_indx on
    shopper.sales1(id) include (itemname)
    

    Dropping indexes

    For dropping the index, you use the following syntax:

    Syntax:

    db2 drop unique index <index_name> on
    <table_name>(<unique_column>) include (<column_names..>)
    

    Example:

    db2 drop index sales_index
    

    Khóa học lập trình tại Toidayhoc vừa học vừa làm dự án vừa nhận lương: Khóa học lập trình nhận lương tại trung tâm Toidayhoc

  • Khóa học miễn phí Home nhận dự án làm có lương

    DB2

    DB2 Tutorial


    This tutorial provides you the basic understanding of concepts of database, database installation and management. At the end of the tutorial you should be equipped with well understanding of database management concepts.

    Audience

    This tutorial is designed for the readers pursuing education in database management domain and all enthusiastic readers.

    Prerequisites

    This tutorial is designed and developed for absolute beginners. Though, awareness about software systems, operating systems and computer fundamentals would be beneficial.

    Khóa học lập trình tại Toidayhoc vừa học vừa làm dự án vừa nhận lương: Khóa học lập trình nhận lương tại trung tâm Toidayhoc