Your cart is currently empty!
Author: alien
-
Khóa học miễn phí DocumentDB – Data Types nhận dự án làm có lương
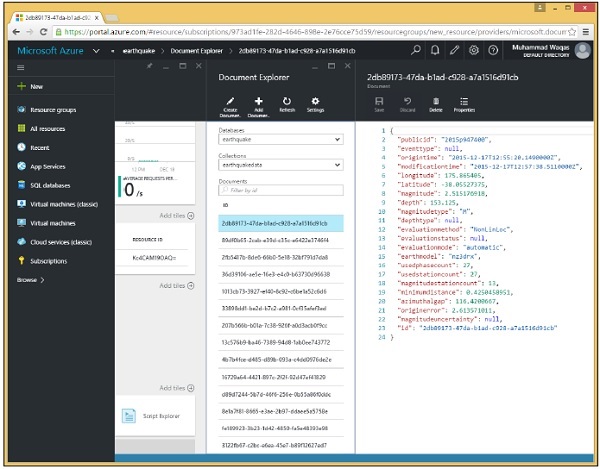
DocumentDB – Data Types
JSON or JavaScript Object Notation is a lightweight text-based open standard designed for human-readable data interchange and also easy for machines to parse and generate. JSON is at the heart of DocumentDB. We transmit JSON over the wire, we store JSON as JSON, and we index the JSON tree allowing queries on the full JSON document.
JSON format supports the following data types −
S.No. Type & Description 1 Number
Double-precision floating-point format in JavaScript
2 String
Double-quoted Unicode with backslash escaping
3 Boolean
True or false
4 Array
An ordered sequence of values
5 Value
It can be a string, a number, true or false, null, etc.
6 Object
An unordered collection of key:value pairs
7 Whitespace
It can be used between any pair of tokens
8 Null
Empty
Let’s take a look at a simple example DateTime type. Add birth date to the customer class.
public class Customer {
   [JsonProperty(PropertyName = "id")]
   public string Id { get; set; }

   // Must be nullable, unless generating unique values for new customers on client
   [JsonProperty(PropertyName = "name")]
   public string Name { get; set; }

   [JsonProperty(PropertyName = "address")]
   public Address Address { get; set; }

   [JsonProperty(PropertyName = "birthDate")]
   public DateTime BirthDate { get; set; }
}
We can store, retrieve, and query using DateTime as shown in the following code.
private async static Task CreateDocuments(DocumentClient client) {
   Console.WriteLine();
   Console.WriteLine("**** Create Documents ****");
   Console.WriteLine();

   var document3Definition = new Customer {
      Id = "1001",
      Name = "Luke Andrew",

      Address = new Address {
         AddressType = "Main Office",
         AddressLine1 = "123 Main Street",
         Location = new Location {
            City = "Brooklyn",
            StateProvinceName = "New York"
         },
         PostalCode = "11229",
         CountryRegionName = "United States"
      },

      BirthDate = DateTime.Parse(DateTime.Today.ToString()),
   };

   Document document3 = await CreateDocument(client, document3Definition);
   Console.WriteLine("Created document {0} from typed object", document3.Id);
   Console.WriteLine();
}
When the above code is compiled and executed, and the document is created, you will see that birth date is added now.
**** Create Documents ****
Created new document: 1001
{
   "id": "1001",
   "name": "Luke Andrew",
   "address": {
      "addressType": "Main Office",
      "addressLine1": "123 Main Street",
      "location": {
         "city": "Brooklyn",
         "stateProvinceName": "New York"
      },
      "postalCode": "11229",
      "countryRegionName": "United States"
   },
   "birthDate": "2015-12-14T00:00:00",
   "_rid": "Ic8LAMEUVgAKAAAAAAAAAA==",
   "_ts": 1450113676,
   "_self": "dbs/Ic8LAA==/colls/Ic8LAMEUVgA=/docs/Ic8LAMEUVgAKAAAAAAAAAA==/",
   "_etag": ""00002d00-0000-0000-0000-566efa8c0000"",
   "_attachments": "attachments/"
}
Created document 1001 from typed object
Khóa học lập trình tại Toidayhoc vừa học vừa làm dự án vừa nhận lương: Khóa học lập trình nhận lương tại trung tâm Toidayhoc
Khóa học miễn phí DocumentDB – Limiting Records nhận dự án làm có lương
DocumentDB – Limiting Records
Microsoft has recently added a number of improvements on how you can query Azure DocumentDB, such as the TOP keyword to SQL grammar, which made queries run faster and consume fewer resources, increased the limits for query operators, and added support for additional LINQ operators in the .NET SDK.
Let’s take a look at a simple example in which we will retrieve only the first two records. If you have a number of records and you want to retrieve only some of them, then you can use the Top keyword. In this example, we have a lot of records of earthquakes.
Now we want to show the first two records only
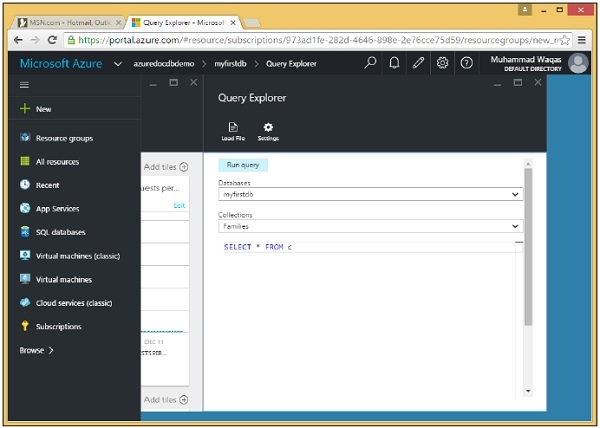
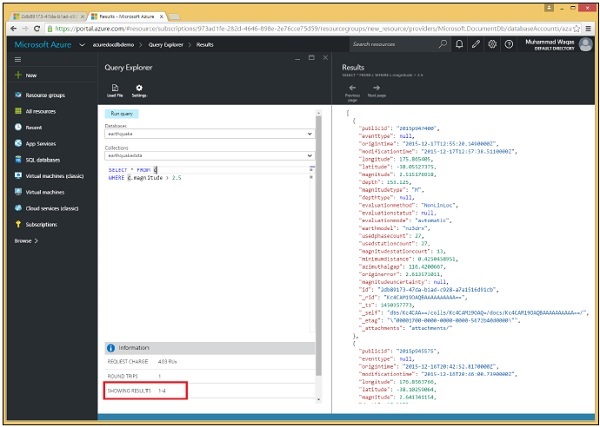
Step 1 − Go to the query explorer and run this query.
SELECT * FROM c
WHERE c.magnitude > 2.5
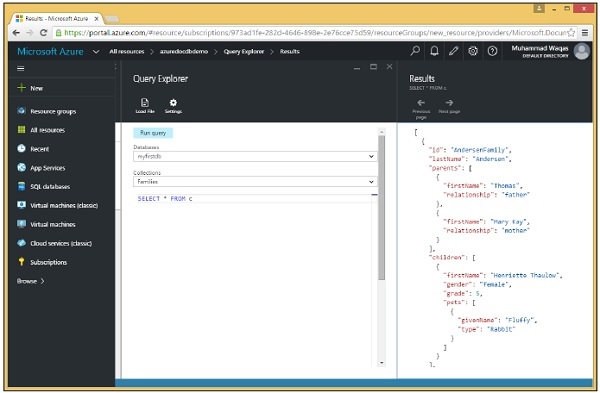
You will see that it has retrieved four records because we have not specified TOP keyword yet.
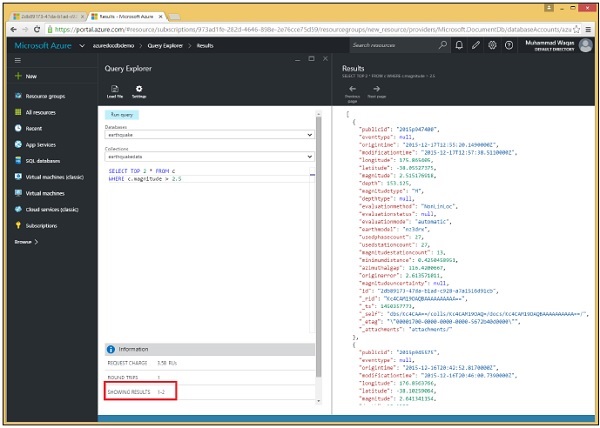
Step 2 − Now use the TOP keyword with same query. Here we have specified the TOP keyword and ‘2’ means that we want two records only.
SELECT TOP 2 * FROM c
WHERE c.magnitude > 2.5
Step 3 − Now run this query and you will see that only two records are retrieved.
Similarly, you can use TOP keyword in code using .Net SDK. Following is the implementation.
private async static Task QueryDocumentsWithPaging(DocumentClient client) {
   Console.WriteLine();
   Console.WriteLine("**** Query Documents (paged results) ****");
   Console.WriteLine();
   Console.WriteLine("Quering for all documents");

   var sql = "SELECT TOP 3 * FROM c";
   var query = client
      .CreateDocumentQuery(collection.SelfLink, sql)
      .AsDocumentQuery();

   while (query.HasMoreResults) {
      var documents = await query.ExecuteNextAsync();

      foreach (var document in documents) {
         Console.WriteLine(" PublicId: {0}; Magnitude: {1};", document.publicid,
            document.magnitude);
      }
   }

   Console.WriteLine();
}
Following is the CreateDocumentClient task in which are instantiated the DocumentClient and earthquake database.
private static async Task CreateDocumentClient() {
   // Create a new instance of the DocumentClient
   using (var client = new DocumentClient(new Uri(EndpointUrl), AuthorizationKey)) {
      database = client.CreateDatabaseQuery("SELECT * FROM c WHERE c.id =
         ''earthquake''").AsEnumerable().First();

      collection = client.CreateDocumentCollectionQuery(database.CollectionsLink,
         "SELECT * FROM c WHERE c.id = ''earthquakedata''").AsEnumerable().First();

      await QueryDocumentsWithPaging(client);
   }
}
When the above code is compiled and executed, you will see that only three records are retrieved.
**** Query Documents (paged results) ****

Quering for all documents
PublicId: 2015p947400; Magnitude: 2.515176918;
PublicId: 2015p947373; Magnitude: 1.506774108;
PublicId: 2015p947329; Magnitude: 1.593394461;
Khóa học lập trình tại Toidayhoc vừa học vừa làm dự án vừa nhận lương: Khóa học lập trình nhận lương tại trung tâm Toidayhoc